Halloween Hot Dog Mummies – Fun, Cute & Delicious
Master the best Hot Dog Mummies with our homemade, easy cooking guide on thenextrecipes. This quick Halloween recipe features savory meat wrapped in golden pastry. Perfect for a festive party dish or a fun family meal, learn how to bake professional mummy hot dog recipe today!
⭐️⭐️⭐️⭐️⭐️ (4.9 from 1,900 fans)
📸 700+ photo shares | ☀️ Updated October 2025

Table of Contents
Hot Dog Mummies: Spooktacularly Simple, Utterly Adorable
Oh, sweet friends, there’s just something utterly magical about food that makes you smile, isn’t there? And these mummy hot dog recipe? They are pure, unadulterated joy on a plate! Imagine savory, juicy hot dogs snuggled in warm, flaky, golden-brown “bandages” of pastry, peeking out with their adorable little mustard eyes. They’re a feast for the eyes and the tummy, perfect for a festive Halloween gathering, a spirited kids’ party, or simply to add a touch of playful fun to a busy weeknight dinner. Every bite is a comforting hug, a little slice of happiness that tastes like childhood memories and cozy evenings.
What You’ll Need
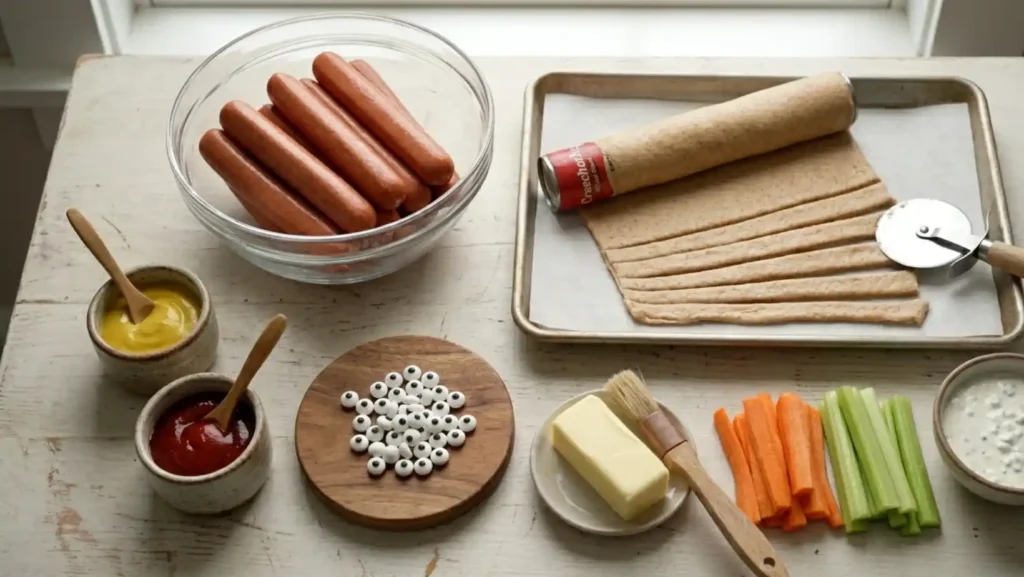
Gathering your ingredients for these mummy hot dog recipe is delightfully simple. You probably have most of these on hand already! Here’s what you’ll need to create this charming culinary masterpiece:
- 1 (8-ounce) can refrigerated crescent roll dough (or pizza dough)
- 8 frankfurters or hot dogs (your favorite kind!)
- Optional: 1 egg, beaten (for a beautiful golden egg wash)
- Mustard, ketchup, or other dipping sauces for serving and creating “eyes”
How to Make Hot Dog Mummies
Crafting these little guys is as fun as eating them! Follow these simple steps, and you’ll have a tray full of cheerful mummies in no time.

How to Make Hot Dog Mummies
Preheating and Prep
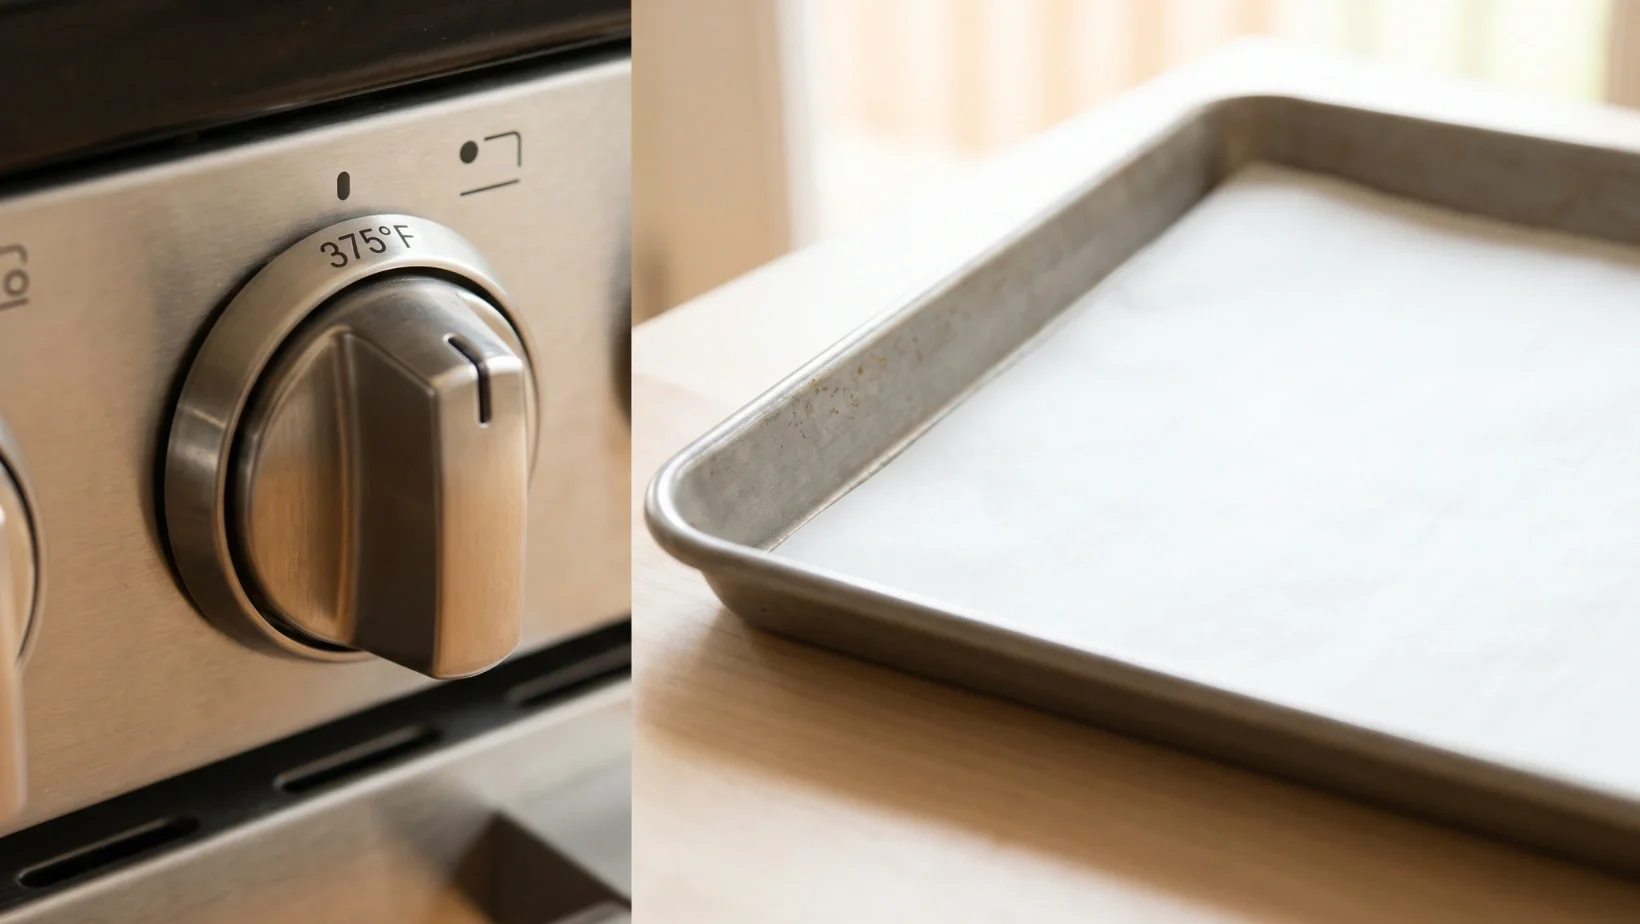
First things first, let’s get that oven ready! Preheat your oven to a cozy 375°F (190°C). Line a baking sheet with parchment paper – it makes cleanup an absolute breeze!
Working the Dough Sheet and Strips
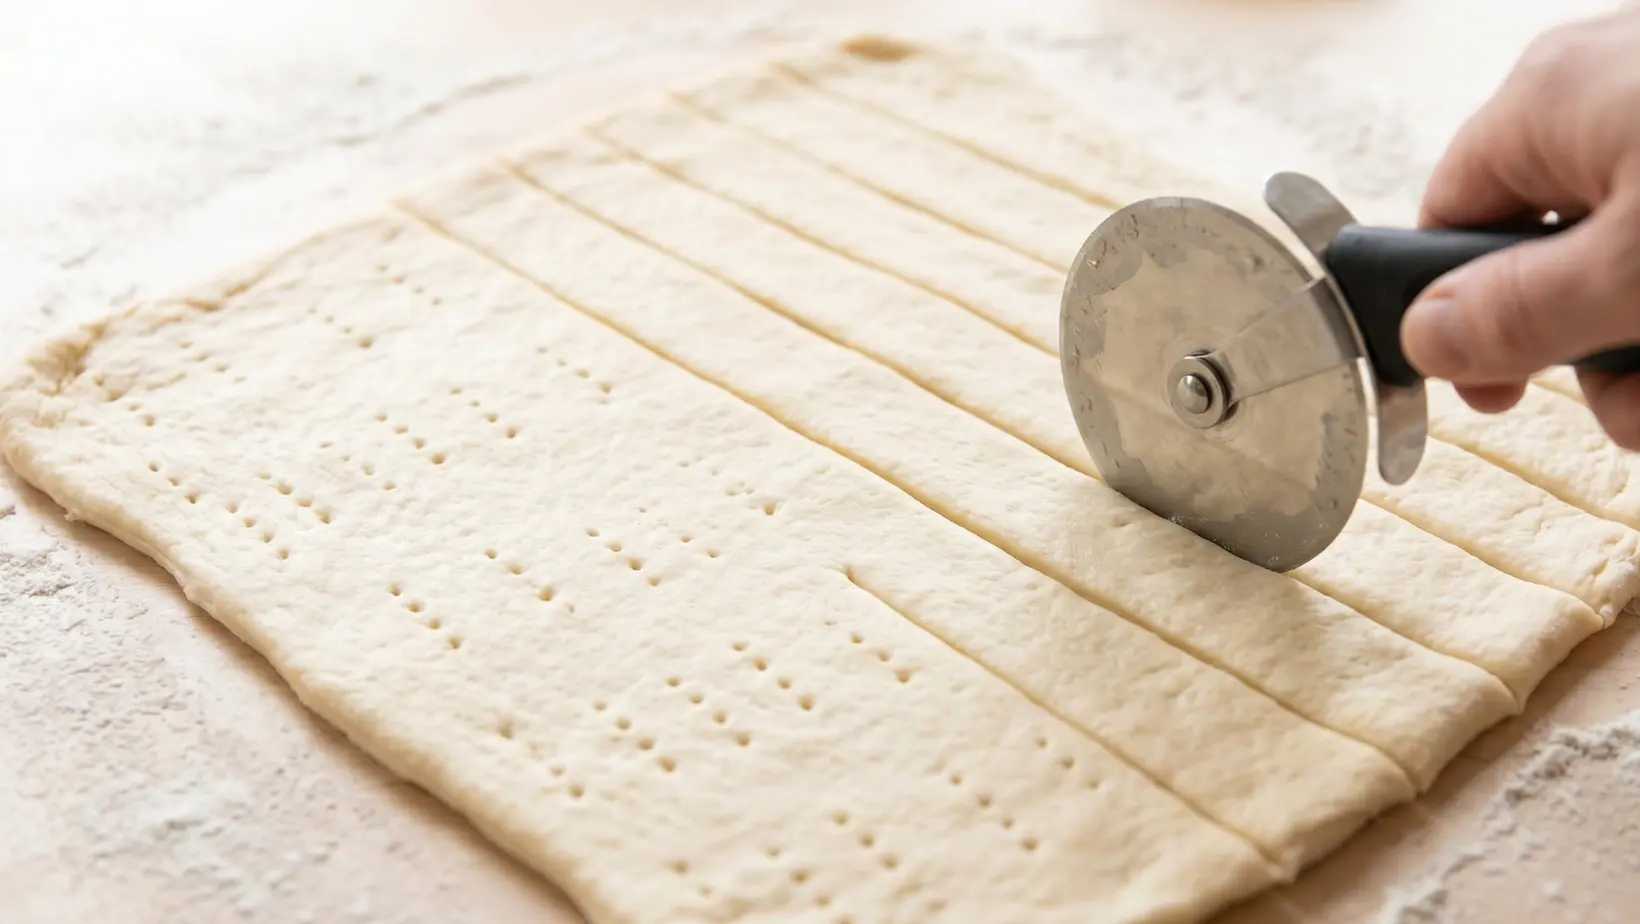
Gently unroll your crescent roll dough on a clean, lightly floured surface. If you’re using crescent rolls with perforations, simply press those seams together to form a beautiful, solid sheet of dough.
Grab a pizza cutter or a sharp knife and slice the dough lengthwise into approximately ½-inch wide strips. You’ll want about 4-5 strips per hot dog, depending on how wrapped up you want your mummies to be!
Wrapping the Mummy Bandages
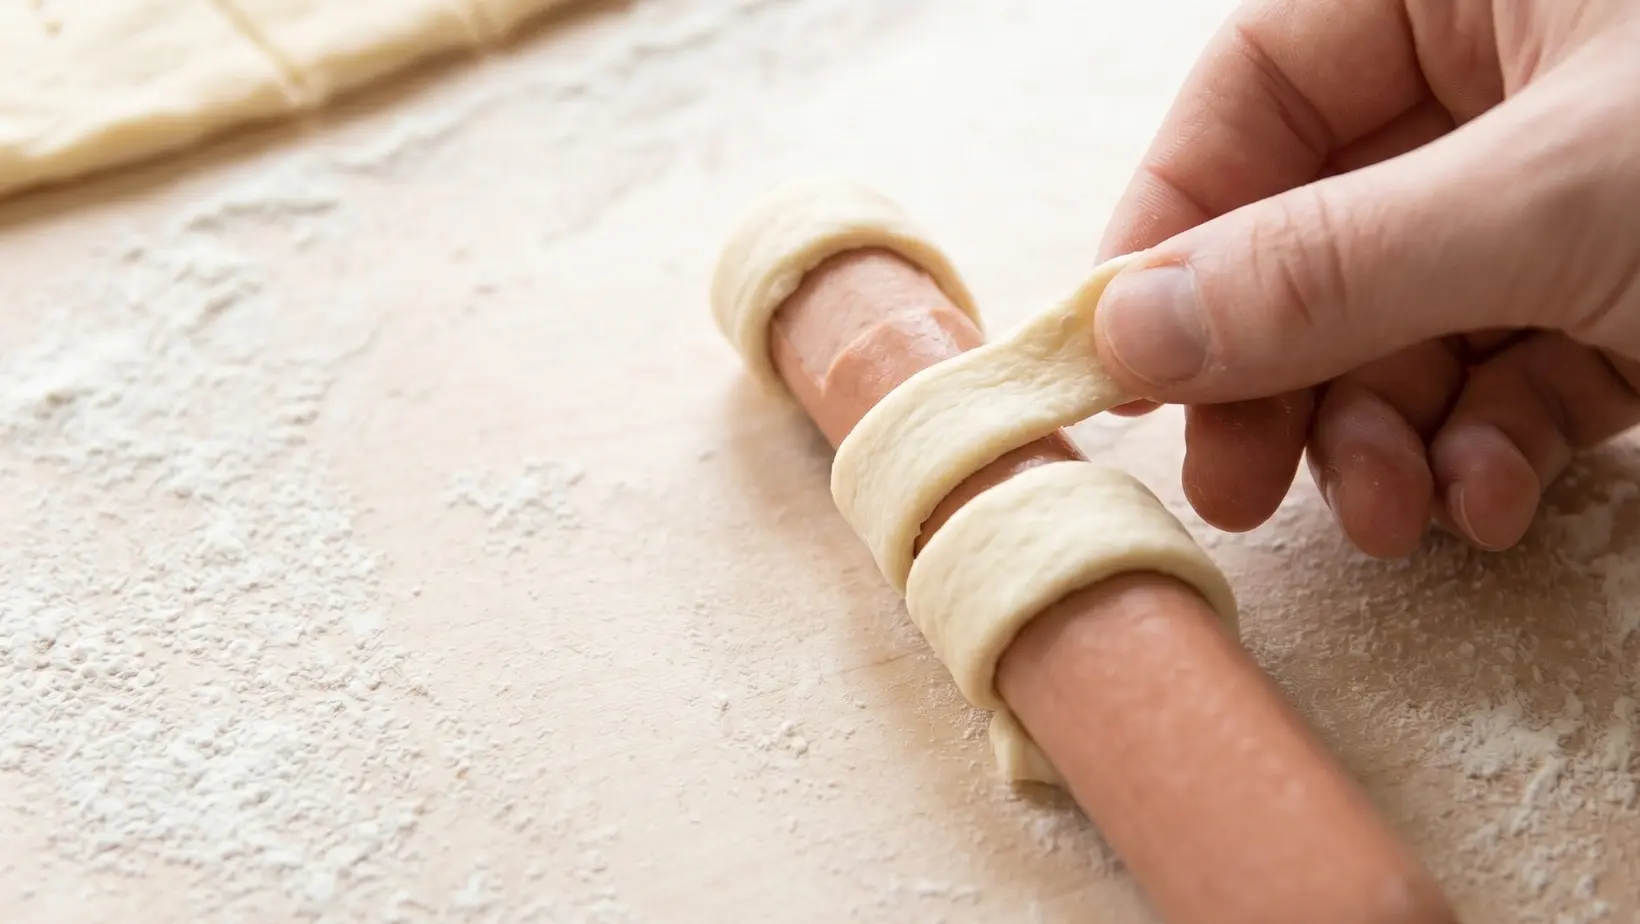
Now for the fun part! Take one dough strip and lovingly wrap it around a hot dog, starting at one end and spiraling around to the other. Be sure to leave a small gap near one end – this will be our mummy’s “face.” Overlap the dough ever so slightly to get that perfect bandage effect.
Egg Wash and Sheet Placement
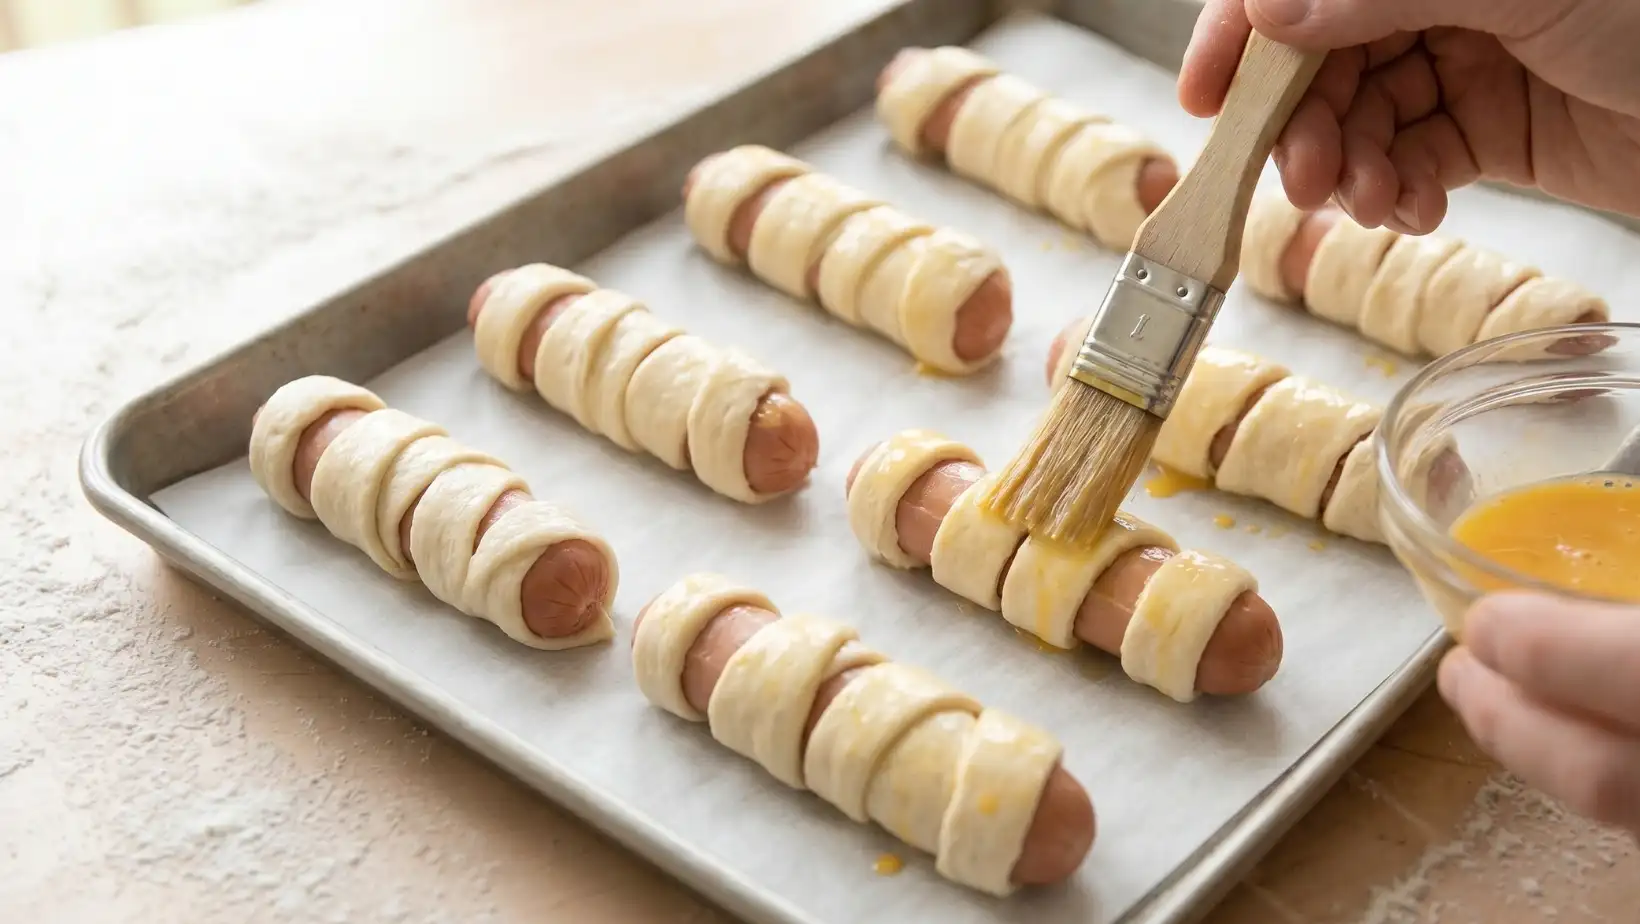
If you’re aiming for that gorgeous, golden-brown sheen, now’s the time to brush your wrapped hot dogs lightly with the beaten egg wash. It adds a lovely glow!
Carefully place your mummy hot dogs on the prepared baking sheet, giving them a little room to breathe.
Fresh From the Oven (Golden Glow)
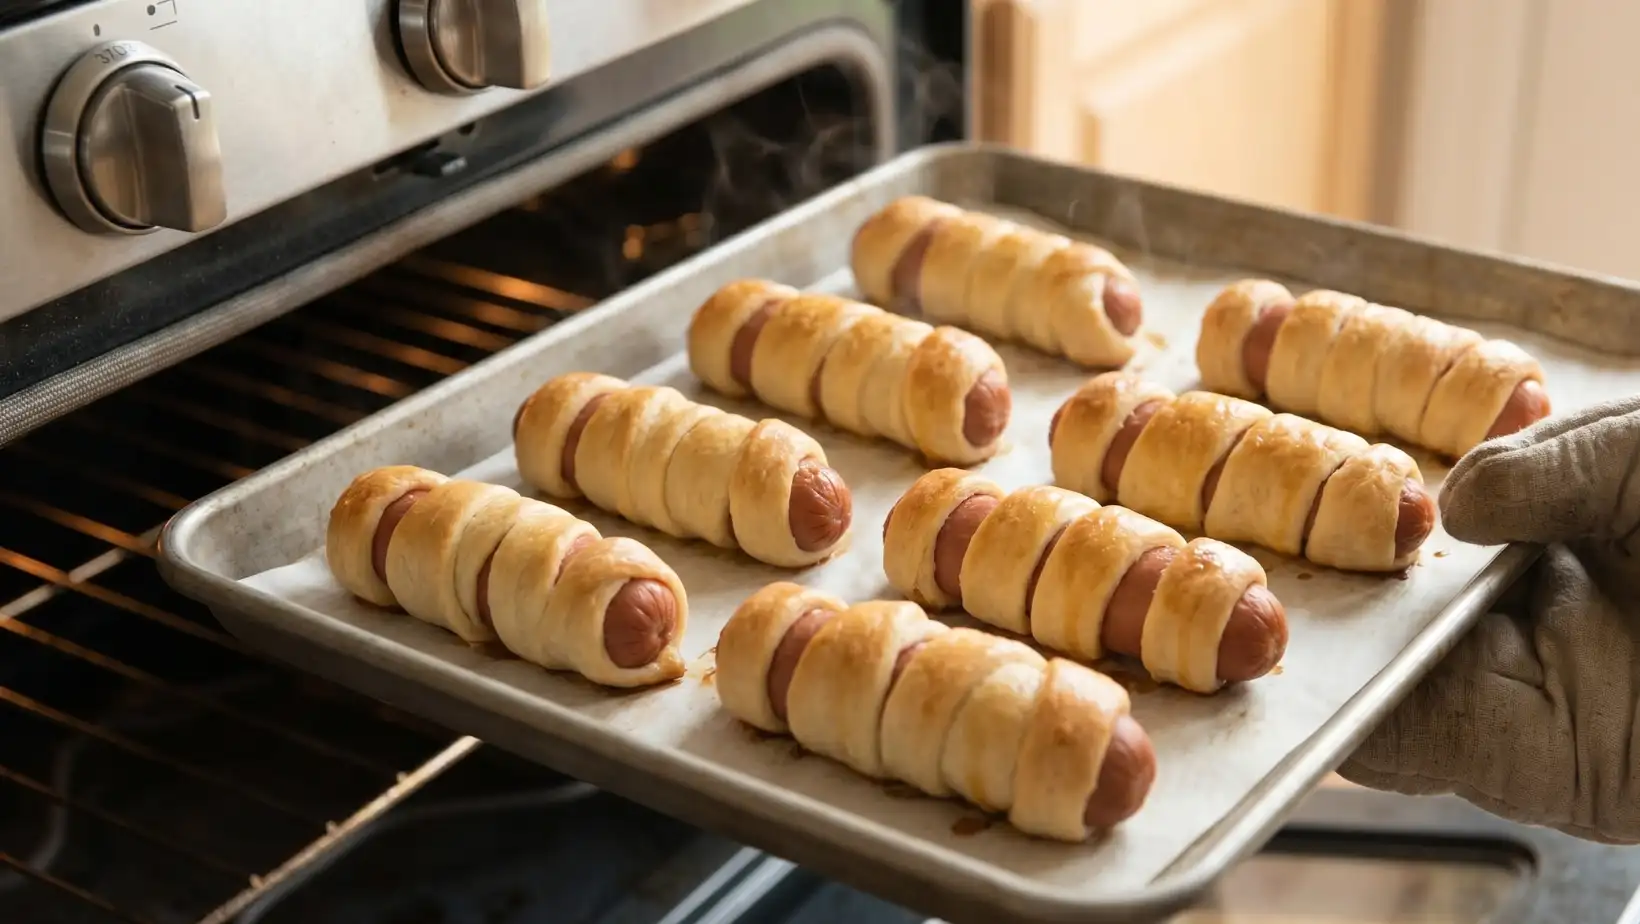
Pop them into your preheated oven and bake for about 12-15 minutes. Keep an eye on them until the dough is beautifully golden brown and cooked through, and the hot dogs are perfectly heated.
Adding the Eyes

Once they’re out of the oven, let them cool just a touch. Then, with a little dab of mustard or ketchup (or even tiny candy eyes!), create two sweet little “eyes” on each mummy’s face.
Serving
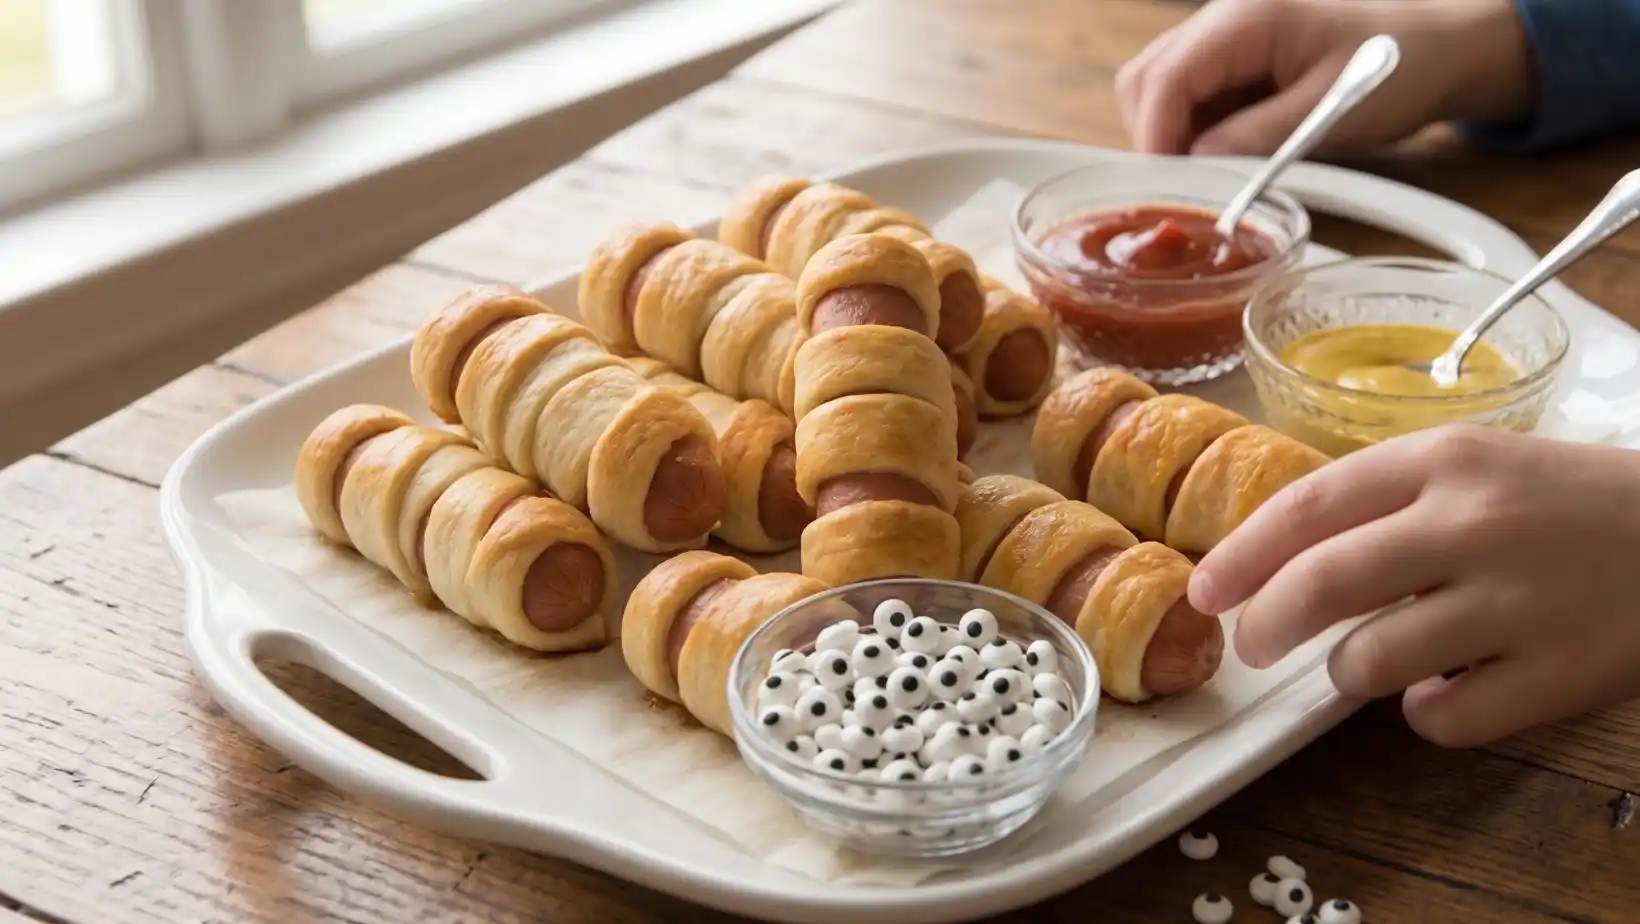
Once they’re out of the oven, let them cool just a touch. Then, with a little dab of mustard or ketchup (or even tiny candy eyes!), create two sweet little “eyes” on each mummy’s face.
Serve them warm with a generous selection of your family’s favorite dipping sauces, and get ready for the oohs and aahs!
Fun Twists & Serving Ideas
These Hot Dog Mummies are wonderfully versatile, offering endless possibilities for creative fun!
- Cheesy Centers: Elevate the deliciousness by slicing your hot dogs lengthwise almost all the way through, tucking in a strip of cheddar or mozzarella cheese, and then wrapping them. Oh, the melty goodness!
- Spicy Mummies: For those who like a little kick, swap out traditional hot dogs for spicy links or sneak a pinch of cayenne pepper into the dough before wrapping.
- Puff Pastry Perfection: For an even flakier, richer “bandage,” try using puff pastry instead of crescent rolls. Just thaw it, cut it into strips, and proceed as usual.
- Dipping Sauce Bar Extravaganza: Set up a fun dipping station! Alongside classic ketchup and mustard, offer honey mustard, a smoky BBQ sauce, a zesty ranch, or even a creamy avocado dip.
- Graveyard Platter: For an unforgettable presentation, arrange your mummy hot dog recipe on a platter with “dirt” (crumbled tortilla chips or pumpernickel bread) and “gravestones” made from cut carrots or celery sticks.
Reviews
- Sarah P. ⭐️⭐️⭐️⭐️⭐️ “These were a huge hit at our Halloween party! So easy to make and absolutely adorable. My kids loved helping to wrap them. A definite yearly tradition now!”
- Mark T. ⭐️⭐️⭐️⭐️ “Simple, effective, and delicious. Can’t beat hot dogs wrapped in flaky pastry. Used a bit of garlic powder on the dough for extra flavor, worked great!”
- Jessica L. ⭐️⭐️⭐️⭐️⭐️ “I make these every year for my grandkids, and they never get old! They’re perfect for a quick, fun dinner or a themed snack. So much joy in such a simple dish!”
FAQ
Can I prepare Hot Dog Mummies ahead of time?
Yes! You can absolutely get a head start. Wrap the hot dogs in the dough and store them covered in the refrigerator for up to 24 hours. Just pop them in the oven when you’re ready to bake!
What kind of hot dogs work best?
Any standard-sized frankfurter or hot dog will be wonderful here. Feel free to use all-beef, turkey, chicken, or even your favorite vegetarian hot dogs to suit your family’s preferences!
Can I use different dough?
Absolutely! While crescent roll dough is a favorite for its ease and flaky texture, you can also use pre-made pizza dough, thawed puff pastry, or even homemade biscuit dough cut into strips.
How do I store leftovers?
If you’re lucky enough to have any leftovers, store them in an airtight container in the refrigerator for up to 2-3 days. Reheat them gently in the oven or an air fryer for the best texture.
Conclusion
There you have it, dear friends – a recipe that brings smiles, laughter, and a touch of playful magic to any table. These Hot Dog Mummies aren’t just food; they’re an experience, a delightful way to create cherished memories in the kitchen and around the dining table. So, don’t hesitate! Gather your loved ones, roll up your sleeves, and dive into the simple, heartwarming joy of making these adorable treats. We promise, the pure delight on everyone’s faces will be the sweetest reward. Happy cooking, and may your kitchen always be filled with warmth and wonderful aromas!
Recipe Note
For an extra golden-brown and slightly crispier crust, brush the wrapped hot dogs with an egg wash (one beaten egg mixed with a tablespoon of water) before baking. And remember, don’t wrap the dough too tightly; leave a little room for it to puff up beautifully as it bakes!
Halloween Hot Dog Mummies
Ingredients
Equipment
Method
- Preheat and Prep: Preheat your oven to 375°F (190°C). Line a large rimmed baking sheet with parchment paper and lightly coat it with cooking spray. Remove the hot dogs from their packaging and pat them completely dry with a paper towel.
- Prepare the Dough: Unroll the crescent dough onto a clean cutting board or work surface. Press the perforated seams together firmly with your fingers to create one solid rectangle of dough.
- Cut the Bandages: Using a pizza cutter or a sharp knife, slice the dough rectangle lengthwise into long, thin strips, about 1/4-inch wide. These will be the mummy bandages.
- Wrap the Mummies: Take one hot dog and begin wrapping a dough strip around it, slightly overlapping the dough to mimic the wrapped look of a mummy. Leave a small open gap about an inch from the top of the hot dog for the face. You will need 2 to 3 strips of dough per hot dog.
- Bake: Place the wrapped hot dogs onto the prepared baking sheet, leaving an inch of space between each one. Bake for 12 to 15 minutes, or until the crescent dough is puffed and golden brown.
- Add the Eyes: Remove the mummies from the oven and let them cool on the pan for 3 to 4 minutes. Using a toothpick, dab two tiny dots of mustard or ketchup onto the open space you left for the face, and gently press the candy eyeballs onto the dots to secure them. If you do not have candy eyeballs, simply use larger dots of mustard or ketchup to draw the eyes!
- Serve: Serve warm with small bowls of ketchup, mustard, and cheese sauce for dipping.
Notes
Add Cheese: For a cheesy version, cut a slice of American or cheddar cheese into thin strips and place a strip of cheese against the hot dog before wrapping the dough around both the cheese and the meat.
Working with Dough: Refrigerated crescent dough becomes very sticky as it warms up to room temperature. Keep the can in the refrigerator until the exact moment you are ready to unroll it and cut the strips.