The Ultimate graduation cake For A Memorable Celebration
Master the perfect graduation cake with our easy homemade cooking guide on thenextrecipes. This quick recipe is the best dessert for any celebratory meal.
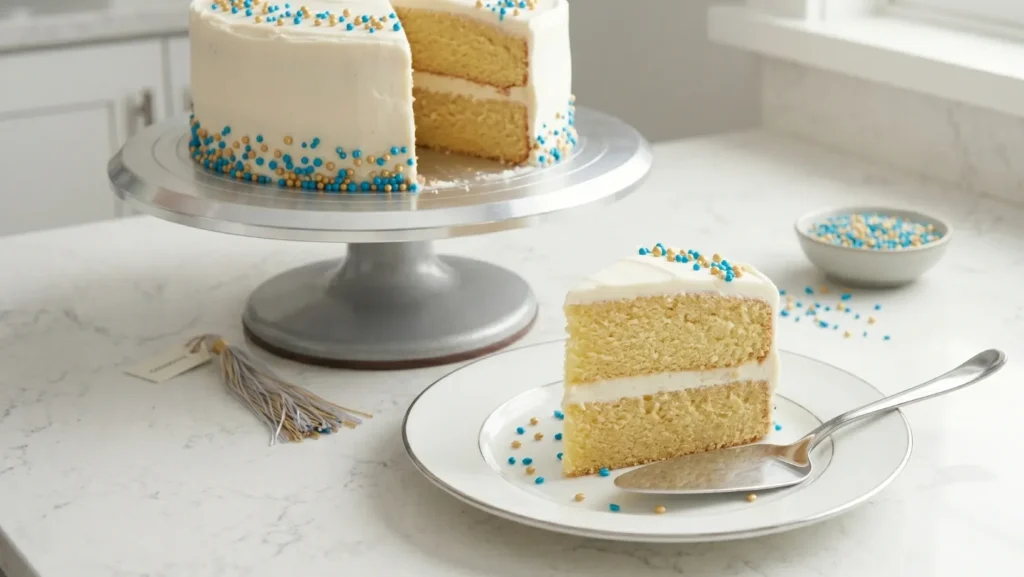
Table of Contents
The Ultimate graduation cake For A Memorable Celebration
As we reach the end of May and transition into the busy summer party season, finding the perfect dessert to honor a major academic milestone is absolutely essential. If you want a guaranteed crowd-pleaser that looks highly professional but requires minimal effort, learning how to bake a flawless graduation cake is a must for your culinary routine. This classic, towering graduation cake is an iconic staple of family gatherings, famous for its comforting vanilla crumb, rich buttercream frosting, and incredibly satisfying texture. Our ultimate recipe is designed to be completely foolproof, bringing together high-quality ingredients and straightforward preparation for a dish everyone will remember.
There is a fantastic reason why this specific homemade recipe is so highly regarded by home cooks everywhere. It perfectly combines a tender, moist cake with ultra-creamy, sweet frosting, resulting in a dish that vastly outshines any bland, store-bought bakery alternative. Preparing this quick recipe from scratch means you avoid unnecessary commercial preservatives while controlling the exact level of sweetness. Whether you need an easy dessert after a heavy meat main course or a central sweet dish for a casual afternoon grazing buffet, mastering this simple cooking process will make your hosting duties incredibly stress-free. A homemade graduation cake is the ultimate way to show your loved ones how proud you are of their achievements.
Ingredients List
To guarantee your graduation cake achieves the ideal consistency and flavor profile, selecting the right ingredients is absolutely vital. While this is a very easy recipe, ingredient quality matters immensely. Here is exactly what you need for this homemade cooking endeavor:
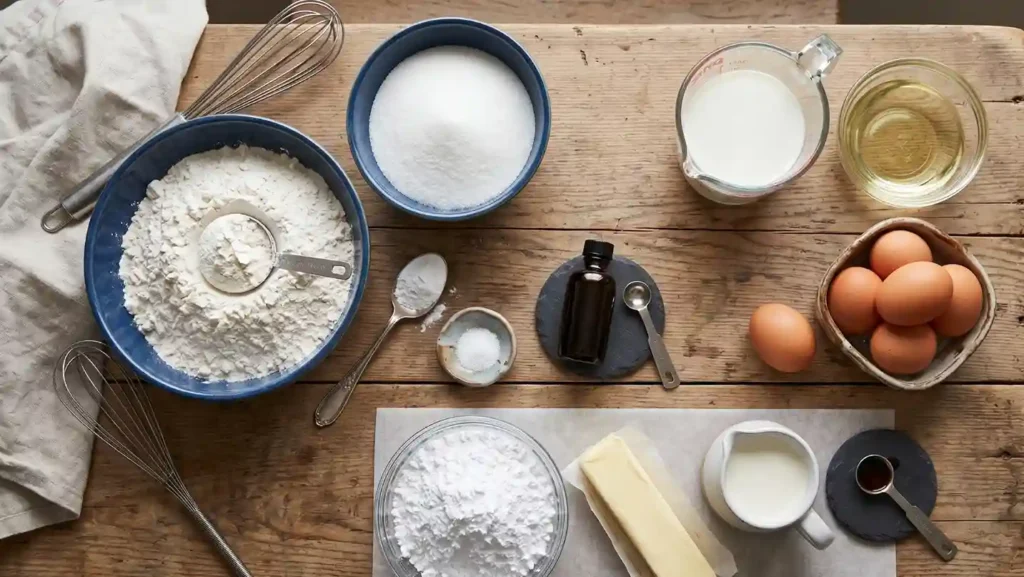
- Dry Ingredients: Two and a half cups of all-purpose flour, two cups of granulated sugar, one tablespoon of baking powder, and half a teaspoon of fine salt. These form the structural base of the recipe.
- Wet Ingredients: One cup of whole milk at room temperature, half a cup of vegetable oil, and four large eggs. Room temperature ingredients ensure a smooth batter for your dish.
- Flavoring: One tablespoon of pure vanilla extract to deeply enhance the overall flavor of the cooking.
- Frosting Ingredients: Three cups of powdered sugar, one cup of softened unsalted butter, two tablespoons of heavy cream, and one teaspoon of vanilla extract to create the perfect topping for this meal.
- Menu Planning Note: While this dessert recipe does not contain meat, it is designed to be the perfect palate-cleanser after serving savory meat dishes like pulled pork or roasted chicken.
Preparation Instructions
Learning how to bake this graduation cake is a wonderfully quick and deeply satisfying cooking experience. Follow these detailed, step-by-step instructions to create your homemade recipe flawlessly:

Preparation Instructions
Step One: Prepare the Equipment
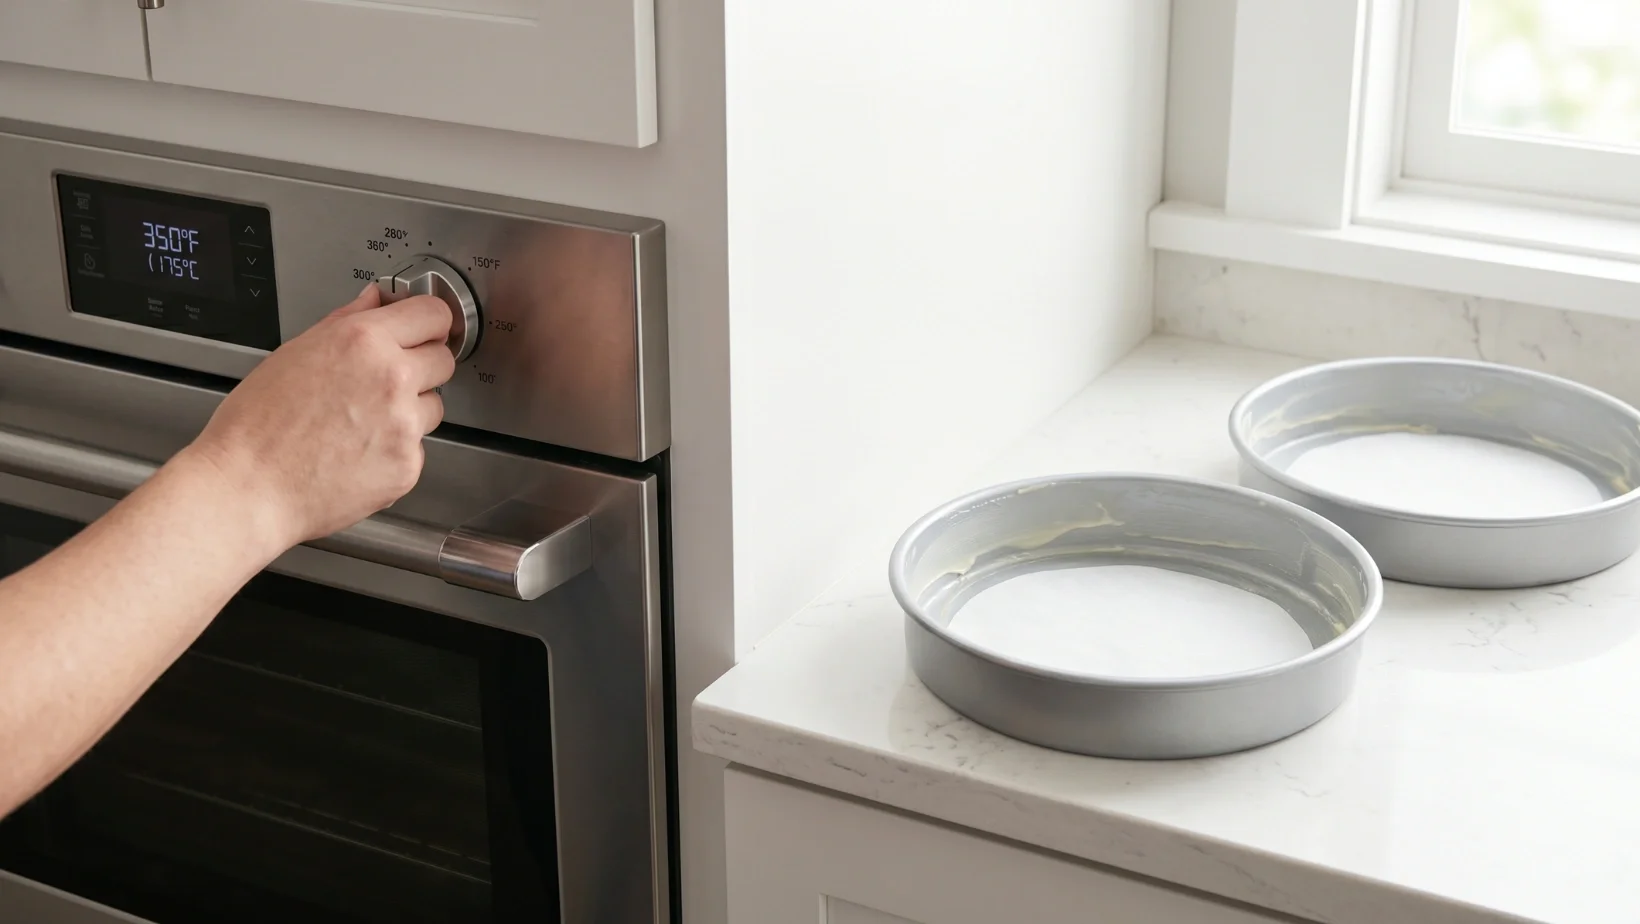
Prepare the Equipment Begin your cooking by preheating your oven to three hundred and fifty degrees Fahrenheit. Grease two nine-inch round cake pans generously with butter and line the bottoms with parchment paper. This preparation step ensures your graduation cake will release cleanly from the pans without tearing, keeping your final dish looking highly professional.
Step Two: Mix the Dry Ingredients

Mix the Dry Ingredients In a large mixing bowl, whisk together the all-purpose flour, granulated sugar, baking powder, and salt. Whisking aerates the ingredients, preventing heavy lumps in the batter of your recipe.
Step Three: Combine Wet and Dry
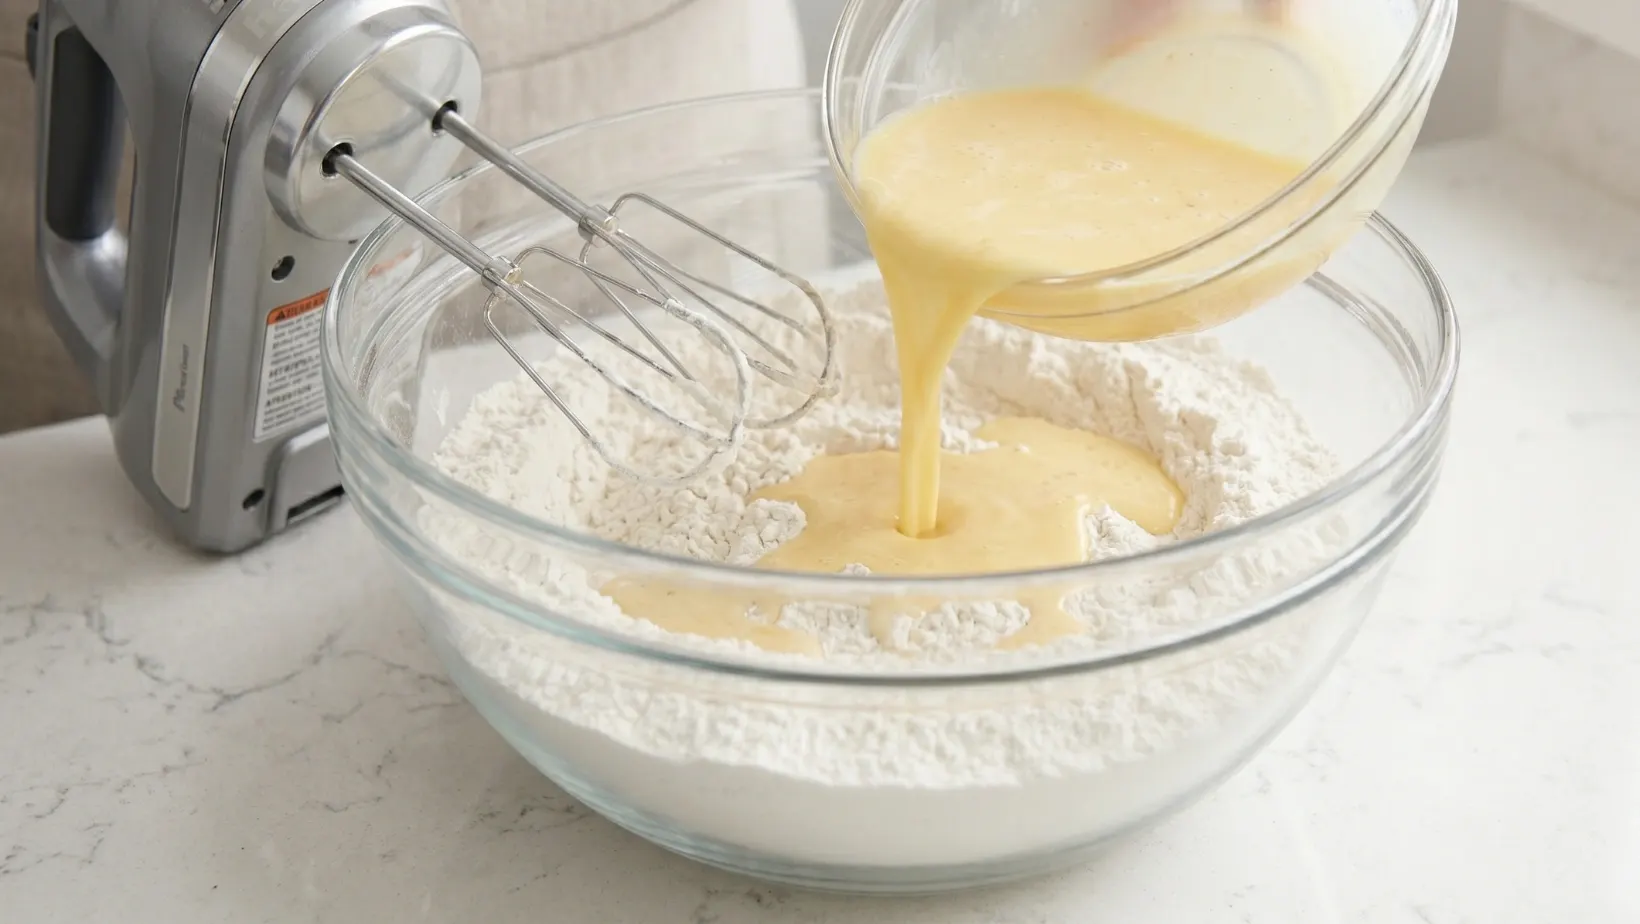
Combine Wet and Dry In a separate bowl, beat the eggs, whole milk, vegetable oil, and vanilla extract until completely smooth. Slowly pour this wet mixture into your dry ingredients. Use a hand mixer on medium speed to beat the batter for exactly two minutes. Do not overmix, or the cake will become dense rather than light and fluffy.
Step Four: Bake the Cake
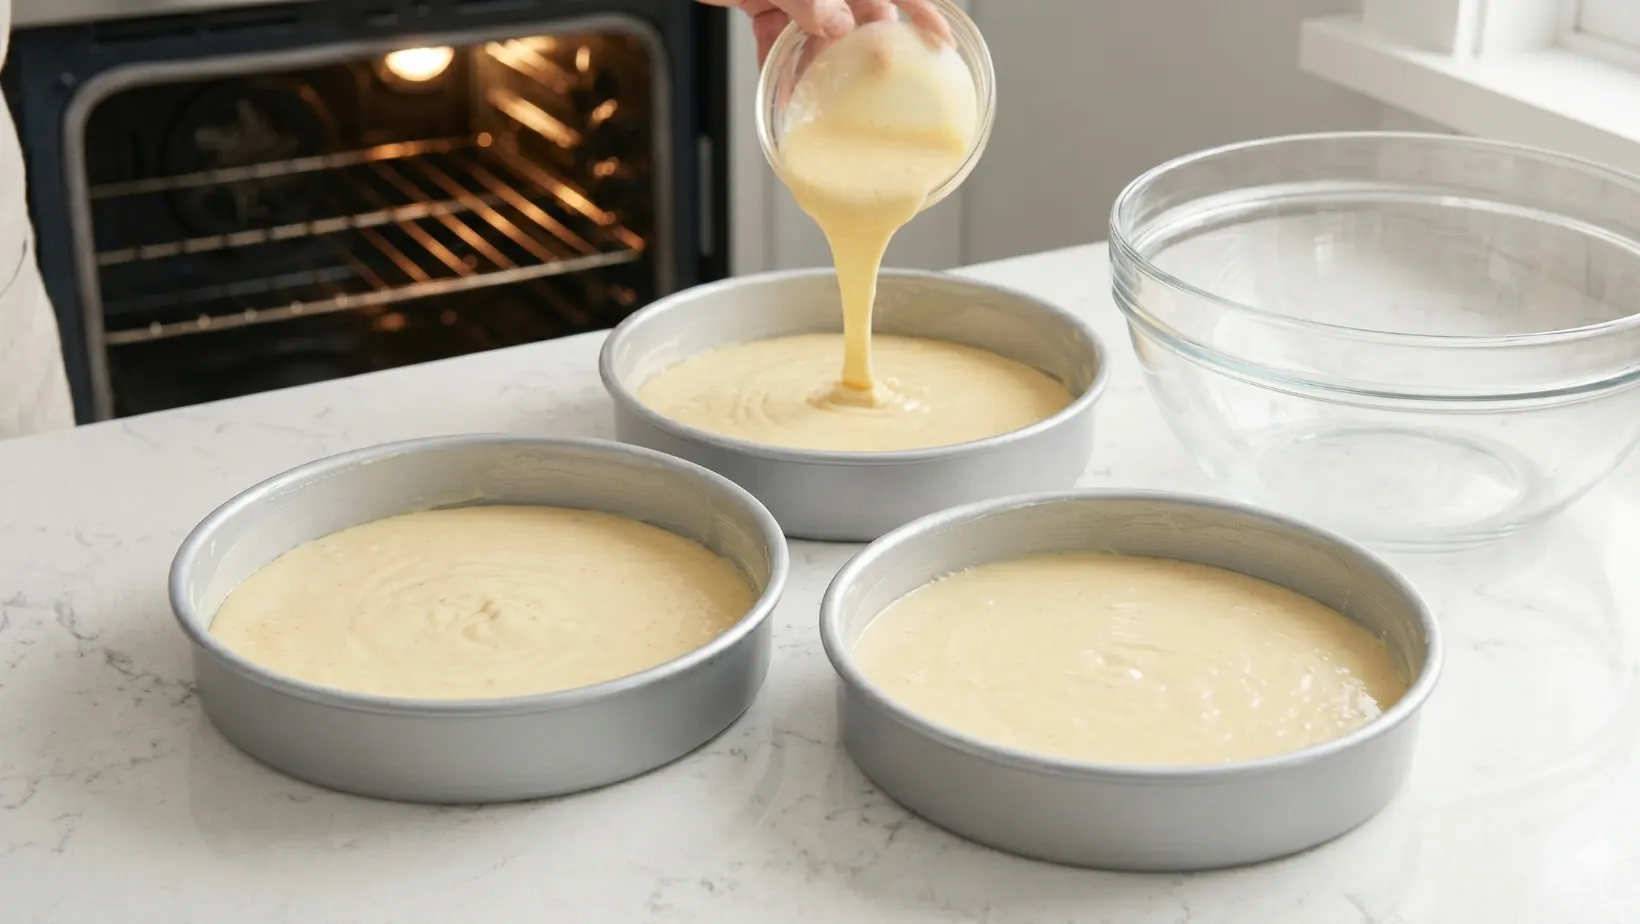
Bake the Cake Divide the batter evenly between the two prepared pans. Place them on the center rack of your oven. Bake for thirty to thirty-five minutes. You will know this phase of the cooking is complete when a toothpick inserted into the center of the dish comes out completely clean.
Step Five: Cool the Layers
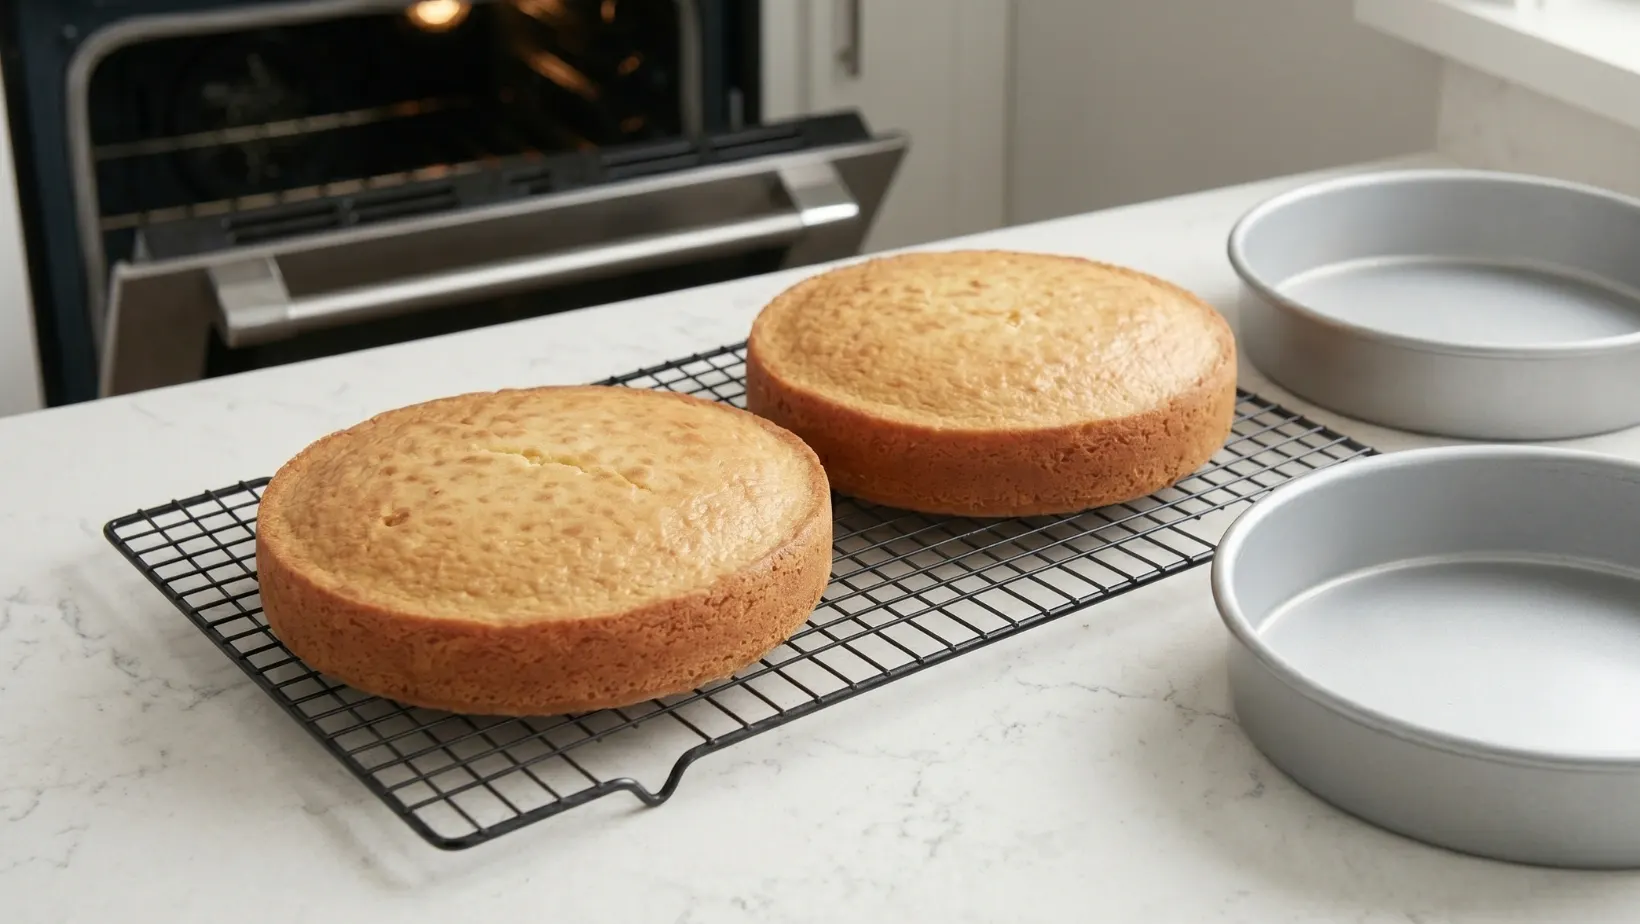
Cool the Layers Remove the pans from the oven and let them cool on a wire rack for ten minutes. Afterward, carefully invert the pans to release the cakes. Allow the layers to cool completely before attempting to add the frosting, otherwise, the butter will melt and ruin your homemade recipe.
Step Six: Whip the Frosting
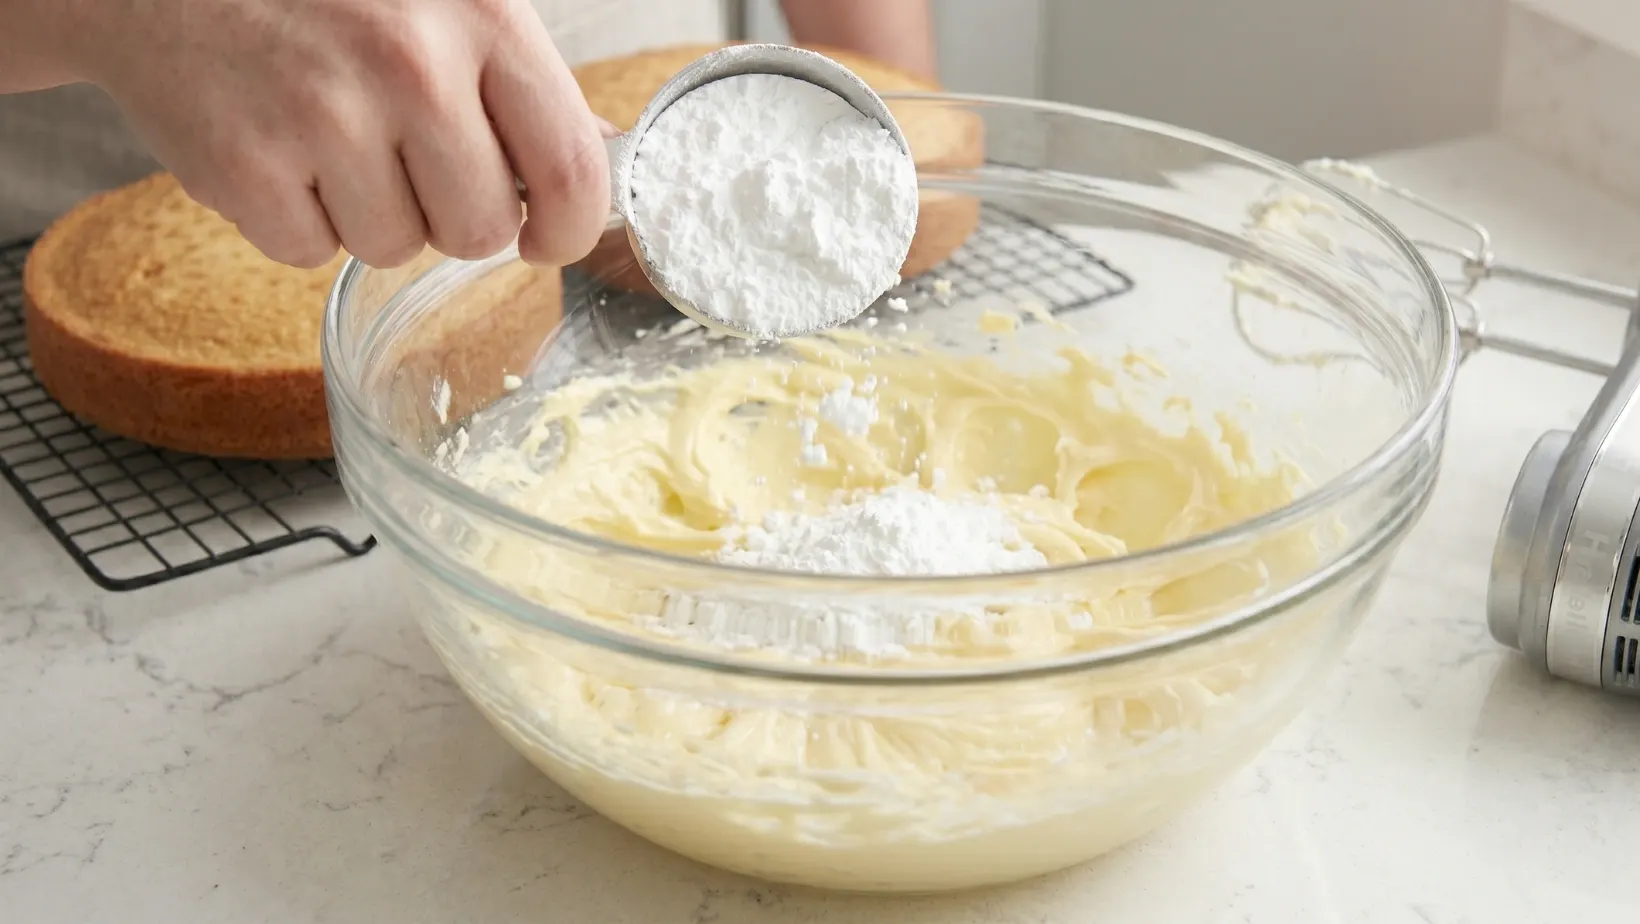
Whip the Frosting While the layers cool, prepare the frosting for your meal. In a large bowl, beat the softened butter until pale and creamy. Gradually add the powdered sugar, one cup at a time. Pour in the heavy cream and vanilla extract, beating on high speed for three minutes until the frosting is light, fluffy, and holds stiff peaks.
Step Seven: Assemble and Decorate
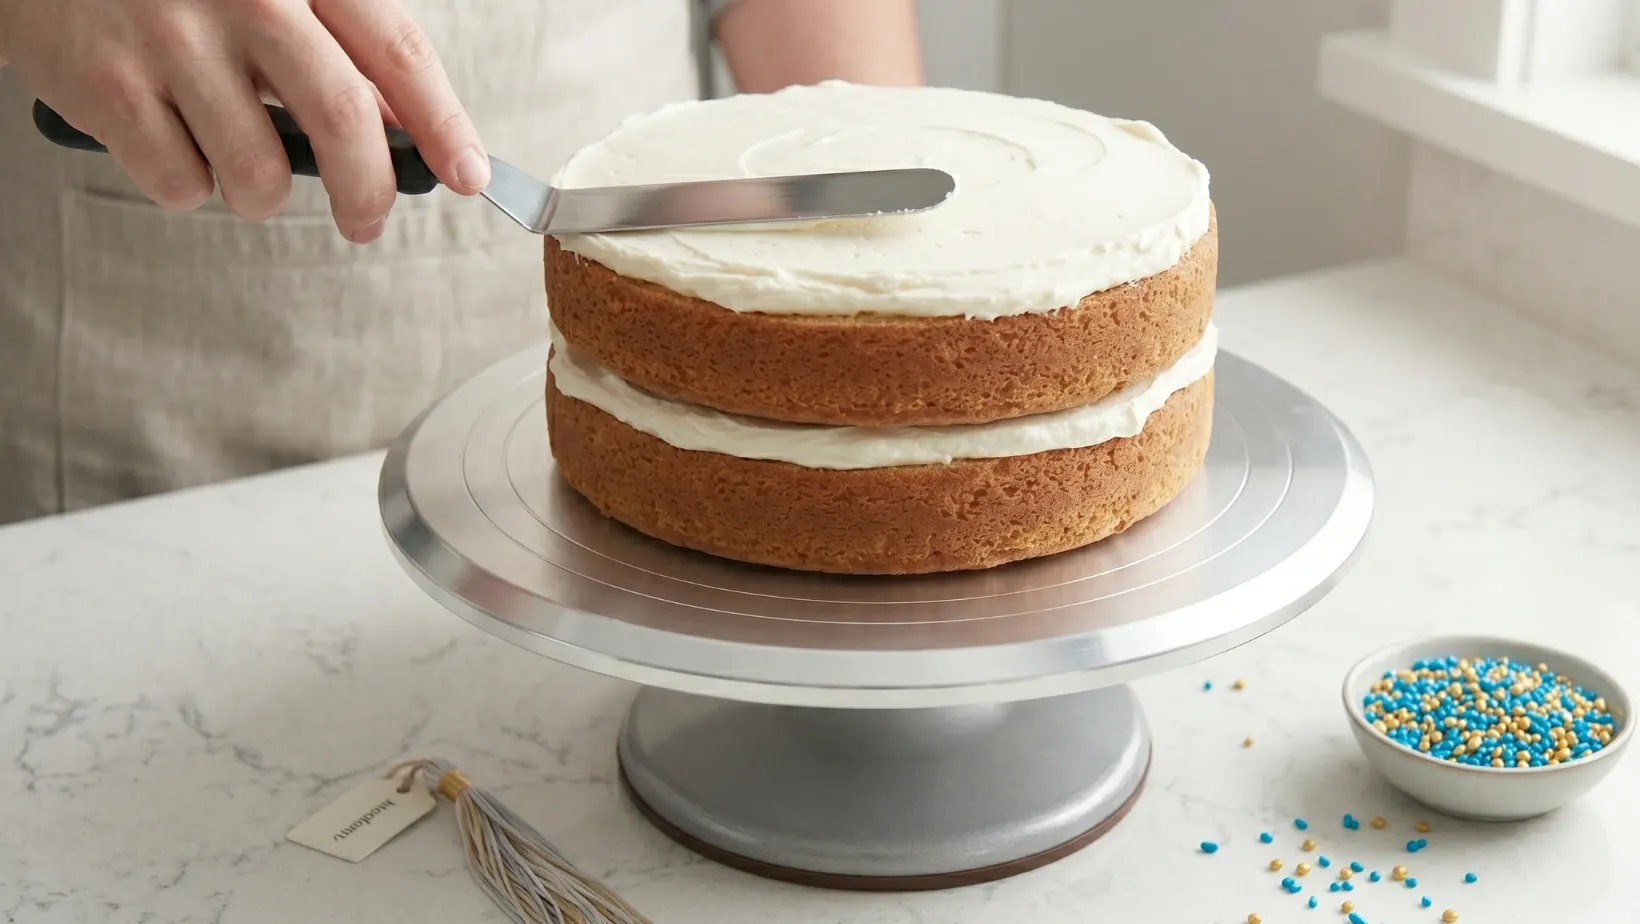
Assemble and Decorate Place the first cake layer on your serving dish. Spread a generous amount of buttercream over the top. Place the second layer directly on top. Frost the top and sides of the entire graduation cake evenly. You can finish the dish by adding school-colored sprinkles or writing a congratulatory message on top.
Serving Suggestions
A fantastic graduation cake deserves excellent accompaniments to complete the celebratory meal experience. Consider these creative serving ideas for your homemade recipe:
- Dinner Pairings: Before bringing out this heavy, sweet dessert dish, you should serve a balanced, elegant dinner. If you are looking for the perfect main course, we highly recommend exploring our popular shrimp and orzo recipes. A bright, citrusy shrimp and orzo recipe is a phenomenal way to balance the menu and keep your guests completely satisfied before the cake arrives.
- Ice Cream Accompaniment: Serve a thick slice of this cake alongside a large scoop of classic vanilla bean ice cream to elevate the entire meal.
- Fresh Fruit: For a lighter touch, offer a bowl of fresh seasonal berries on the side of the dessert dish to provide a tart contrast to the sweet frosting.
Frequently Asked Questions (FAQ)
Can I bake this graduation cake ahead of time?
Yes, making this dish ahead of time is incredibly easy and perfect for busy parties. You can bake the cake layers up to two days in advance. Simply wrap the completely cooled layers tightly in plastic wrap and store them in the refrigerator. Frost the recipe the morning of your event.
How do I store the leftovers of this recipe?
Store any leftover homemade cake in an airtight container at room temperature for up to three days. If you need to keep it longer, place the container in the refrigerator for up to one week. Bring the cake back to room temperature before eating to restore the soft texture of the crumb.
Can I freeze this dish for later?
Absolutely. Unfrosted cake layers freeze beautifully. Wrap them tightly in plastic wrap and then in aluminum foil. They will stay fresh in the freezer for up to three months. Thaw them overnight in the refrigerator before assembling your final meal.
Conclusion and Call to Action
Mastering this classic graduation cake is a fantastic way to elevate your everyday entertaining skills and provide a deeply comforting, homemade dish for your family and guests. This quick and easy recipe proves that you do not need complicated ingredients or advanced cooking techniques to create a highly memorable dessert. The rich combination of a tender crumb and perfect buttercream makes this an indispensable addition to any graduation party spread.
We highly encourage you to try making this graduation cake at your next gathering and experience the delicious, crowd-pleasing flavors for yourself. If you enjoyed preparing this easy recipe, please leave a comment below and let us know what school colors you used to decorate your version! Make sure to bookmark thenextrecipes as your primary go-to site for more professional culinary guides, expert cooking tips, and quick homemade meal ideas. Do not forget to browse our dinner section for that perfect shrimp and orzo recipe to serve beforehand. Happy baking!
Elegant Vanilla Bean Graduation Cake
Ingredients
Equipment
Method
- Preheat and Prep Pans: Preheat your oven to 350°F (175°C). Grease three 8-inch round cake pans with butter or non-stick baking spray, then line the bottoms with parchment paper rounds to ensure the cakes release perfectly.
- Mix Dry Ingredients: In a large mixing bowl, whisk together the cake flour, baking powder, baking soda, and kosher salt. Set this mixture aside.
- Cream Butter and Sugar: In the bowl of a stand mixer fitted with the paddle attachment, beat the softened unsalted butter on medium-high speed for about 2 minutes until completely smooth and creamy. Add the granulated sugar and beat for another 3 to 4 minutes until the mixture is very pale and fluffy.
- Add Eggs and Vanilla: Reduce the mixer speed to medium. Add the room temperature eggs one at a time, mixing well after each addition. Scrape down the sides of the bowl with a silicone spatula. Beat in the vanilla bean paste.
- Alternate Wet and Dry: With the mixer on the lowest speed, add one-third of the dry flour mixture. Once barely mixed in, pour in half of the buttermilk. Repeat with another third of the flour, the remaining buttermilk, and finish with the last of the flour. Mix just until combined; do not overmix.
- Bake the Layers: Divide the batter evenly among the three prepared cake pans. Smooth the tops with a spatula. Bake for 30 to 35 minutes, or until a toothpick inserted into the center comes out completely clean. Let the cakes cool in the pans for 10 minutes before turning them out onto wire racks to cool completely.
- Make the Buttercream: In a clean stand mixer bowl, beat the softened butter on medium-high speed for 5 minutes until it is very pale and almost white. Reduce the speed to low and gradually add the sifted powdered sugar, one cup at a time. Add the heavy whipping cream, clear vanilla extract, and salt. Increase the speed to high and beat for 3 to 5 minutes until the frosting is incredibly light and fluffy.
- Assemble and Decorate: Place the first cooled cake layer on a serving platter or cake stand. Spread an even layer of buttercream over the top. Repeat with the second and third layers. Apply a smooth, thin crumb coat of frosting around the entire cake and chill in the refrigerator for 20 minutes.
- Final Frosting: Apply a thick, final layer of the white buttercream, smoothing the sides with a bench scraper. Divide the remaining frosting into small bowls and dye it using your gel food coloring to match the specific school colors. Transfer the colored frosting to piping bags and pipe decorative borders, rosettes, or a congratulatory message onto the cake.
Notes
Clear Vanilla Extract: To achieve a stark, beautiful white base frosting that looks great in photos, use clear imitation vanilla extract instead of pure brown vanilla extract, which will give the frosting a yellow tint.
Make-Ahead Layers: You can bake the cake layers up to a month in advance. Let them cool completely, wrap each layer tightly in a double layer of plastic wrap, and freeze. You can actually assemble and frost the cake while the layers are still slightly frozen; it makes them much easier to handle and stack without breaking.