Traditional Danish Pastries – Sweet, Soft & Flaky
🥐 Flaky, Buttery, and Utterly Dreamy: Homemade Danish Pastries that Whisper Sweet Comfort

⭐️⭐️⭐️⭐️⭐️ (4.9 from 1,900 fans)
📸 700+ photo shares | ☀️ Updated [October 2025]
There are some treats that just transport you, aren’t there? And for me, homemade Danish Pastries are one of those magical bites. Imagine a delicate, golden pastry, crackling with hundreds of buttery layers, yielding to reveal a creamy, sweet filling—perhaps a tangy berry compote or a smooth, vanilla-kissed cream cheese. The aroma alone, a warm embrace of butter and sugar fresh from the oven, is enough to brighten any morning. These aren’t just pastries; they’re little pockets of joy, perfect for a slow weekend breakfast, a thoughtful brunch spread, or simply a moment of quiet indulgence with a steaming cup of coffee. They invite you to slow down, savor, and truly taste the love baked into every single flaky layer.
Recipe Card will be inserted here
Quick Glance
⏱️ Prep Time: 3 hours (active time 45 minutes)
🍽️ Servings: 12-16 pastries
💥 Vibe: Flaky, Buttery, Dreamy
Jump Ahead
- What You’ll Need
- How to Make Danish Pastries
- Fun Twists & Serving Ideas
- Reviews
- FAQ
- Conclusion
- Recipe Note
What You’ll Need
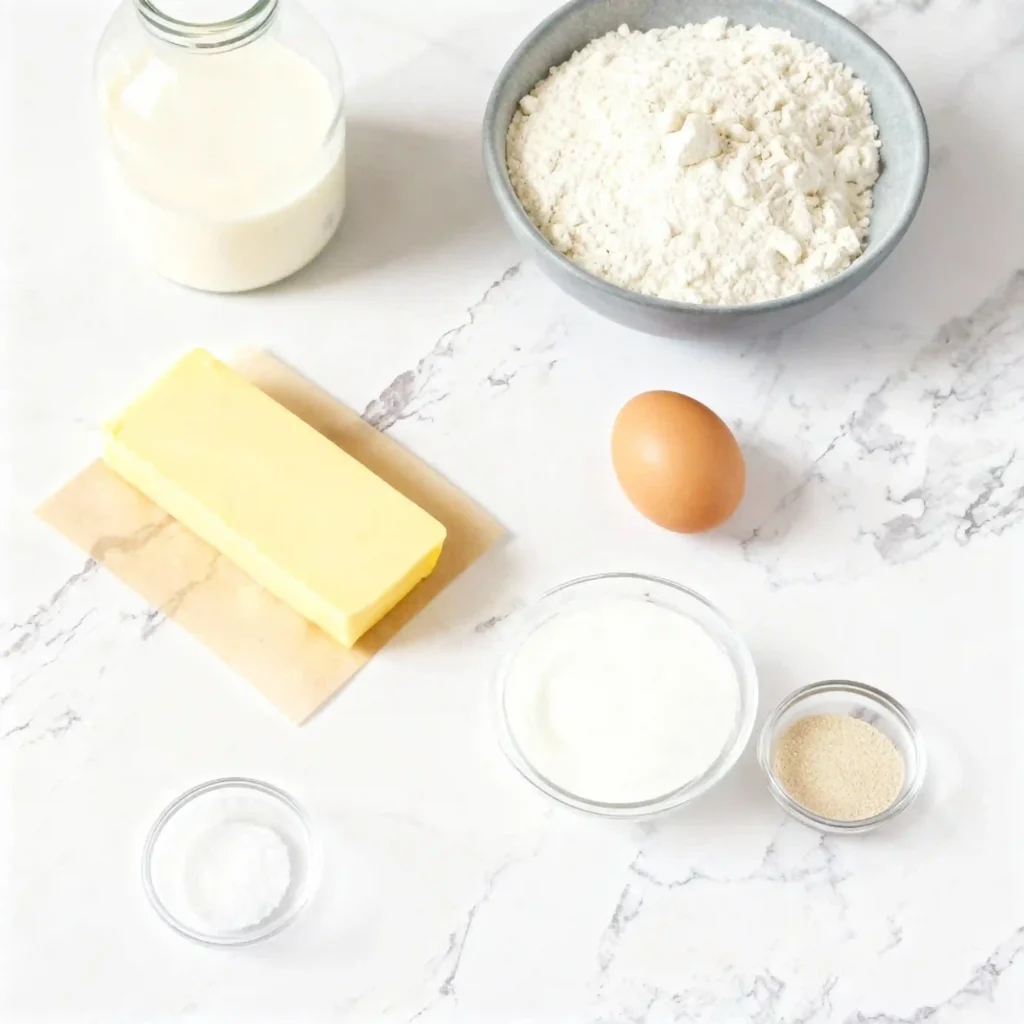
Gathering your ingredients is the first step on our delicious journey to perfect Danish pastries. Fresh, quality ingredients are key to unlocking those incredible layers and rich flavors we’re after. Have everything measured and ready to go for a smooth baking experience!
- For the Dough:
- 3 ½ cups (420g) all-purpose flour, plus more for dusting
- ½ cup (100g) granulated sugar
- 1 teaspoon salt
- 1 packet (2 ¼ teaspoons) active dry yeast
- ½ cup (120ml) warm milk (105-115°F / 40-46°C)
- 2 large eggs, lightly beaten
- ½ cup (113g) unsalted butter, melted and cooled slightly
- 1 ½ cups (340g) unsalted butter, cold, for laminating
- For the Cream Cheese Filling:
- 8 oz (226g) cream cheese, softened
- ¼ cup (50g) granulated sugar
- 1 large egg yolk
- ½ teaspoon vanilla extract
- For the Egg Wash:
- 1 large egg, beaten with 1 tablespoon water
- For the Glaze:
- 1 ½ cups (180g) powdered sugar
- 2-3 tablespoons milk
- ½ teaspoon vanilla extract
How to Make Danish Pastries
Creating these beautiful pastries is a labor of love, but oh so rewarding! Each step builds towards that incredible flaky texture and sweet, tender bite. Don’t rush, enjoy the process, and you’ll be delighted with the results.
- Activate the Yeast: In a small bowl, combine the warm milk with a pinch of sugar and the active dry yeast. Stir gently and let it sit for 5-10 minutes until frothy. This tells you your yeast is alive and ready to work its magic!
- Mix the Dough: In a large mixing bowl (or stand mixer with a dough hook), whisk together the flour, granulated sugar, and salt. Pour in the yeast mixture, beaten eggs, and melted butter. Mix on low speed until a shaggy dough forms, then increase to medium and knead for 5-7 minutes until the dough is smooth and elastic.
- First Chill: Transfer the dough to a lightly oiled bowl, turn to coat, cover with plastic wrap, and refrigerate for at least 2 hours, or up to overnight. This cold rest is crucial for flavor development and easier handling.
- Prepare the Butter Block: While the dough chills, prepare your butter. Place the cold 1 ½ cups of butter between two sheets of parchment paper. Using a rolling pin, gently pound and roll it into an 8×8 inch square. Keep it in the fridge until ready to use.
- Roll and Enclose: On a lightly floured surface, roll the chilled dough into a 16×16 inch square. Place the butter block in the center of the dough, rotated to look like a diamond. Fold the four corners of the dough over the butter, completely enclosing it. Pinch the seams tightly to seal.
- The First Turn (Single Fold): Lightly flour your work surface and the top of the dough. Gently roll the dough into a 24×8 inch rectangle. Brush off any excess flour. Fold one-third of the dough over the middle, then fold the remaining third over that, like folding a letter. This is your first “turn.” Wrap tightly in plastic wrap and refrigerate for 30 minutes.
- Repeat the Turns: Repeat step 6 two more times, chilling the dough for 30 minutes after each turn. You will complete a total of three single turns. This process creates those incredible layers!
- Make the Filling: While the dough has its final chill, prepare the cream cheese filling. In a medium bowl, beat the softened cream cheese, granulated sugar, egg yolk, and vanilla extract until smooth and creamy. Transfer to a piping bag (or a ziploc bag with the corner snipped).
- Shape the Pastries: After the final chill, roll the dough into a large 16×20 inch rectangle. Using a sharp knife or pizza cutter, trim the edges to create clean lines, then cut the dough into 12-16 squares (about 4×4 inches each).
- Fill and Fold: For each square, make four small cuts, one in from each corner towards the center, leaving the very center untouched. Pipe or spoon a dollop of cream cheese filling into the center. Take one cut corner and fold it into the center, pressing gently. Take the opposite cut corner and fold it over the first, pressing again. Repeat with the remaining two corners, creating a pinwheel or a square with an open center.
- Proof and Preheat: Place the shaped pastries on parchment-lined baking sheets, leaving space between them. Cover loosely with plastic wrap and let them proof in a warm place for 45-60 minutes, or until visibly puffy. Preheat your oven to 400°F (200°C) during the last 20 minutes of proofing.
- Egg Wash and Bake: Brush the tops and exposed dough of the pastries with the egg wash. Bake for 15-20 minutes, or until deeply golden brown and puffed. If using fruit topping, add a small spoonful into the center of the cream cheese filling after about 10 minutes of baking.
- Cool and Glaze: Remove the pastries from the oven and let them cool on a wire rack. Once mostly cooled, whisk together the powdered sugar, milk, and vanilla extract for the glaze until smooth. Drizzle generously over the pastries and serve slightly warm or at room temperature.
Fun Twists & Serving Ideas

Danish pastries are wonderfully versatile! Here are a few ideas to spark your creativity and make them even more special:
- Fruity Burst: Add a teaspoon of your favorite fruit preserve (raspberry, apricot, or blueberry are divine!) on top of the cream cheese filling before baking. The fruit will get wonderfully jammy and warm.
- Nutty Crunch: Before baking, sprinkle a little chopped almond or pecan on top of the filling for added texture and a lovely roasted nut flavor. A light dusting of cinnamon sugar can also be added to the dough before its final fold.
- Chocolate Lover’s Dream: Swap some of the cream cheese filling for a spoonful of rich chocolate ganache or a few chocolate chips. The melted chocolate in the warm pastry is pure bliss.
- Lemon Zest Brightness: Stir a teaspoon of fresh lemon zest into your cream cheese filling for a bright, zesty counterpoint to the sweetness.
- Savory Surprise (for the adventurous!): While traditionally sweet, you could experiment with a savory filling like herbed cream cheese with sun-dried tomatoes, or even a pesto and mozzarella blend.
Reviews
It’s always a joy to hear how much you’re loving these recipes! Here are some sweet words from fellow fans:
Sarah L. ⭐️⭐️⭐️⭐️⭐️
“I was intimidated by making Danish pastries, but this recipe made it so approachable! The instructions were clear, and the results were absolutely stunning. My family devoured them. Thank you for this perfect weekend treat!”
Mark T. ⭐️⭐️⭐️⭐️⭐️
“These are better than any bakery Danish I’ve ever had. The layers are incredible, and the cream cheese filling is just right. It’s a bit of work, but every minute is worth it for that first bite. A new favorite for sure!”
Jessica R. ⭐️⭐️⭐️⭐️⭐️
“The smell filling my kitchen while these were baking was heavenly! I used cherry pie filling on some, and the classic cream cheese on others. Both were fantastic. This recipe is a keeper!”
FAQ
Got questions? We’ve got answers to help you bake with confidence!
Q: Can I make the dough ahead of time?
A: Absolutely! The dough can be prepared up to the final shaping step and refrigerated for up to 2 days, or even frozen for up to 2 weeks. If frozen, thaw in the refrigerator overnight before proceeding with shaping.
Q: What if my butter breaks through the dough during rolling?
A: Don’t panic! This sometimes happens if the butter isn’t cold enough or the dough isn’t elastic enough. Gently patch the dough with a small piece of unworked dough or extra flour. If it’s severe, quickly pop the dough back in the fridge for 15-20 minutes to firm up both the butter and dough.
Q: Can I use different fillings?
A: Yes, be creative! Besides cream cheese, you can use fruit jams, almond paste, pastry cream, or even a simple cinnamon-sugar mixture. Just ensure your chosen filling isn’t too wet, which could make the pastry soggy.
Q: How do I store leftover Danish pastries?
A: Store cooled pastries in an airtight container at room temperature for up to 2 days. For longer storage, refrigerate for up to 4 days. You can gently warm them in a toaster oven for a few minutes before serving to bring back some of their fresh-baked glory.
Conclusion
There’s something truly magical about bringing a tray of homemade Danish pastries to the table. It’s not just the incredible taste or the beautiful layers; it’s the joy of creation, the shared moments around the breakfast table, and the quiet satisfaction of mastering something so seemingly intricate. This recipe isn’t just about baking; it’s about making memories, filling your home with warmth, and treating yourself and your loved ones to a little slice of heaven. So go on, roll up your sleeves, embrace the process, and get ready to fall head over heels for your very own, utterly dreamy Danish Pastries!
Recipe Note
For the flakiest results, ensure both your dough and the laminating butter are very cold throughout the lamination process. If the butter starts to soften and seep, pop the dough back into the refrigerator for 15-20 minutes to firm up before continuing.
Danish Pastries
Cook Time: N/A
Total Time: 6-8 hours (includes chilling and proofing)
Course: Breakfast, Brunch, Dessert
Servings: 12
Calories: 380 per pastry (approximate, varies with filling)
Ingredients
- 1 cup (240ml) whole milk, warmed to 105-115°F (40-46°C)
- 2 1/4 teaspoons (1 packet) active dry yeast
- 1/4 cup (50g) granulated sugar, plus 1 tsp for yeast
- 1 large egg
- 1 teaspoon salt
- 3 cups (360g) all-purpose flour, plus more for dusting
- 8 ounces (226g) unsalted butter, very cold (for butter block)
- For Egg Wash: 1 large egg beaten with 1 tbsp water
- For Glaze: 1 cup (120g) powdered sugar, 2-3 tablespoons milk or water, 1/2 teaspoon vanilla extract
Instructions
- Make the Dough: In a large bowl, combine warm milk, 1 teaspoon sugar, and yeast. Let sit for 5-10 minutes until foamy. Add the remaining 1/4 cup sugar, egg, and salt. Whisk to combine. Add the flour gradually, mixing until a shaggy dough forms. Turn out onto a lightly floured surface and knead for 5-7 minutes until smooth and elastic. The dough will be slightly sticky. Form into a ball, place in a lightly oiled bowl, cover, and refrigerate for at least 1 hour.
2. Prepare the Butter Block: Place the very cold 8 ounces of unsalted butter between two sheets of parchment paper. Using a rolling pin, flatten the butter into an 8×8 inch square. Keep cold in the refrigerator until ready to use.
3. First Fold: On a lightly floured surface, roll the chilled dough into a 16×16 inch square. Place the cold butter block diagonally in the center of the dough. Fold the four corners of the dough over the butter, completely enclosing it like an envelope. Pinch the seams to seal.
4. Laminate (First Turn): Gently roll the dough into a 10×20 inch rectangle. Fold the dough into thirds, like a business letter (bring one short end to the center, then fold the other short end over it). Wrap tightly in plastic wrap and refrigerate for 30 minutes to 1 hour.
5. Laminate (Second Turn): Remove the dough from the refrigerator. Place it on a lightly floured surface with the open seam facing you. Roll into another 10×20 inch rectangle. Fold into thirds again. Wrap and refrigerate for another 30 minutes to 1 hour.
6. Laminate (Third Turn): Repeat step 5 one more time. After the third fold, wrap and refrigerate the dough for at least 1 hour, or preferably overnight.
7. Shape the Pastries: On a lightly floured surface, roll the chilled dough into a large rectangle, about 1/8 inch thick (approximately 16×20 inches). Trim the edges to create a clean rectangle. Cut the dough into 12 squares (about 4×4 inches each). You can shape them in various ways: a) Pinwheel: Cut slits from each corner almost to the center, leaving a 1/2 inch center. Place filling in the center, then fold every other point into the center, pressing to seal. b) Basket: Place filling in the center, then fold two opposite corners towards the center, overlapping slightly. c) Twist: Cut dough into long strips, twist, and form into desired shapes.
8. Fill and Proof: Place the shaped pastries on baking sheets lined with parchment paper. If using cream cheese or fruit filling, add it now to the center of each pastry. Cover loosely with plastic wrap and let rise in a warm place for 1-2 hours, or until visibly puffy.
9. Bake: Preheat your oven to 400°F (200°C). Brush the pastries with egg wash. Bake for 15-20 minutes, or until golden brown and puffed. If using a jam that browns quickly, you might add it after 10 minutes of baking.
10. Glaze: While the pastries cool, whisk together powdered sugar, milk/water, and vanilla extract until smooth. Drizzle or spread the glaze over the cooled pastries. Serve warm or at room temperature.
Chef’s Notes: Achieving flaky layers requires patience and cold dough/butter. Do not rush the chilling steps. For filling, you can use cream cheese filling (8 oz cream cheese, 1/2 cup sugar, 1 egg yolk, 1 tsp vanilla) or your favorite fruit jam.