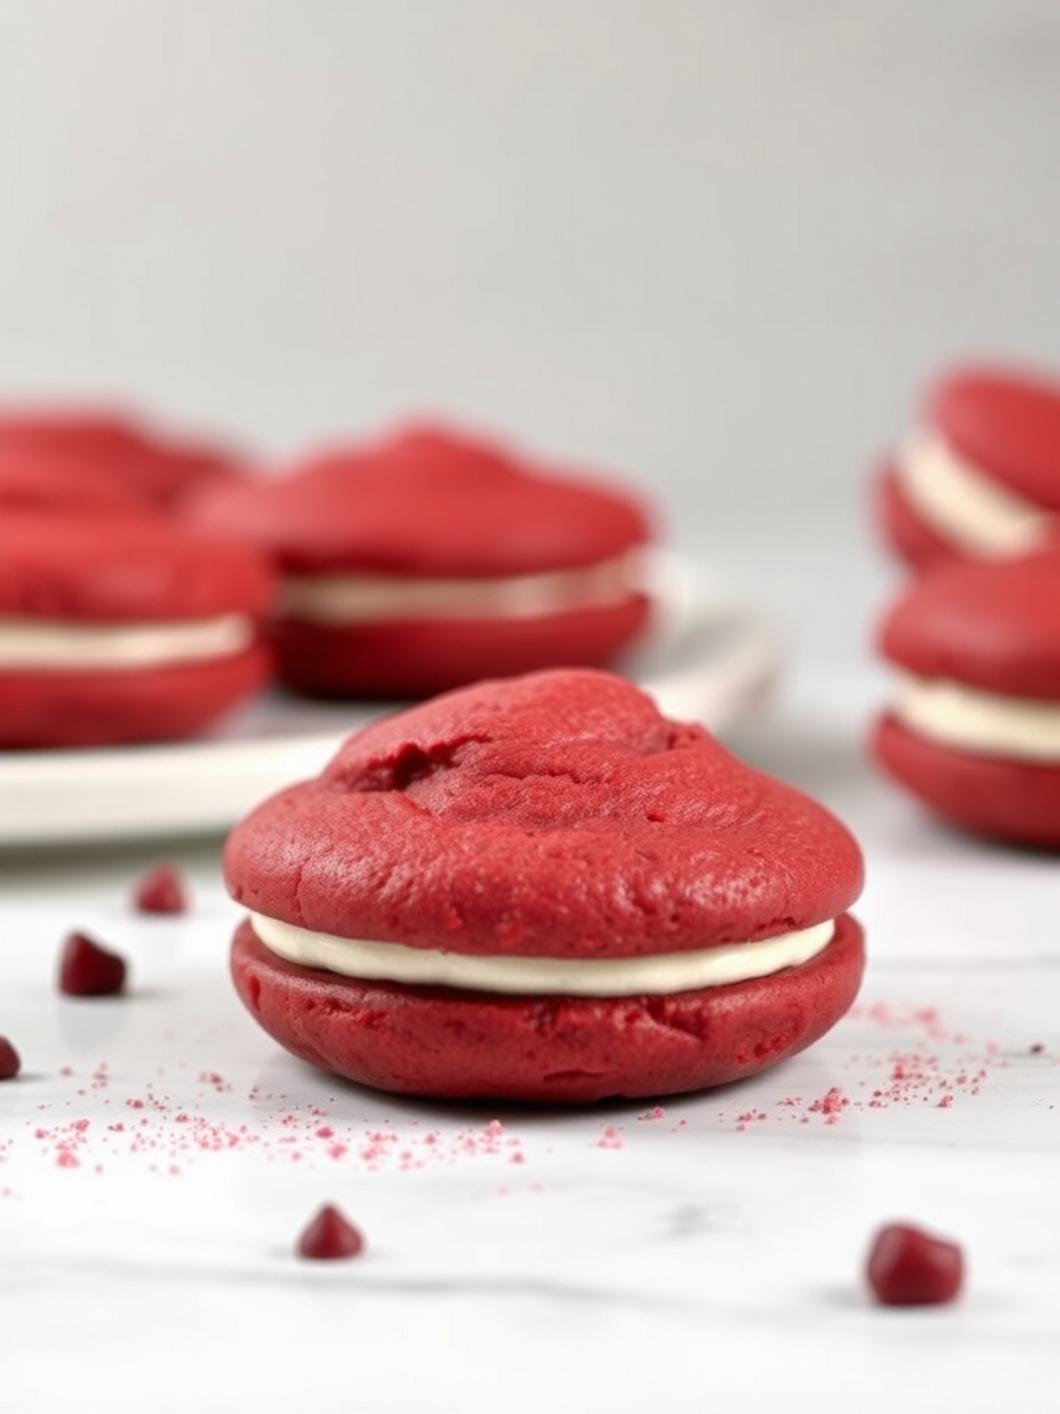
Red Velvet Whoopie Pies – Soft, Sweet & Cream-Filled
Red Velvet Whoopie Pies: A Little Bite of Velvet Heaven!
Oh, darling bakers, gather ’round! Today, we’re diving headfirst into a classic that truly speaks to the soul: Red Velvet Whoopie Pies. If you’ve never experienced the joy of biting into a soft, cake-like red velvet cookie sandwiching a cloud of tangy cream cheese frosting, then prepare for a revelation! These aren’t just desserts; they’re little pockets of pure joy, a delightful twist on the traditional whoopie pie, bringing all the charm and flavor of a red velvet cake into a fun, handheld treat. Get ready to fall in love!
⭐️⭐️⭐️⭐️⭐️ (4.8 from 2,500 fans)
📸 1100+ photo shares | ☀️ Updated December 2025

Why You’ll Love This Recipe
There’s something irresistibly charming about a red velvet dessert, and these whoopie pies are no exception! They strike the perfect balance between the subtle cocoa notes and the vibrant crimson hue, all complemented by a rich, slightly tart cream cheese filling. They’re perfect for celebrations, potlucks, or just a cozy afternoon pick-me-up. Plus, they’re incredibly fun to make and even more fun to eat – trust me, they disappear fast!
What You’ll Need
Equipment:
- Large mixing bowls
- Electric mixer (stand or hand-held)
- Whisk
- Spatula
- Measuring cups and spoons
- Baking sheets
- Parchment paper or silicone baking mats
- Small ice cream scoop or piping bag with a round tip
- Wire cooling rack
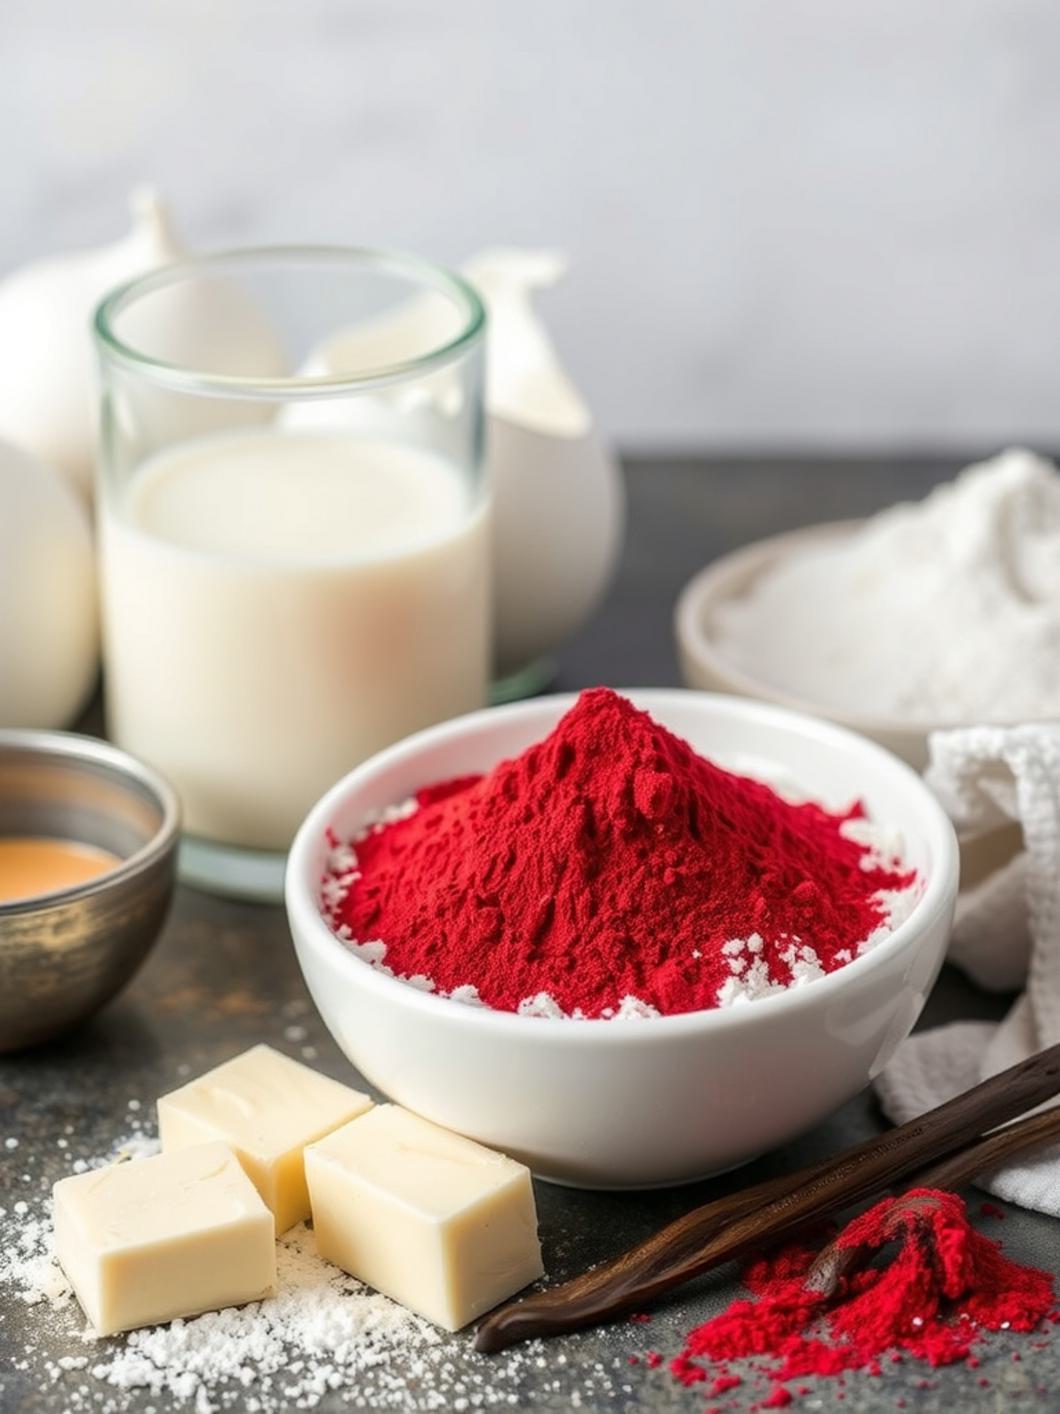
For the Red Velvet Whoopie Pies:
- 2 ½ cups all-purpose flour
- ½ cup unsweetened cocoa powder
- 1 teaspoon baking soda
- ½ teaspoon salt
- ½ cup unsalted butter, softened
- 1 ½ cups granulated sugar
- 2 large eggs
- 1 teaspoon vanilla extract
- 1 cup buttermilk
- 2 tablespoons red food coloring (gel for best results)
- 1 tablespoon white vinegar
For the Cream Cheese Frosting:
- 8 ounces cream cheese, softened
- ½ cup unsalted butter, softened
- 4 cups powdered sugar, sifted
- 1 teaspoon vanilla extract
- Pinch of salt
How to Make Red Velvet Whoopie Pies
Making these glorious Red Velvet Whoopie Pies is a delightful process. Follow these steps for perfect, pillow-soft cookies and creamy filling!
- Prep Your Workspace: Preheat your oven to 350°F (175°C). Line two baking sheets with parchment paper or silicone baking mats.
- Combine Dry Ingredients: In a medium bowl, whisk together the flour, cocoa powder, baking soda, and salt. Set aside.
- Cream Butter & Sugar: In a large mixing bowl, using an electric mixer, cream together the softened butter and granulated sugar until light and fluffy (about 2-3 minutes).
- Add Wet Ingredients: Beat in the eggs one at a time, mixing well after each addition. Stir in the vanilla extract.
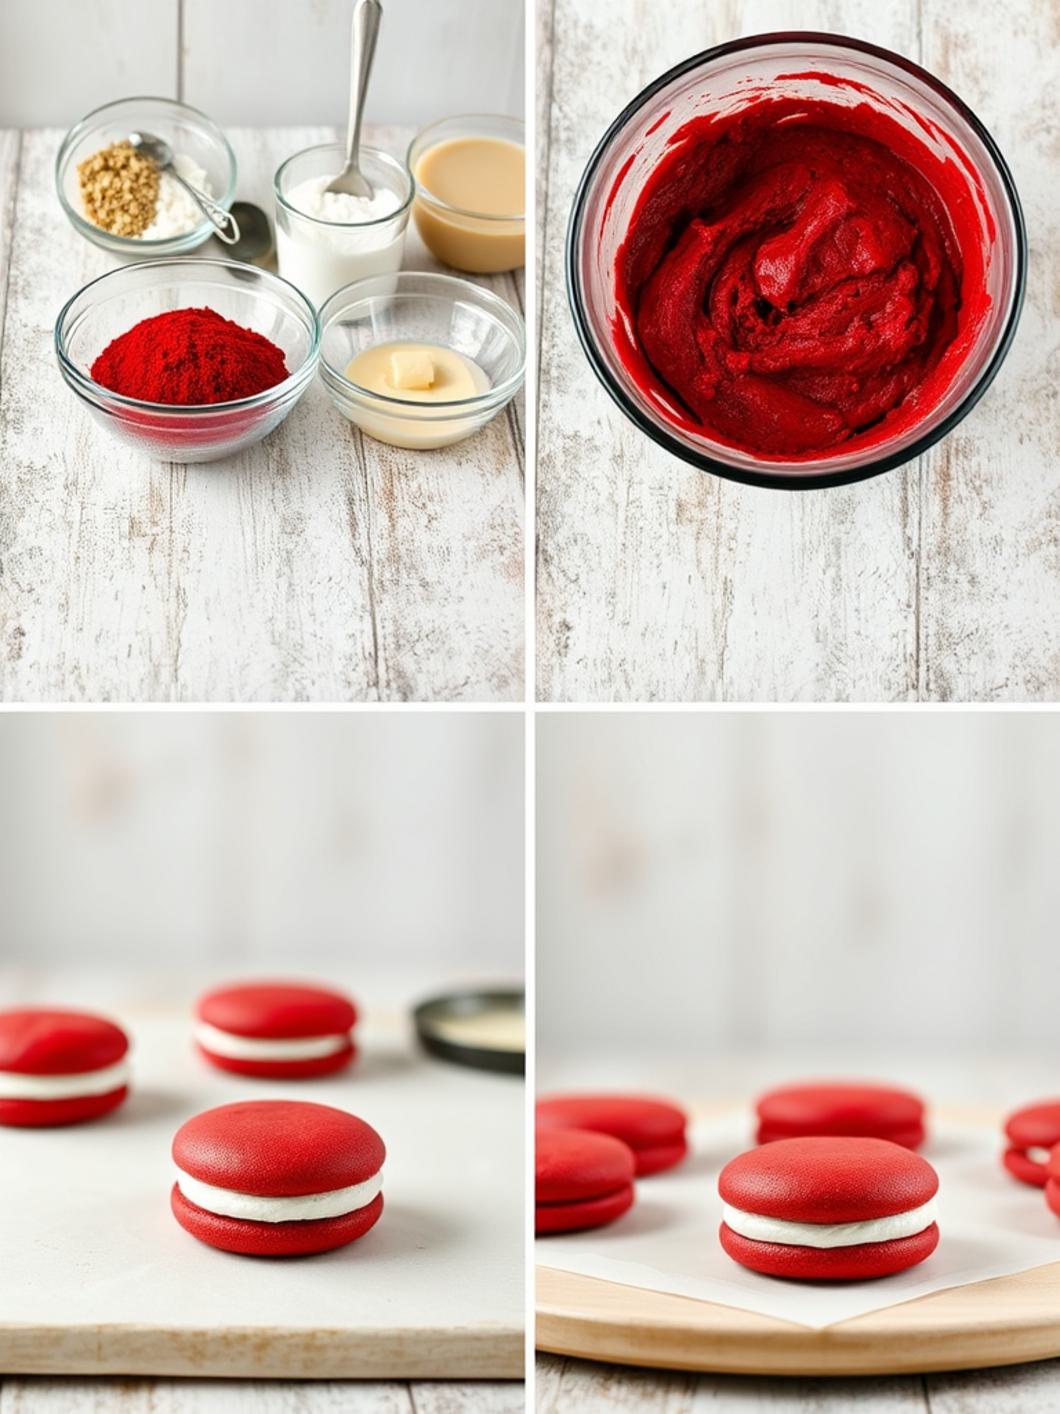
- Alternate Wet & Dry: In a separate small bowl, combine the buttermilk, red food coloring, and vinegar. Gradually add the dry ingredients to the butter mixture in three additions, alternating with the buttermilk mixture, beginning and ending with the dry ingredients. Mix until just combined, being careful not to overmix. The batter will be thick and vibrant!
- Scoop & Bake: Drop rounded tablespoons (or use a small ice cream scoop) of batter onto the prepared baking sheets, leaving about 2 inches between each. These cookies spread a little, so don’t crowd them.
- Bake the Cookies: Bake for 10-12 minutes, or until the edges are set and the centers spring back slightly when lightly touched. Do not overbake!
- Cool Completely: Let the cookies cool on the baking sheets for a few minutes before transferring them to a wire rack to cool completely. This is crucial for proper assembly later.
- Make the Frosting: While the cookies cool, prepare the cream cheese frosting. In a large bowl, beat the softened cream cheese and butter together until smooth and creamy. Gradually add the sifted powdered sugar, a cup at a time, mixing until fully incorporated and smooth. Beat in the vanilla extract and a pinch of salt.
- Assemble Your Whoopie Pies: Once the cookies are completely cool, match them up into pairs of similar sizes. Spread a generous dollop of cream cheese frosting onto the flat side of one cookie. Gently top with another cookie, flat side down, to create a sandwich. Repeat with the remaining cookies and frosting.
Pro Tips for Perfection
- Gel Food Coloring is Key: For that truly vibrant red hue, opt for gel food coloring over liquid. You’ll get a deeper color without adding too much moisture to your batter.
- Don’t Overmix: Overmixing the batter can lead to tough cookies. Mix until just combined for a tender, cake-like texture.
- Cool Completely: This cannot be stressed enough! Warm cookies will melt your beautiful cream cheese frosting and make a messy situation.
- Piping Bag for Filling: For a neater and more professional-looking finish, pipe the cream cheese frosting onto the cookies using a piping bag with a large round tip.
- Match Your Halves: Before frosting, take a moment to pair up cookies of similar sizes. This makes for a much more appealing and stable whoopie pie.
Fun Twists & Serving Ideas
- Chocolate Drizzle: Melt some white or dark chocolate and drizzle it over the assembled whoopie pies for an extra touch of decadence.
- Sprinkle Fun: Roll the edges of the frosted whoopie pies in festive sprinkles for holidays or birthdays.
- Mini Whoopies: Use a smaller scoop to make bite-sized whoopie pies, perfect for dessert platters.
- Spiced Cream Cheese: Add a pinch of cinnamon or nutmeg to your cream cheese frosting for a subtle warming spice.
- Coffee Pairing: These are absolutely divine with a hot cup of coffee, a glass of milk, or even a shot of espresso.
Storage & Make-Ahead Tips
Storage: Store assembled Red Velvet Whoopie Pies in an airtight container in the refrigerator for up to 3-4 days. The cream cheese frosting needs to be kept cool. Let them come to room temperature for about 15-20 minutes before serving for the best texture.
Make-Ahead: The cookie halves can be baked up to 2 days in advance and stored in an airtight container at room temperature. The cream cheese frosting can also be made ahead and stored in the refrigerator for up to 3 days. Bring the frosting to room temperature and re-whip it briefly before assembling.
Freezing: You can freeze the unfrosted cookie halves for up to 1 month. Thaw at room temperature before filling. I don’t recommend freezing the assembled whoopie pies as the texture of the frosting can change upon thawing.
Readers’ Reviews
⭐️⭐️⭐️⭐️⭐️ Chloe S.: “These are heavenly! I made them for a party, and they were the first dessert to disappear. The recipe is so easy to follow, and the cookies are perfectly soft. A new favorite!”
⭐️⭐️⭐️⭐️⭐️ Mark T.: “I’m usually intimidated by baking, but this recipe for Red Velvet Whoopie Pies was a breeze. The cream cheese frosting is out of this world. My wife absolutely adored them. Will definitely make again!”
⭐️⭐️⭐️⭐️⭐️ Lily P.: “I’ve tried a few whoopie pie recipes, and this one is by far the best! The red velvet cookies have the perfect texture, and the vibrant color is stunning. They taste even better than they look!”
FAQs about Red Velvet Whoopie Pies
Q: What gives red velvet its unique flavor?
A: Red velvet’s signature flavor comes from a combination of cocoa powder, buttermilk, and vinegar, which react to create a subtle tang and moist texture. The red food coloring provides the distinctive color, which historically was a natural reaction with cocoa powder.
Q: Can I use regular milk instead of buttermilk?
A: Buttermilk is crucial for the tender texture and slight tang. If you don’t have it, you can make a substitute by adding 1 tablespoon of white vinegar or lemon juice to a measuring cup, then filling the rest with regular milk to make 1 cup. Let it sit for 5-10 minutes until it slightly curdles.
Q: Why did my whoopie pie cookies spread too much?
A: This can happen if your butter was too soft, your oven wasn’t at the correct temperature, or if there wasn’t enough flour. Ensure your butter is just softened (not melted) and measure ingredients accurately, especially flour. Chilling the dough for 15-30 minutes before baking can also help.
Q: Can I make these gluten-free?
A: Yes, you can often substitute a 1:1 gluten-free all-purpose flour blend. Ensure your blend contains xanthan gum, or add ½ teaspoon per cup of flour. Baking times might vary slightly.
My Final Thoughts
There you have it, folks! These Red Velvet Whoopie Pies are truly a celebration in every bite. They embody everything we love about red velvet cake—richness, tenderness, and that signature cream cheese tang—all wrapped up in an irresistible, handheld form. They’re a testament to how fun and rewarding baking can be. So, roll up your sleeves, embrace the red, and let’s bake some magic!
Recipe Note: Please adjust baking times according to your oven. All measurements are standard. Enjoy your baking adventure!
Red Velvet Whoopie Pies
Cook Time: 45 minutes
Total Time: 1 hour 30 minutes
Course: Dessert
Servings: 9-10 whoopie pies (18-20 individual cookies)
Calories: 380 per whoopie pie (estimated)
Ingredients
- 2 ½ cups all-purpose flour
- 2 tablespoons unsweetened cocoa powder
- 1 teaspoon baking soda
- ½ teaspoon salt
- ½ cup (1 stick) unsalted butter, softened
- 1 ½ cups granulated sugar
- 1 large egg
- 1 teaspoon vanilla extract
- 1 cup buttermilk
- 2 tablespoons red food coloring (liquid or gel)
- 1 teaspoon white vinegar
- 8 ounces cream cheese, softened
- ½ cup (1 stick) unsalted butter, softened (for frosting)
- 3-4 cups powdered sugar, sifted
- 1 teaspoon vanilla extract (for frosting)
- Pinch of salt (optional, for frosting)
Instructions
1.For the Whoopie Pies:
1. Preheat oven to 350°F (175°C). Line baking sheets with parchment paper.
2. In a medium bowl, whisk together flour, cocoa powder, baking soda, and salt. Set aside.
3. In a large bowl, cream together softened butter and granulated sugar until light and fluffy. Beat in the egg and vanilla extract until well combined.
4. In a separate small bowl, combine buttermilk, red food coloring, and white vinegar.
5. Gradually add the dry ingredients to the wet ingredients, alternating with the buttermilk mixture, beginning and ending with the dry ingredients. Mix until just combined, being careful not to overmix. The batter will be thick.
6. Drop rounded tablespoons (or use a small ice cream scoop) of batter onto the prepared baking sheets, spacing them about 2 inches apart.
7. Bake for 10-12 minutes, or until the edges are set and a toothpick inserted into the center comes out clean.
8. Let the whoopie pies cool on the baking sheets for a few minutes before transferring them to a wire rack to cool completely. This is crucial before frosting.
For the Cream Cheese Frosting:
1. In a large bowl, beat the softened cream cheese and softened butter together until smooth and creamy.
2. Gradually add the sifted powdered sugar, 1 cup at a time, beating until smooth after each addition.
3. Stir in the vanilla extract and an optional pinch of salt. Beat until light and fluffy. If the frosting is too thick, add a tiny splash of milk or cream. If too thin, add more powdered sugar.
Assembly:
1. Once the whoopie pie halves are completely cool, spread a generous spoonful of cream cheese frosting on the flat side of one whoopie pie half.
2. Top with another whoopie pie half, pressing gently to create a sandwich.
3. Repeat with the remaining whoopie pies and frosting.
4. Serve immediately or store in an airtight container in the refrigerator.
Chef’s Notes: Ensure all ingredients, especially butter and cream cheese, are at room temperature for the best consistency. Do not overmix the batter to keep the pies tender. Cooling the cookies completely before frosting is crucial to prevent the frosting from melting.