How to Dye Easter Eggs Naturally for Bread (Vibrant & Edible)
How to Dye Easter Eggs Naturally for Bread (Vibrant & Edible)
Table of Contents

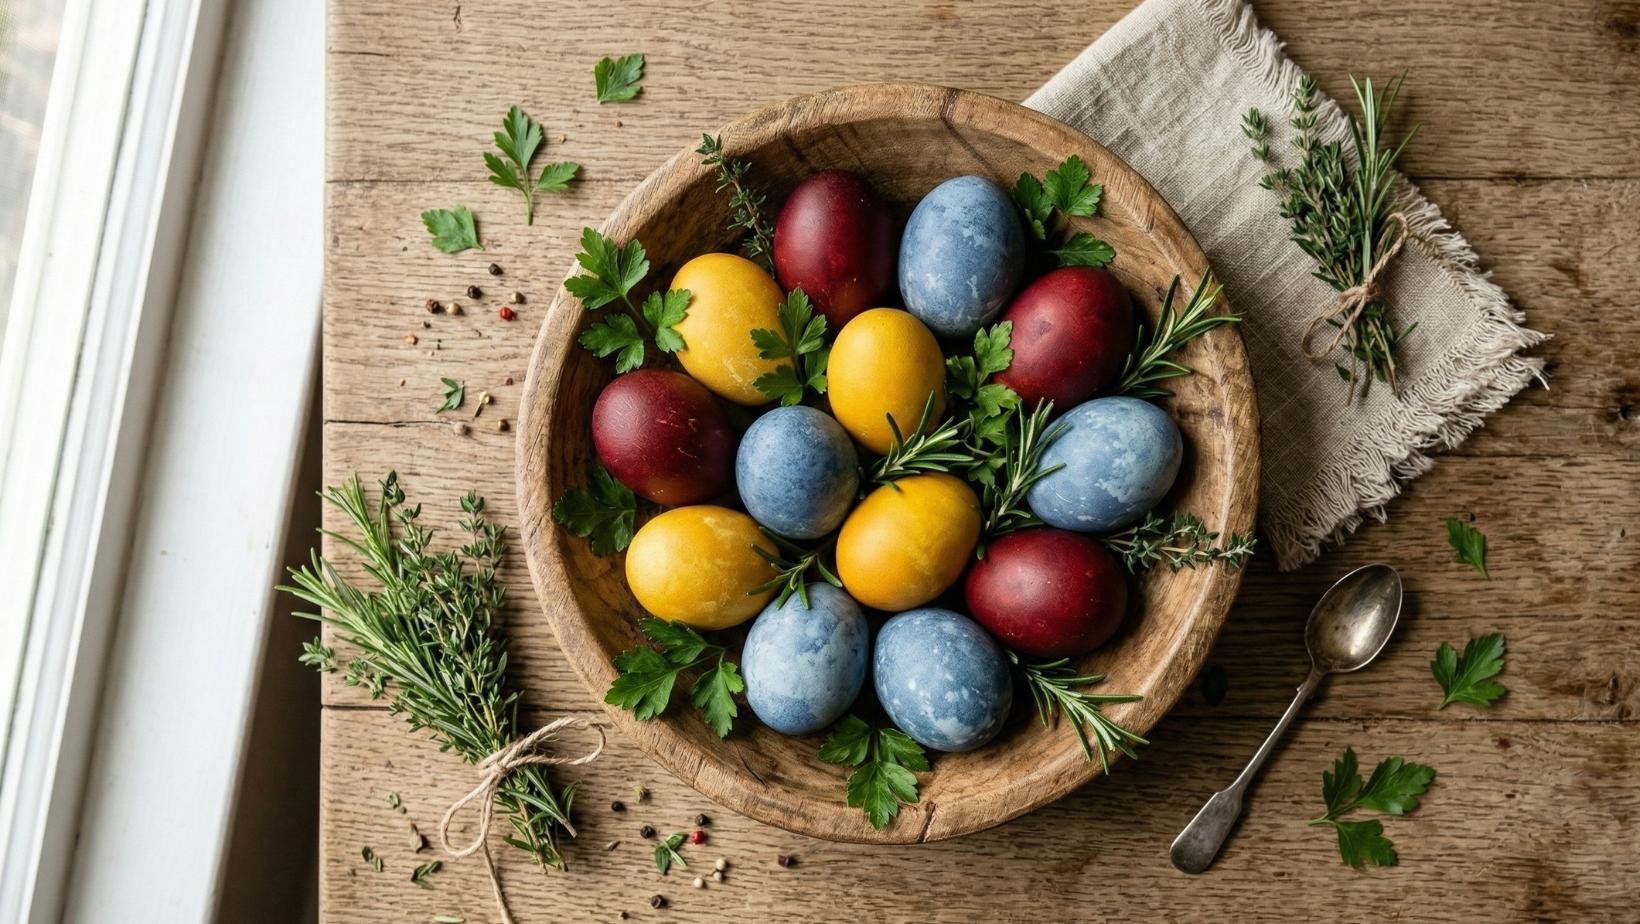
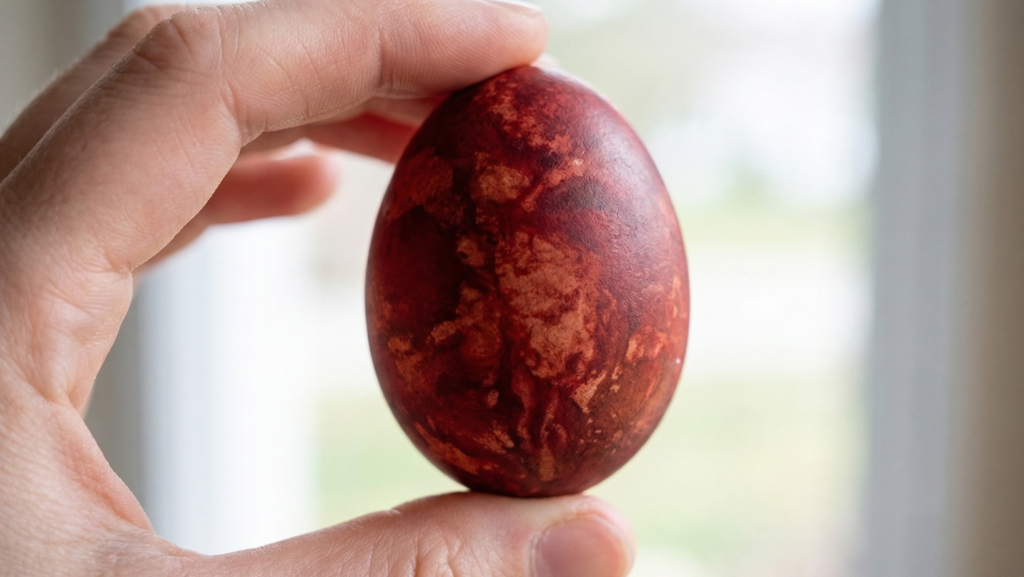
If you’ve ever admired the stunning, deep-red eggs nestled in a traditional Italian Easter Bread, you might be surprised to learn that the most vibrant colors don’t come from a little plastic bottle. Learning how to dye Easter eggs naturally is a centuries-old tradition that uses everyday kitchen staples like onion skins, turmeric, and red cabbage to create earthy, sophisticated tones.
Using natural dyes is not only safer and 100% edible, but it also creates a unique, marbled finish that artificial dyes simply can’t match. In this guide, I’ll show you my favorite “thenextrecipes” methods to get those perfect, oven-safe colors for your holiday baking.
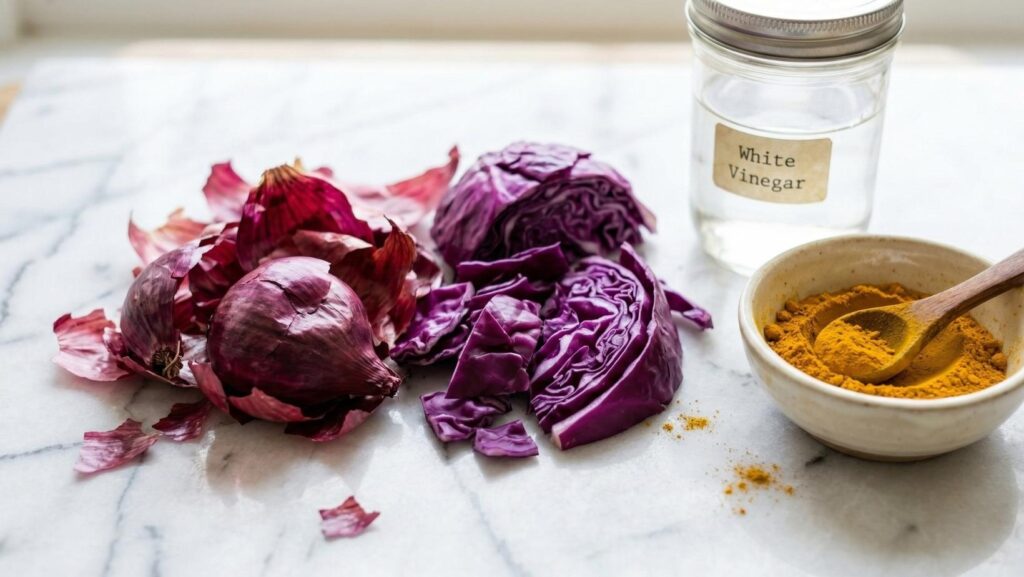
The Natural Color Palette: What to Use
Before we start, let’s look at what’s in your pantry. Each of these ingredients creates a specific, beautiful hue:
| Desired Color | Natural Ingredient | Source |
| Deep Ruby Red | Red Onion Skins | 5-7 onions |
| Golden Yellow | Turmeric Powder | 2 tablespoons |
| Royal Blue | Red Cabbage | 1/2 head, chopped |
| Soft Orange | Yellow Onion Skins | 5-7 onions |
| Deep Brown | Strong Coffee | 1 quart dark roast |
Ingredients & Equipment
- White Eggs: Room temperature (they take the dye better).
- White Vinegar: This is the “mordant” that helps the color stick to the shell.
- Dye Material: (Onion skins, turmeric, or cabbage).
- Small Saucepan: For boiling the dye.
- Fine Mesh Strainer: To remove solids.
- Coconut Oil or Olive Oil: For a final shine (optional).
👨🍳 Step-by-Step Guide to Natural Dyeing
Step 1: Prepare the Dye Bath
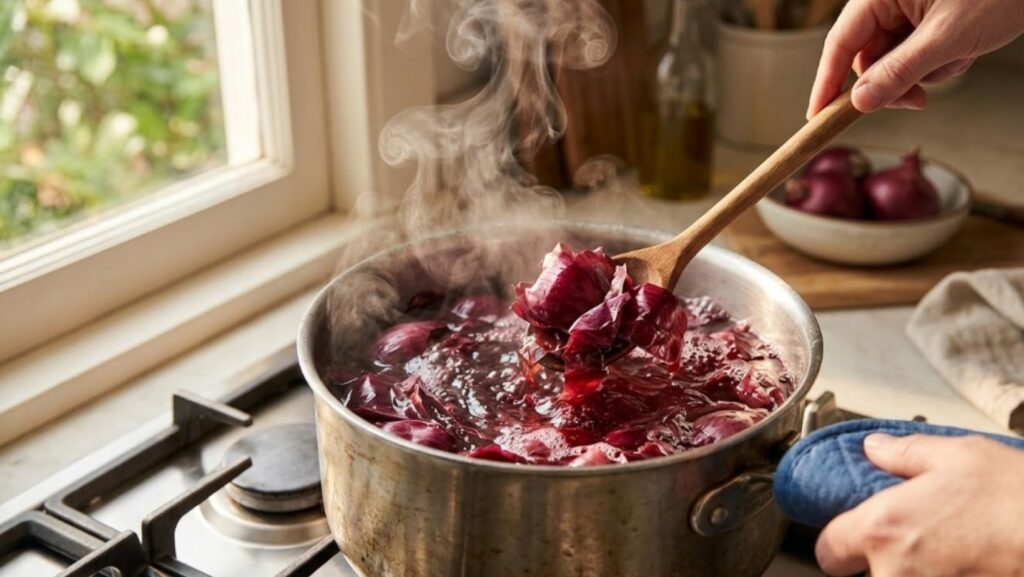
In a medium saucepan, combine your chosen ingredient with 1 quart of water and 2 tablespoons of white vinegar.
- Pro Tip: If using onion skins, use as many as possible for a richer, deeper red.
Step 2: Simmer for Strength
Bring the mixture to a boil, then reduce heat and simmer for 30 minutes. This “extracts” the pigment. Let the liquid cool to room temperature, then strain out the solids into a glass jar or bowl.
Step 3: The Soaking Process
Carefully lower your white eggs into the liquid.
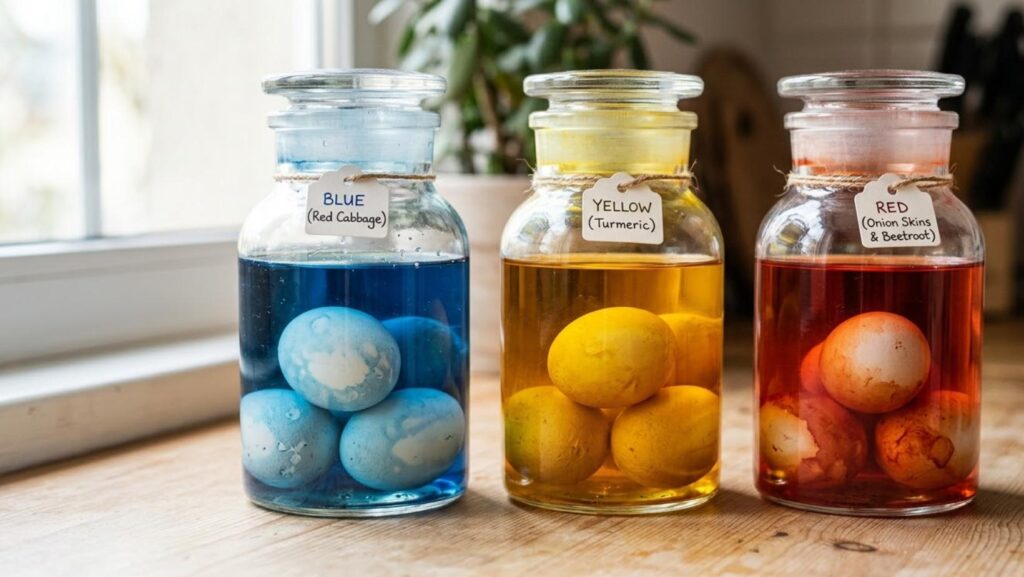
- For Pastel Colors: Soak for 2-4 hours.
- For Vibrant Colors: Soak in the refrigerator overnight.
Step 4: Drying and “The Secret Shine”
Remove the eggs with a slotted spoon and let them air dry on a wire rack. Do not wipe them while wet, as the color can rub off. Once fully dry, rub a tiny drop of oil on the shell for a professional, glossy finish.
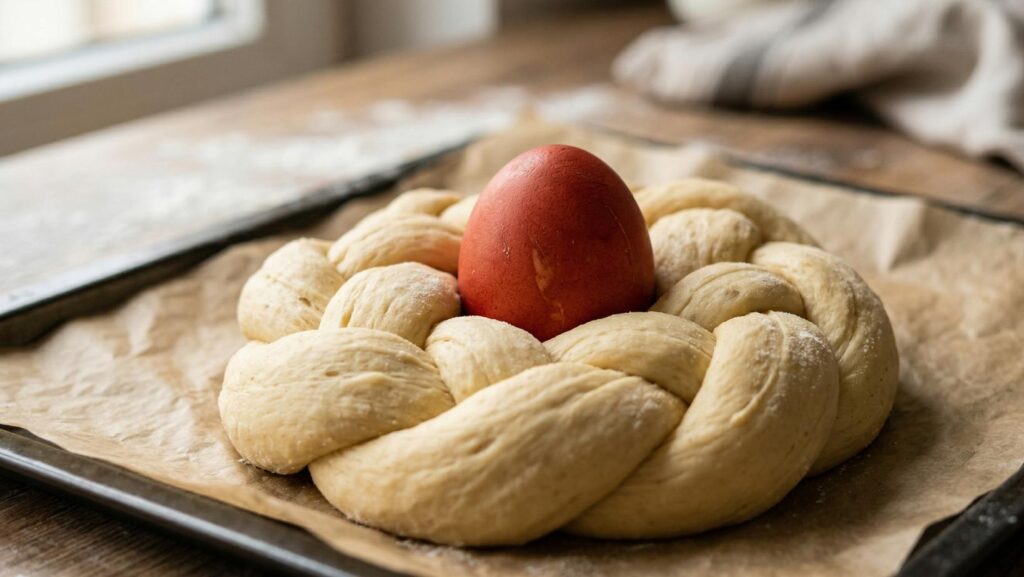
How to Use These Eggs in Your Pane di Pasqua
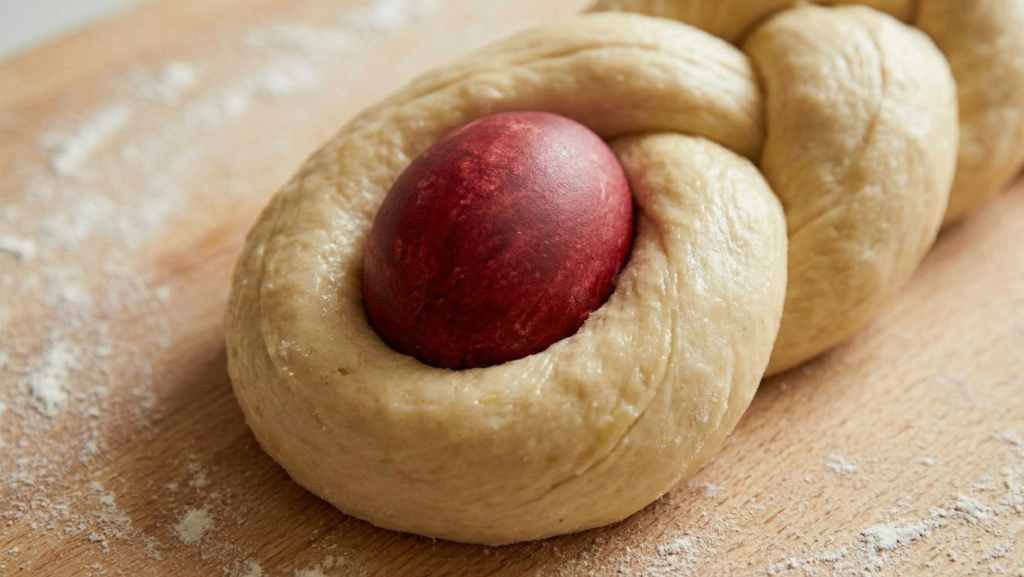
The best part about these naturally dyed eggs is that they are oven-safe. Simply nestle your dyed (but uncooked) eggs directly into the braids of your Italian Easter Bread dough. As the bread bakes, the eggs will hard-boil perfectly inside the oven!
Conclusion: Crafting Memories, Not Just Colors
Dyeing eggs with onion skins or turmeric brings a sense of slow, intentional baking to your kitchen. It’s a wonderful activity to do with family, and the results are always a conversation starter at the Easter table.