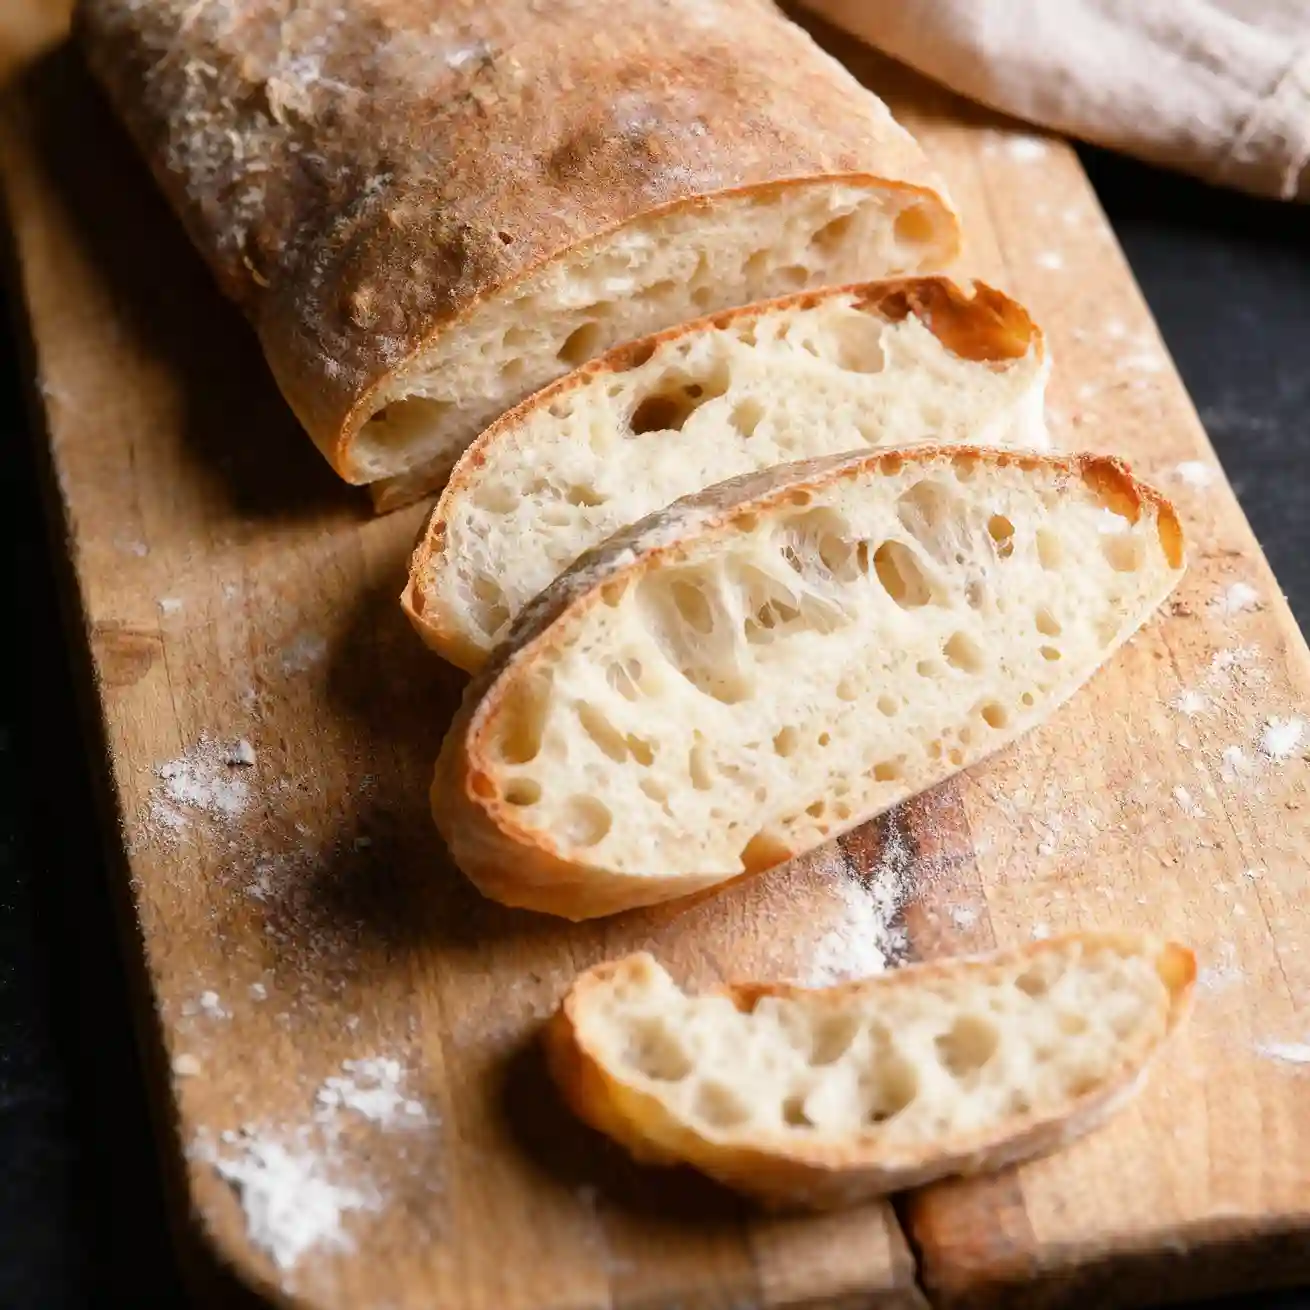
Easy Ciabatta Bread Recipe – Soft, Fluffy & Golden
Ciabatta Bread: Rustic Charm and Unforgettable Flavor

⭐️⭐️⭐️⭐️⭐️ (4.9 from 1,900 fans)
📸 700+ photo shares | ☀️ Updated October 2025
Oh, the humble ciabatta! Just thinking about it conjures images of sun-drenched Italian kitchens, the aroma of freshly baked bread filling every nook and cranny. This isn’t just any bread; it’s a testament to simple ingredients transformed into something truly extraordinary. With its gorgeously crisp, golden crust and a ridiculously airy, open interior, each bite of homemade ciabatta is a delightful journey. It’s perfect for tearing and dipping into fragrant olive oil, building the most incredible sandwiches, or simply savoring on its own. It might seem a little daunting at first glance, but I promise you, the joy and satisfaction of pulling a warm, rustic ciabatta loaf from your own oven is an experience you won’t soon forget. It’s pure, comforting magic, ready to elevate any meal or moment.
Recipe Card will be inserted here
Quick Glance
⏱️ Prep Time: 20 minutes active, 12-18 hours proofing
🍽️ Servings: 2 loaves
💥 Vibe: Rustic, Airy, Chewy
Jump Ahead
- What You’ll Need
- How to Make Ciabatta Bread
- Fun Twists & Serving Ideas
- Reviews
- FAQ
- Conclusion
- Recipe Note
What You’ll Need
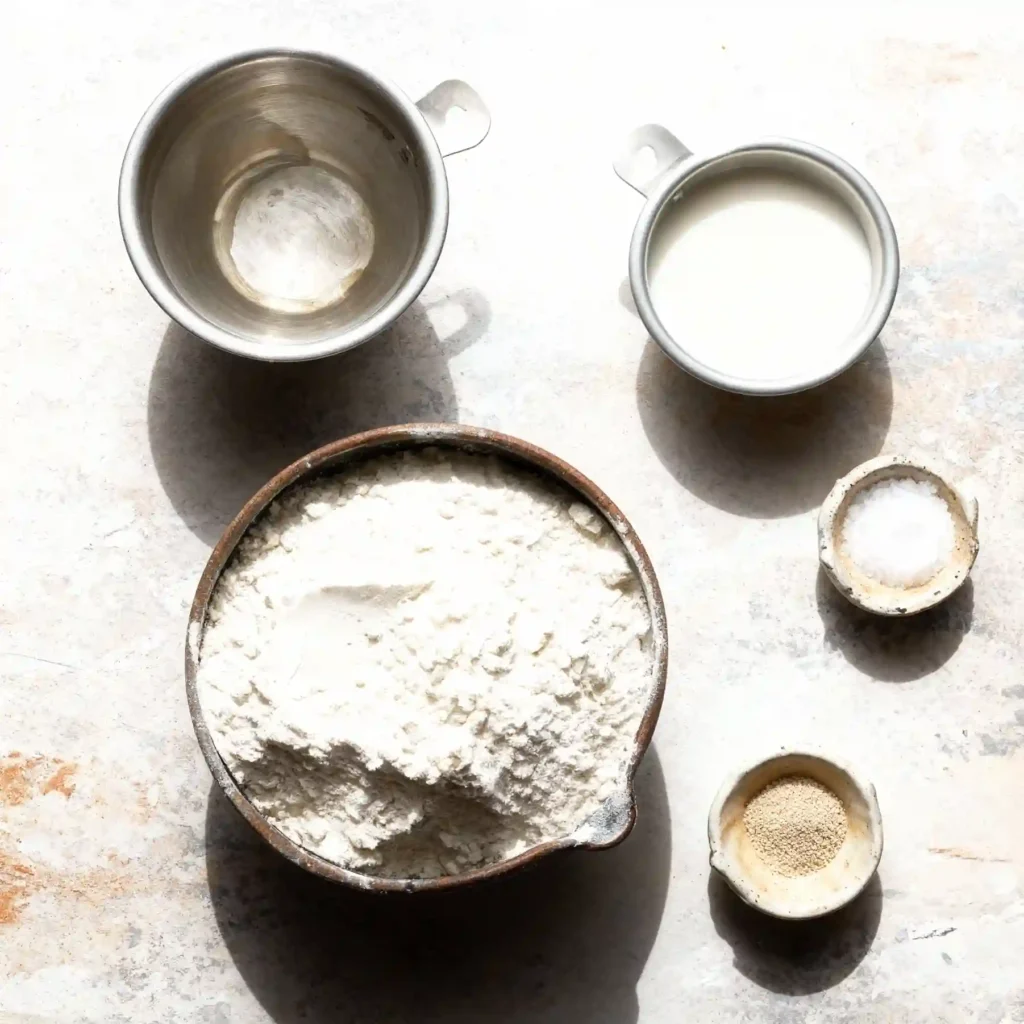
The beauty of ciabatta lies in its simplicity. Just a few everyday ingredients come together to create this incredible bread. Don’t be tempted to swap out the bread flour; its higher protein content is key to ciabatta’s signature chew and open crumb structure. Gather these essentials, and let’s get baking!
- 3 ½ cups (450g) bread flour, plus more for dusting
- 2 cups (475ml) warm water (105-115°F / 40-46°C)
- 1 ½ teaspoons instant yeast
- 1 ½ teaspoons fine sea salt
- 2 tablespoons olive oil, plus more for greasing
How to Make Ciabatta Bread
Creating ciabatta is more about patience and gentle handling than strenuous kneading. Embrace the stickiness, trust the process, and you’ll be rewarded with two glorious loaves!
- Prepare the Dough (Overnight Start): In a very large bowl, combine the warm water and instant yeast. Let it sit for 5 minutes until foamy. Add the bread flour and fine sea salt. Mix with a wooden spoon or spatula until just combined and a shaggy, sticky dough forms. Drizzle in the 2 tablespoons of olive oil and mix briefly until incorporated. Cover the bowl tightly with plastic wrap and refrigerate for 12-18 hours. This slow, cold fermentation builds incredible flavor and structure.
- Awaken the Dough: The next day, remove the bowl from the refrigerator. Let the dough sit at room temperature for 30 minutes to take off the chill. With wet hands or a rubber spatula, gently fold the dough in on itself a few times in the bowl, bringing the edges to the center. This helps develop gluten without heavy kneading.
- First Proof: Re-cover the bowl and let it rise at room temperature for 1-2 hours. You’re looking for it to become visibly bubbly and nearly doubled in size. The dough will still be very wet and loose – this is exactly what we want!
- Shape the Loaves: Liberally flour your countertop or a large wooden board. Gently scrape the dough out of the bowl onto the floured surface. Dust the top of the dough with a little more flour. Using a dough scraper or a sharp knife, divide the dough into two equal pieces. Gently stretch each piece into a rustic rectangle, about 10×5 inches. Try not to deflate the dough too much; those air pockets are precious.
- Second Proof: Carefully transfer each ciabatta loaf to a piece of parchment paper or a well-floured linen couche. Drape lightly with a floured kitchen towel or plastic wrap to prevent a skin from forming. Let proof for 45-60 minutes, until the loaves look noticeably puffy and lighter.
- Preheat Oven & Stone/Steel: While the loaves proof, place a baking stone or steel in your oven and preheat to a scorching 475°F (245°C) for at least 30 minutes. This ensures a consistent, high heat. Place an empty, oven-safe pan on the bottom rack of your oven for steam.
- Bake with Steam: Once the oven is fully preheated, carefully slide the parchment paper with the loaves directly onto the hot baking stone or steel. Quickly pour ½ cup of hot water into the empty pan on the bottom rack (be careful of the steam!). Immediately close the oven door to trap the steam.
- Bake: Bake for 20-25 minutes, or until the ciabatta loaves are deeply golden brown, incredibly crusty, and sound hollow when tapped on the bottom.
- Cool: Using a spatula or oven mitts, transfer the baked loaves to a wire rack to cool completely. This crucial step allows the interior crumb to set and prevents a gummy texture.
Fun Twists & Serving Ideas
Ciabatta is a blank canvas just waiting for your creative touch! Here are a few ways to switch it up and enjoy your beautiful loaves:
- Garlic Herb Ciabatta: During the initial mixing, fold in 2 cloves of finely minced garlic and 1 tablespoon of fresh, chopped rosemary or oregano. The aroma is heavenly!
- Olive Ciabatta: For a briny kick, gently fold in ½ cup of pitted and roughly chopped Kalamata or green olives before the first proof.
- Sun-Dried Tomato Ciabatta: Add ¼ cup of oil-packed sun-dried tomatoes, drained and chopped, for a burst of sweet, savory flavor.
- The Perfect Dipper: Serve warm slices with a small bowl of your best extra virgin olive oil, perhaps a splash of balsamic vinegar, and a sprinkle of flaky sea salt and freshly cracked black pepper.
- Hearty Sandwiches: This bread is built for sandwiches! Think fresh mozzarella, ripe tomatoes, and fragrant basil, or thinly sliced prosciutto and arugula.
- Soup Companion: There’s nothing quite like a crusty piece of ciabatta to sop up the last delicious drops of a rustic minestrone or a rich beef stew.
Reviews
Don’t just take my word for it! Here’s what some of our wonderful readers have to say about this ciabatta recipe:
“Absolutely incredible! The crust was perfect, and the inside so airy and open. My family devoured both loaves in one sitting. This recipe is a keeper!” – Sarah M. ⭐️⭐️⭐️⭐️⭐️
“I’ve always been intimidated by bread making, especially something like ciabatta. But this recipe made it so approachable. The overnight proof is genius for busy schedules. Thank you for this!” – David P. ⭐️⭐️⭐️⭐️⭐️
“Better than any bakery ciabatta I’ve bought! The instructions were clear and the result was pure joy. My house smelled amazing, and the taste was just divine.” – Elena R. ⭐️⭐️⭐️⭐️⭐️
FAQ
Got questions? I’ve got answers! Let’s demystify ciabatta bread together.
Q: What if my dough isn’t very bubbly after the first proof?
A: Ensure your instant yeast is fresh and your water temperature was correct (not too hot or too cold). Sometimes a cooler room can slow things down, so try placing it in a slightly warmer spot if it’s struggling to rise. Give it a little more time!
Q: Can I make this without a baking stone or steel?
A: Yes, you can! A heavy-duty baking sheet works well. Preheat it in the oven just like you would a stone to ensure it’s piping hot when the bread goes in. While the stone/steel gives a slightly superior crust, a preheated baking sheet will still give you fantastic results.
Q: How do I get a really crispy crust on my ciabatta?
A: The key to that glorious crispy crust is the steam created in the initial baking phase. Make sure your oven is fully preheated to the correct temperature and quickly pour hot water into the bottom pan to generate that burst of steam. Avoid opening the oven door unnecessarily during the first 10-15 minutes of baking.
Q: How long does ciabatta stay fresh?
A: Ciabatta is truly at its best the day it’s baked, when the crust is crackling and the interior is soft. You can store it at room temperature in a paper bag (plastic will make the crust soft) for 1-2 days. For longer storage, it freezes beautifully. Simply wrap it tightly in plastic wrap, then foil, and thaw at room temperature. You can even refresh it in a hot oven for a few minutes.
Conclusion
There’s something deeply satisfying, almost magical, about transforming simple flour, water, yeast, and salt into such an iconic, soul-stirring loaf of ciabatta. This recipe invites you into the wonderful world of artisan bread baking, promising not just incredible flavor and texture, but also the pure joy of creating something truly special with your own hands. Don’t be shy; embrace the stickiness, trust the process, and soon you’ll be pulling fragrant, crusty loaves from your oven, ready to share (or devour all by yourself!). It’s a taste of Italy, a hug in bread form, and a reminder that the best things in life are often the simplest. Happy baking, my friends!
Recipe Note
Always allow your ciabatta loaves to cool completely on a wire rack before slicing. This allows the internal starches to set, resulting in the perfect airy, chewy crumb you’re looking for. Slicing too early can lead to a gummy texture.
Ciabatta Bread
Cook Time: Cook: 20-25 minutes
Total Time: Approximately 16 to 23 hours (includes inactive fermentation times)
Course: Bread, Side Dish, Italian Recipes
Servings: 2 loaves (approx. 10-12 servings)
Calories: Approx. 200-250 per serving (slice)
Ingredients
- FOR THE BIGA (Preferment, make 12-18 hours ahead):
- 150g bread flour
- 150g lukewarm water
- 1/8 teaspoon instant yeast
- FOR THE MAIN DOUGH:
- 350g bread flour
- 200-250g lukewarm water (start with 200g, add more if needed)
- 1 teaspoon instant yeast
- 10g fine sea salt
- All of the prepared biga
- Extra flour for dusting
Instructions
1.Prepare the Biga (12-18 hours ahead): In a medium bowl, combine 150g bread flour, 150g lukewarm water, and 1/8 teaspoon instant yeast. Mix with a spoon until well combined and no dry spots remain; it will be a thick, sticky paste. Cover the bowl loosely with plastic wrap and let it ferment at room temperature (around 68-72°F / 20-22°C) for 12-18 hours, or until bubbly, slightly domed, then possibly a little sunken. It should have a pleasant, yeasty aroma.
2. Mix the Main Dough: In a large mixing bowl, combine 200g lukewarm water and 1 teaspoon instant yeast. Stir to dissolve. Add the biga (break it into smaller pieces if necessary), 350g bread flour, and 10g fine sea salt. Mix with a sturdy spoon or your hands until a shaggy, very wet, and sticky dough forms, and no dry flour remains. If the dough seems too stiff, add the remaining 50g water gradually. Cover the bowl with plastic wrap and let it rest for 20-30 minutes (autolyse).
3. Perform Stretch and Folds (Bulk Fermentation): Over the next 2-3 hours, perform a series of stretch and folds. For each set, lightly moisten your hands. Gently grab a portion of the dough from one side, stretch it upwards, and fold it over to the opposite side of the bowl. Rotate the bowl a quarter turn and repeat this process 3-4 more times, stretching and folding all sides. This completes one set of folds. Cover the bowl and let it rest for 30-45 minutes. Repeat this process for a total of 4-6 sets of stretch and folds. The dough will become progressively smoother, more elastic, and will show visible gas bubbles. 4. Pre-shape and Rest: Gently turn the dough out onto a generously floured surface (avoid punching down or deflating). Using a bench scraper or floured hands, gently divide the dough into 2 or 3 equal portions. Gently pat each portion into a loose rectangle or square, trying to maintain as much air as possible. Cover loosely with a damp cloth or plastic wrap and let rest for 20 minutes.
5. Final Shaping: Prepare a heavily floured couche (linen cloth) or a large piece of parchment paper. Lightly flour your hands and the dough. Gently pick up one piece of dough, stretching it carefully into a rectangle, approximately 10-12 inches long, being careful not to degas it too much. Carefully transfer it to the floured couche or parchment. Repeat with the remaining dough. If using a couche, create folds between the loaves to support their shape during proofing.
6. Final Proofing: Cover the shaped loaves loosely with a damp cloth or plastic wrap and let them proof at room temperature for 30-60 minutes, or until slightly puffy and light, but not overly risen (they should still feel substantial and not completely deflated when gently poked).
7. Preheat Oven & Prepare for Steam: About 30 minutes before baking, preheat your oven to 475°F (245°C) with a baking stone or heavy baking steel inside. Place an empty oven-safe pan (like a cast iron skillet or broiler pan) on the bottom rack of your oven.
8. Bake the Ciabatta: Carefully transfer the proofed loaves to the hot baking stone/steel. Immediately pour about 1 cup of hot water into the empty pan on the bottom rack (this creates steam for a crisp crust). Quickly close the oven door. Bake for 20-25 minutes, or until the crust is deeply golden brown and the internal temperature reaches 200-210°F (93-99°C). You may want to rotate the loaves halfway through baking for even browning.
9. Cool: Transfer the baked ciabatta to a wire rack and let cool completely before slicing and serving. Cooling is crucial for the crumb to set properly and for the flavor to fully develop.
Chef’s Notes: Ciabatta, Italian for ‘slipper,’ is renowned for its open, airy crumb, crisp crust, and delightfully chewy texture. This recipe employs a biga (preferment) for profound flavor development and improved crumb structure. The high-hydration dough requires gentle handling to preserve the characteristic irregular holes. Don’t be afraid of the stickiness!