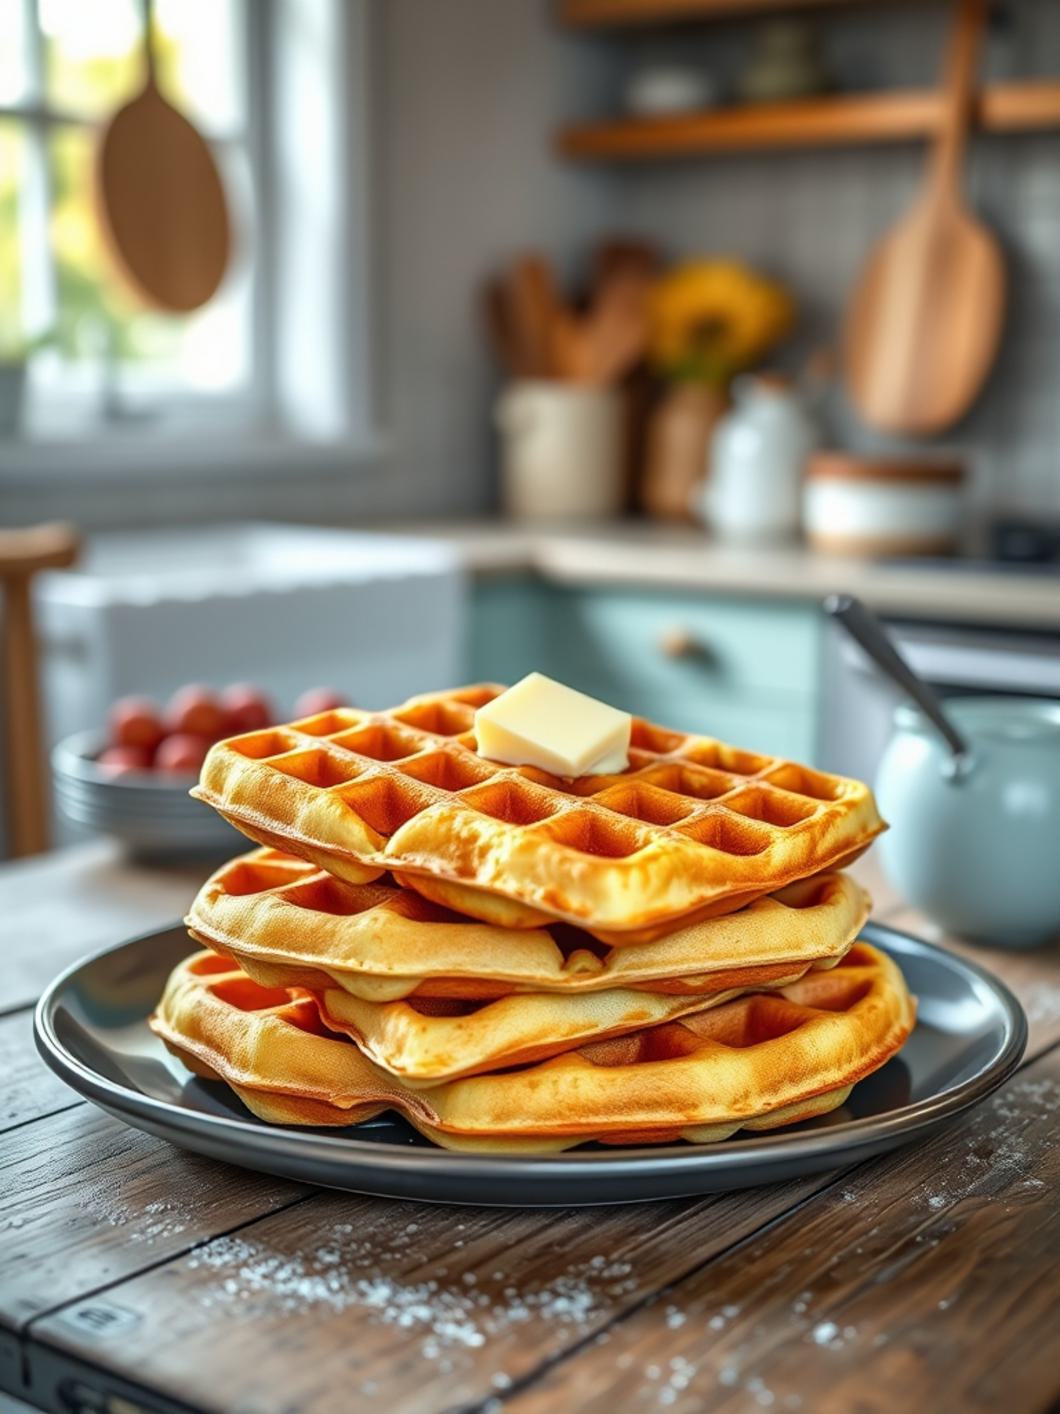
Classic Buttermilk Waffles – Crisp & Tender
The Ultimate Fluffy & Crispy Buttermilk Waffles Recipe
⭐️⭐️⭐️⭐️⭐️ (4.8 from 2,500 fans)
📸 1100+ photo shares | ☀️ Updated December 2025
Welcome to Waffle Wonderland!
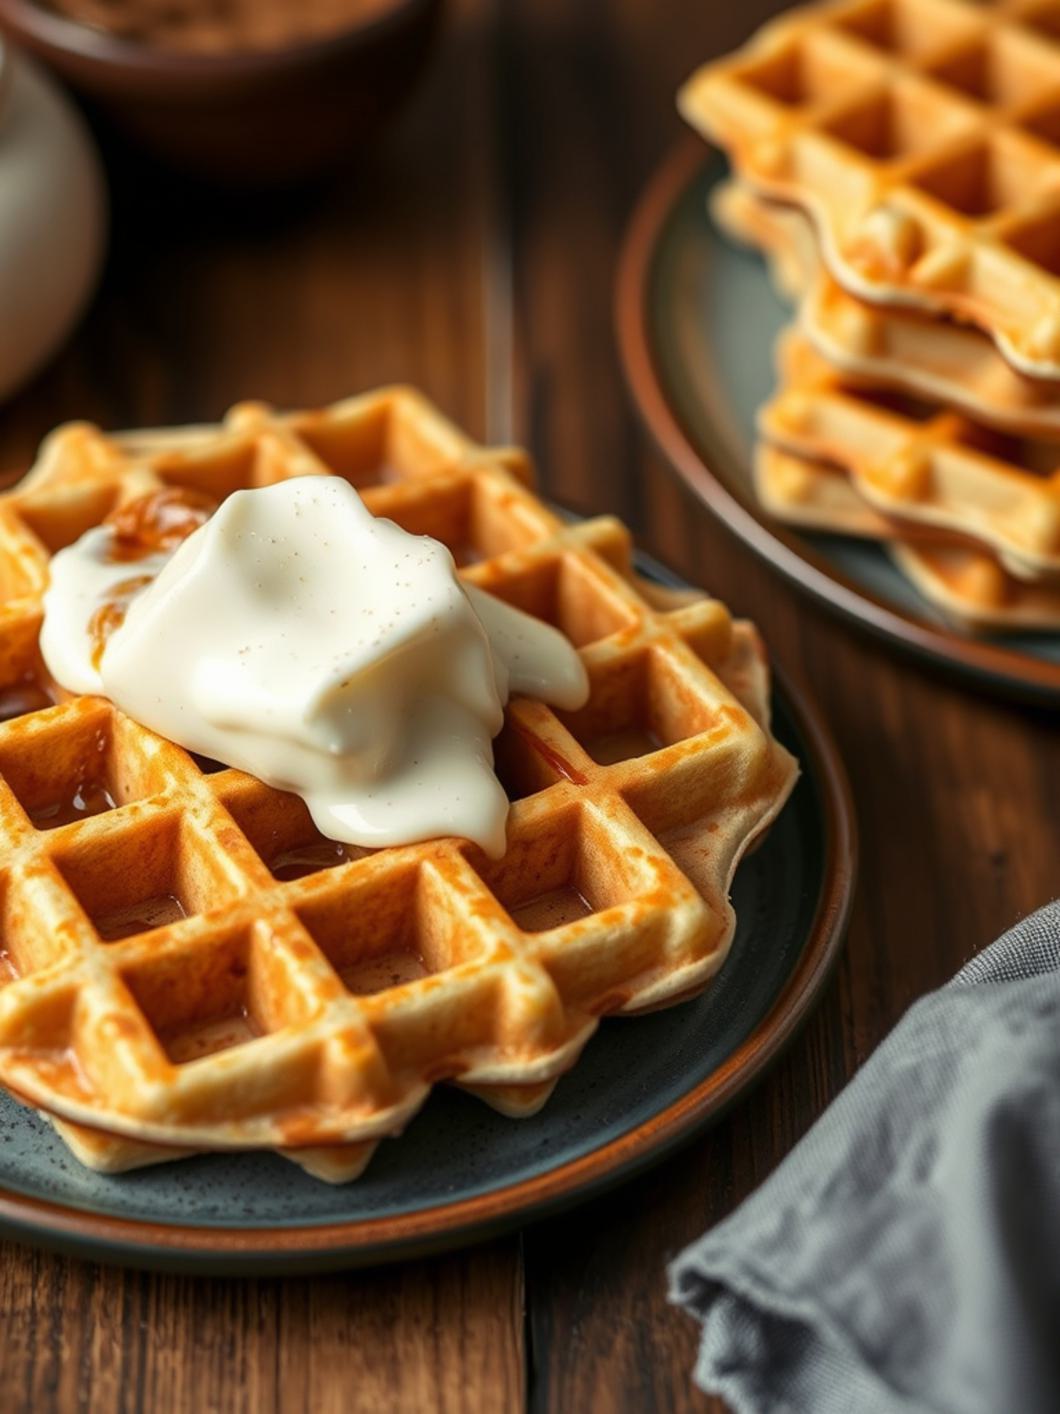
Oh, the joy of a perfect Sunday morning! There’s nothing quite like the aroma of freshly made waffles wafting through the house, promising a delicious start to the day. And when it comes to waffles, there’s one secret ingredient that elevates them from good to absolutely glorious: buttermilk. These aren’t just any waffles; these are the ultimate fluffy, crispy, golden-edged Buttermilk Waffles that will make every bite feel like a hug. Forget soggy, dense disappointments – we’re talking about a texture that’s light as air on the inside with an irresistible crunch on the outside. Get ready to ditch the boxed mixes forever!
Why You’ll Love This Buttermilk Waffles Recipe
If you’re searching for that quintessential waffle experience, look no further. This recipe is an absolute game-changer for several reasons:
- Unbeatable Texture: Thanks to the magic of buttermilk, these waffles boast an incredibly tender, fluffy interior contrasted with a beautifully crisp, golden exterior.
- Effortlessly Delicious: Despite their gourmet taste, they’re surprisingly simple to whip up, making them perfect for lazy weekend mornings or even a quick weeknight treat.
- Versatile Canvas: They’re the perfect base for any topping imaginable, from fresh berries and whipped cream to savory fried chicken.
- Family Favorite: A guaranteed crowd-pleaser that will have everyone asking for seconds (and the recipe!).
What You’ll Need
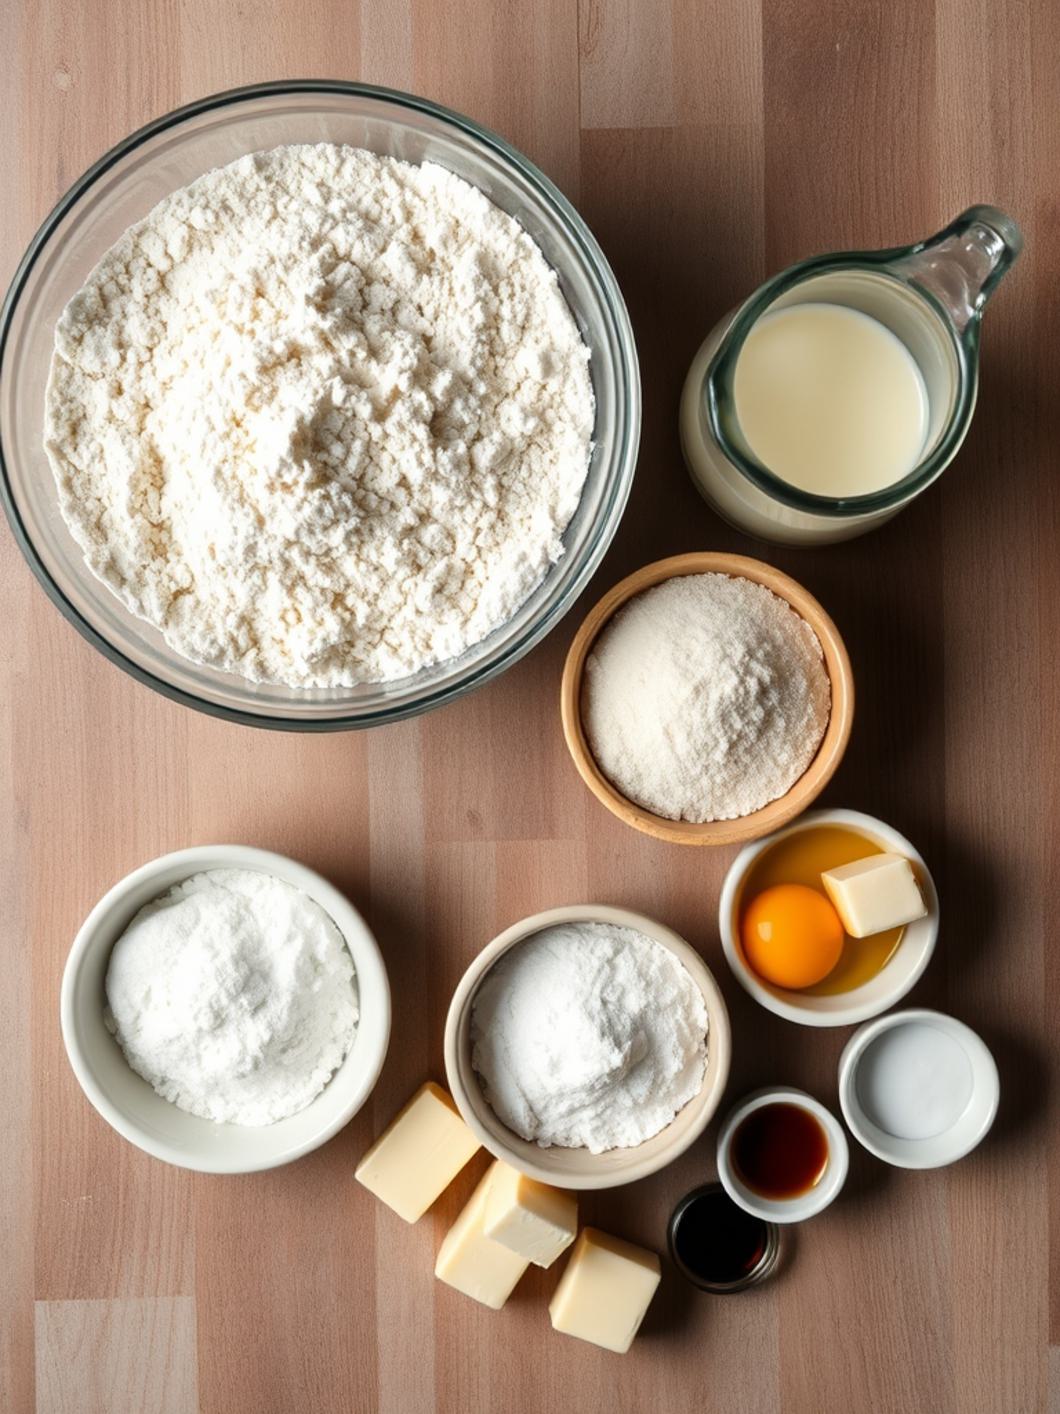
- 2 cups all-purpose flour
- 2 tablespoons granulated sugar
- 1 tablespoon baking powder
- 1 teaspoon baking soda
- ½ teaspoon salt
- 2 large eggs
- 1 ¾ cups buttermilk
- ½ cup (1 stick) unsalted butter, melted and cooled slightly
- 1 teaspoon vanilla extract
- Non-stick cooking spray or additional melted butter for the waffle iron
How to Make Buttermilk Waffles
Step-by-Step Instructions
- Whisk Dry Ingredients: In a large bowl, whisk together the flour, sugar, baking powder, baking soda, and salt. Make sure there are no lumps and everything is well combined.
- Combine Wet Ingredients: In a separate medium bowl, lightly beat the eggs. Then, whisk in the buttermilk, melted butter, and vanilla extract until smooth.
- Mix Batter: Pour the wet ingredients into the dry ingredients. Stir gently with a whisk or spatula until just combined. A few lumps are perfectly fine and even desired – overmixing will lead to tough waffles! Let the batter rest for 5-10 minutes while your waffle iron preheats.
- Preheat Waffle Iron: Preheat your waffle iron according to the manufacturer’s instructions. Lightly grease it with non-stick cooking spray or a brush of melted butter.
- Cook Waffles: Pour about ½ to ¾ cup of the Buttermilk Waffles batter onto the hot waffle iron, spreading it slightly if needed. Close the lid and cook for 3-5 minutes, or until golden brown and crisp, and steam is no longer escaping.
- Serve Immediately: Carefully remove the cooked waffle and serve hot with your favorite toppings. Repeat with the remaining batter. Keep cooked waffles warm on a wire rack in a low oven (around 200°F / 95°C) while you finish the batch.
Fun Twists & Serving Ideas
Delicious Variations
- Chocolate Chip Waffles: Fold in ½ cup of chocolate chips (mini or regular) into the batter before cooking.
- Berry Bliss: Gently fold in ½ cup of fresh blueberries, raspberries, or chopped strawberries into the batter.
- Cinnamon Spice: Add 1 teaspoon of ground cinnamon and a pinch of nutmeg to the dry ingredients for a warm, comforting twist.
- Savory Herb: Omit sugar, add 1/4 cup shredded cheddar cheese and 2 tablespoons chopped chives to the batter. Serve with fried chicken!
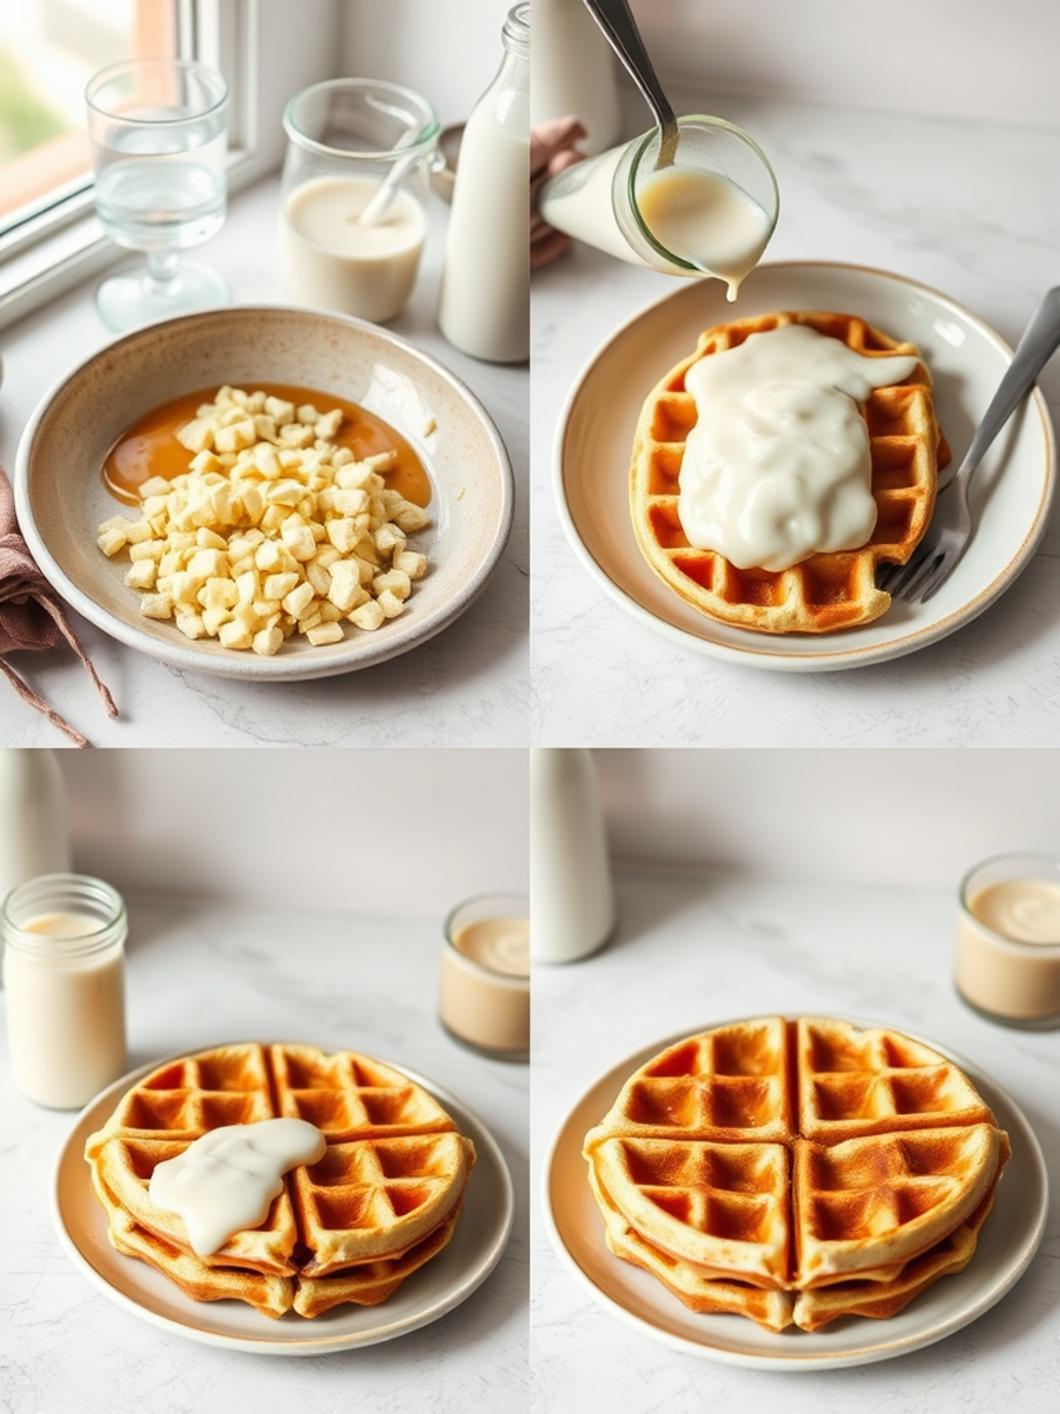
Topping Inspiration
- Classic maple syrup and a pat of butter.
- Fresh berries and a dollop of whipped cream.
- Powdered sugar and a squeeze of lemon.
- Nutella or melted chocolate drizzle.
- Fruit compote (berry, apple, or peach).
- Fried chicken for the ultimate chicken and waffles experience.
Reader Reviews
⭐️⭐️⭐️⭐️⭐️ Sarah M. – “These are hands down the best waffles I’ve ever made! So light and crispy. My family devoured them in minutes. The buttermilk really makes all the difference. New weekend tradition!”
⭐️⭐️⭐️⭐️⭐️ David P. – “I’ve tried so many waffle recipes, but these Buttermilk Waffles are truly superior. The simple ingredients create such a rich flavor and perfect texture. Highly recommend trying them with fresh strawberries.”
⭐️⭐️⭐️⭐️⭐️ Jessica L. – “Finally, a waffle recipe that delivers on both fluffiness and crispness! So easy to follow and the results were spectacular. My kids gave them two thumbs up!”
Frequently Asked Questions (FAQs)
Q: Can I make the batter ahead of time?
A: Yes, you can prepare the batter the night before and store it in an airtight container in the refrigerator. Give it a gentle whisk before using, and you might need to add a splash more buttermilk if it’s too thick.
Q: What if I don’t have buttermilk?
A: You can make a homemade substitute! For 1 ¾ cups of buttermilk, add 1 ¾ tablespoons of white vinegar or lemon juice to a liquid measuring cup, then fill the rest with regular milk (any kind) up to the 1 ¾ cup mark. Let it sit for 5-10 minutes until it slightly curdles.
Q: How do I store leftover waffles?
A: Allow them to cool completely, then store in an airtight container or freezer bag in the refrigerator for up to 3-4 days, or freeze for up to 1-2 months. Reheat in a toaster, toaster oven, or air fryer for best crispness.
Q: Why are my waffles not crispy?
A: Make sure your waffle iron is fully preheated and well-oiled. Also, avoid overmixing the batter, as this can develop gluten too much, leading to tougher, less crispy waffles. Using a good quality waffle iron also helps!
There you have it – the secret to the most irresistible Buttermilk Waffles you’ll ever taste! The slight tang from the buttermilk reacts with the leavening agents to create that incredible rise and tender crumb, while the butter ensures a golden, crispy finish. Whether you’re making them for a special occasion or just because it’s Tuesday, these waffles are guaranteed to bring smiles to the table. Happy cooking!
Recipe Note: For best results, ensure all ingredients are at room temperature before mixing, especially the buttermilk and eggs, as this helps create a smoother, more uniform batter.
Buttermilk Waffles
Cook Time: 20-30 minutes
Total Time: 35-45 minutes
Course: Breakfast
Servings: 4-6 servings (approx. 8-10 waffles)
Calories: 350-450 kcal per serving (without toppings)
Ingredients
- 2 cups all-purpose flour
- 2 tablespoons granulated sugar
- 2 teaspoons baking powder
- 1 teaspoon baking soda
- 1/2 teaspoon salt
- 2 large eggs
- 1 3/4 cups buttermilk
- 1/2 cup unsalted butter, melted and slightly cooled (or neutral oil)
- 1 teaspoon vanilla extract
Instructions
-
Preheat Waffle Iron
Heat waffle iron according to manufacturer instructions. -
Mix Dry Ingredients
In a large bowl, whisk flour, sugar, baking powder, baking soda, and salt. -
Mix Wet Ingredients
In another bowl, whisk buttermilk, eggs, melted butter, and vanilla. -
Combine Batter
Add wet ingredients to dry ingredients. Stir until just combined—do not overmix. -
Cook Waffles
Lightly grease waffle iron.
Pour batter and cook until waffles are golden and crisp. -
Serve
Serve immediately or keep warm in a 200°F (95°C) oven.
Chef’s Notes: For extra crispy waffles, slightly increase cooking time. Do not overmix the batter; a few lumps are fine. This batter can be made the night before and refrigerated, but you may need to add a splash more buttermilk to thin it slightly before cooking.