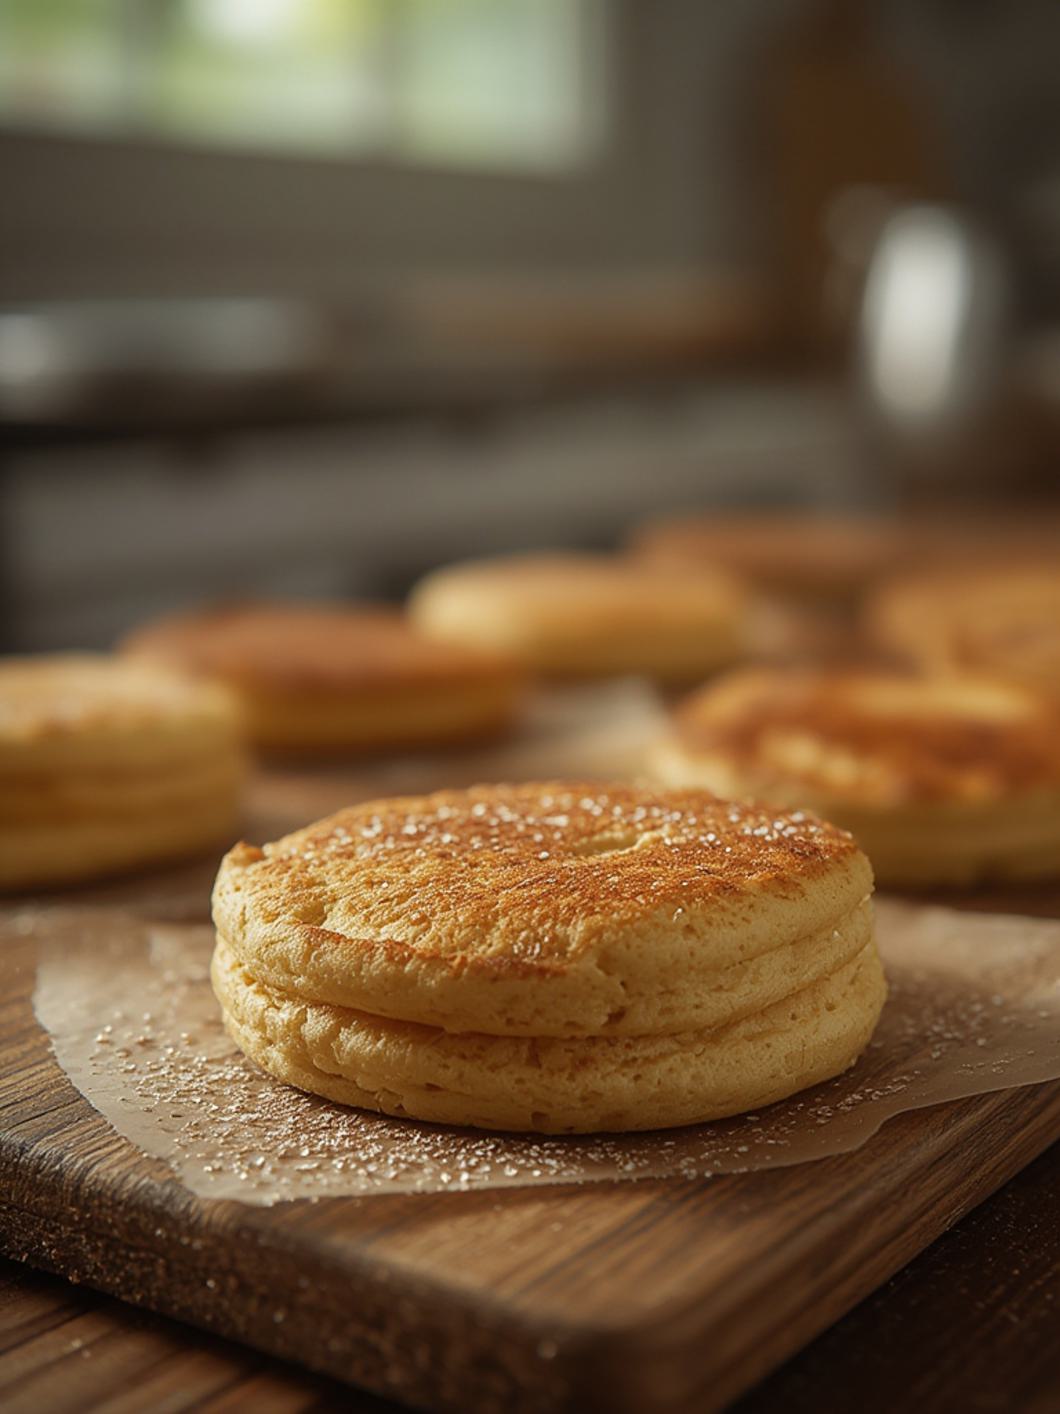
Homemade Crumpets – Soft, Spongy & Classic
Homemade Crumpets: The Ultimate Guide to Perfect Pocked Perfection!
Oh, friends, gather ’round! Today, we’re diving headfirst into a world of cozy comfort, a culinary journey that promises warmth, nostalgia, and a whole lot of deliciousness. Forget everything you thought you knew about breakfast pastries, because we’re about to unlock the secrets to creating the most incredible, hole-filled, butter-absorbing Crumpets right in your own kitchen! These aren’t just any breakfast treat; they’re a hug in edible form, a delightful dance of crispy edges and chewy centers, eagerly awaiting a generous slather of your favorite jam or a melting pat of butter. If you’ve ever dreamt of perfecting that quintessential British tea-time classic, moving beyond simple English Muffins, then this is your moment!
⭐️⭐️⭐️⭐️⭐️ (4.8 from 2,500 fans)
📸 1100+ photo shares | ☀️ Updated December 2025
Why You’ll Love This Crumpets Recipe
There’s something uniquely magical about homemade crumpets. The moment you pull them from the griddle, perfectly golden with those iconic airy holes, you’ll feel a surge of pure culinary joy. This recipe isn’t just about ingredients; it’s about a ritual, a slow, satisfying process that results in an unbelievably tender crumb and an unparalleled ability to soak up every drop of deliciousness you spread on them. They’re surprisingly easy to master, require minimal active time, and will elevate your breakfast or afternoon tea to an experience truly worth savoring.
What You’ll Need for Perfect Crumpets
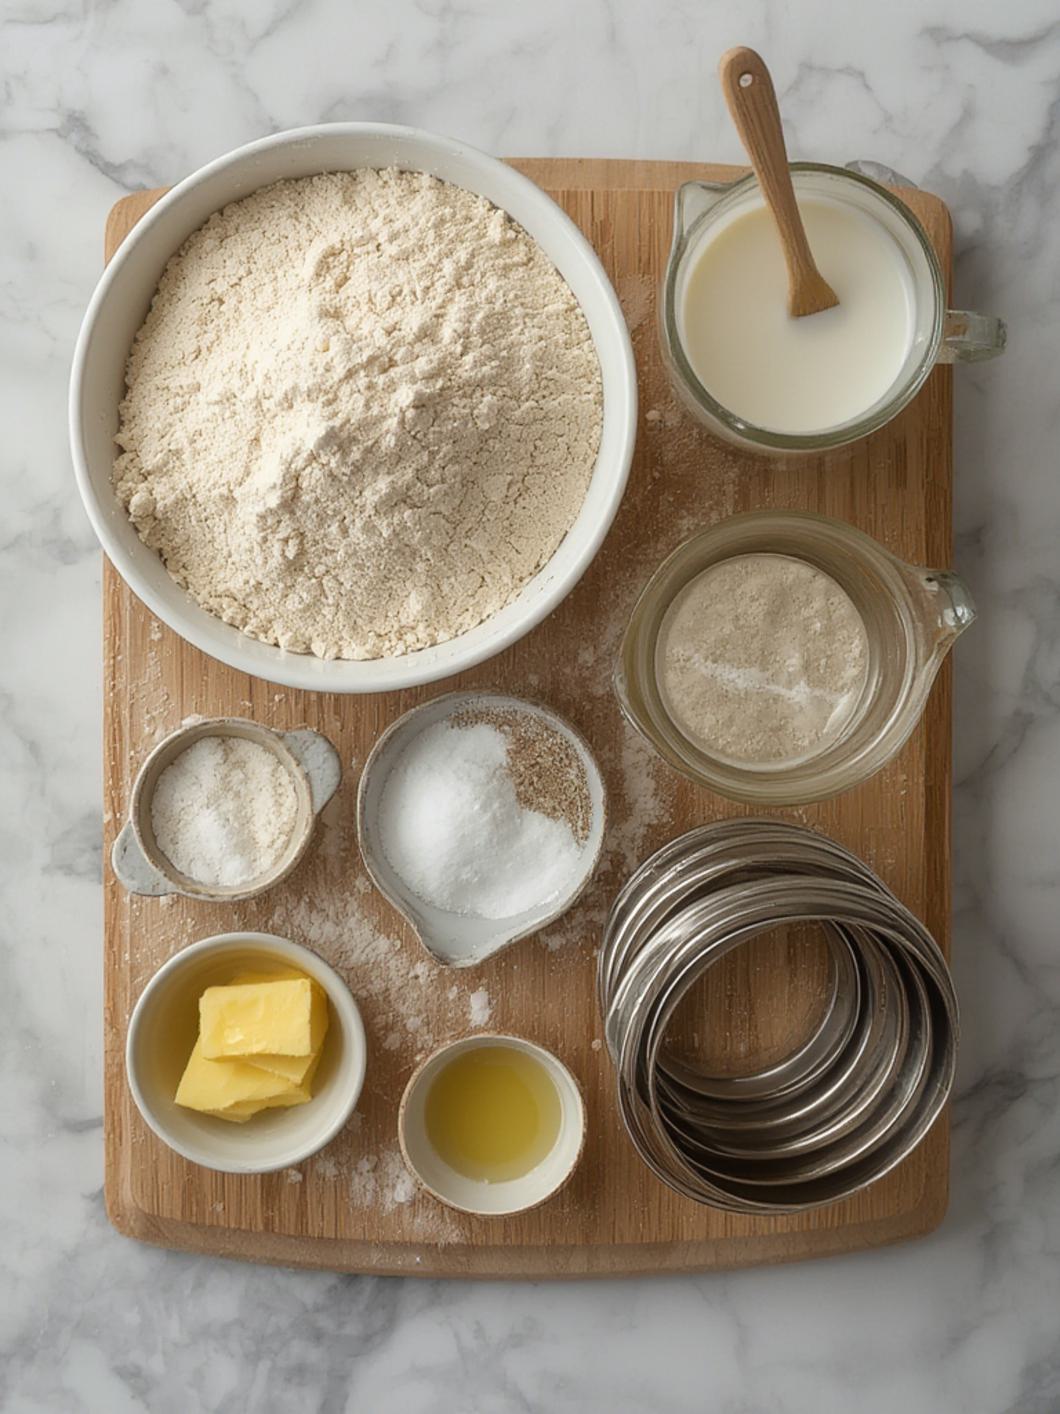
Ready to gather your tools and ingredients? This recipe uses everyday pantry staples, proving that extraordinary results can come from the simplest things.
Ingredients List:
- 2 cups (240g) All-Purpose Flour
- 1 teaspoon Granulated Sugar
- 1 teaspoon Instant Dry Yeast
- ½ teaspoon Fine Sea Salt
- 1 cup (240ml) Warm Milk (about 105-115°F / 40-46°C)
- ½ cup (120ml) Warm Water (about 105-115°F / 40-46°C)
- ½ teaspoon Baking Soda
- 1 tablespoon Melted Butter (for greasing rings and griddle)
Equipment:
- Large Mixing Bowl
- Whisk
- Plastic Wrap or a Clean Kitchen Towel
- Heavy-bottomed Skillet or Griddle
- Crumpet Rings (or Metal Cookie Cutters, 3-4 inches in diameter and at least 1 inch high)
- Small Ladle or Measuring Cup
- Spatula
How to Make Crumpets: Step-by-Step Guide
Get ready to transform simple ingredients into golden, hole-filled masterpieces! This process is straightforward and incredibly rewarding.
Prep First! (20 minutes active, 1.5-2 hours proofing)
- Activate the Yeast: In a large mixing bowl, combine the warm milk and warm water. Sprinkle in the sugar and yeast. Give it a gentle whisk and let it sit for 5-10 minutes until frothy. This shows your yeast is alive and ready to work!
- Mix the Dry Ingredients: Add the flour and salt to the frothy yeast mixture. Stir well with a whisk until a smooth, thick batter forms. Don’t overmix; a few small lumps are okay.
- First Proof: Cover the bowl with plastic wrap or a clean kitchen towel and let it rest in a warm place for about 1 to 1.5 hours, or until the batter is bubbly, doubled in size, and slightly spongy. This is crucial for developing the characteristic texture of our homemade Crumpets.
- Add Baking Soda: Once proofed, stir in the baking soda. The batter will immediately become very bubbly and elastic. This is where the magic happens, creating those beautiful holes!
Let’s Get Cooking! (Cook time: 3-5 minutes per side, per batch)
- Preheat and Prep: Lightly grease your crumpet rings (or cookie cutters) and the surface of your griddle or heavy-bottomed skillet with melted butter. Place the rings on the cold griddle and set over medium-low heat. You want a consistent, gentle heat to allow the crumpets to cook through without burning.
- Pour the Batter: Once the griddle and rings are warm (a few minutes), ladle about ¼ cup of batter into each ring, filling it about two-thirds of the way up. Don’t overfill, as they will expand.
- Watch the Holes Appear: Cook for 3-5 minutes, or until you see an abundance of tiny holes appearing on the surface and the top looks mostly set and dry, losing its wet sheen. This is the hallmark of perfectly cooked English Muffins‘ delightful cousin!
- Flip and Finish: Carefully remove the rings using tongs (they will be hot!). Flip the crumpets and cook for another 1-2 minutes on the other side, just to get a light golden-brown finish and ensure they are cooked through.
- Serve Warm: Transfer the cooked crumpets to a wire rack. Repeat with the remaining batter, re-greasing the rings and griddle as needed. Serve immediately with your favorite toppings!
Fun Twists & Serving Ideas
While a classic crumpet with butter and jam is pure perfection, don’t be afraid to get creative!
Sweet & Simple: A drizzle of honey or maple syrup, a dollop of clotted cream, or a sprinkle of cinnamon sugar.
Savory Sensations: Top with a fried egg and bacon, smoked salmon and cream cheese, or a smear of avocado and a sprinkle of chili flakes.
Fruit Fiesta: Fresh berries and Greek yogurt, or stewed apples with a dusting of nutmeg.
Chocolate Indulgence: A smear of Nutella or melted chocolate chips for a truly decadent treat.
Flour Fun: Experiment with a small percentage of whole wheat or spelt flour for a nuttier flavor and slightly denser texture.
Common Questions About Crumpets (FAQ)
Q: Why aren’t my crumpets getting holes?
A: The holes come from a combination of yeast activity and the baking soda creating bubbles. Ensure your yeast is active (frothy after step 1), your batter is adequately proofed, and you’re cooking them on medium-low heat. Too high heat can set the surface too quickly, preventing holes from forming.
Q: Can I make the batter ahead of time?
A: Yes! You can prepare the batter up to the end of the first proof (before adding baking soda), cover it tightly, and refrigerate for up to 24 hours. When ready to cook, let it come to room temperature for about 30 minutes, then stir in the baking soda and proceed with cooking.
Q: What if I don’t have crumpet rings?
A: You can use metal cookie cutters, as long as they are at least 1 inch high and relatively sturdy. Alternatively, if you’re okay with slightly less uniform shapes, you can try free-forming them, though the classic crumpet shape is best achieved with rings.
Q: How do I store leftover crumpets?
A: Store cooled crumpets in an airtight container at room temperature for up to 2-3 days, or freeze for up to 3 months. To reheat, toast them directly from the fridge or freezer until warmed through and lightly crisped.
What Our Readers Are Saying! (Reviews)
“Absolutely brilliant! I’ve tried so many crumpet recipes, and these are by far the best. The holes were perfect, and they soaked up butter like a dream. My family devoured them!” – Eleanor V. (⭐️⭐️⭐️⭐️⭐️)
“I was intimidated at first, but this recipe made it so easy. The step-by-step instructions were clear, and the crumpets turned out just like the ones from my childhood in England. So cozy and comforting!” – David S. (⭐️⭐️⭐️⭐️⭐️)
“My weekend breakfast just got an upgrade! These crumpets are incredibly light and fluffy. I served them with homemade strawberry jam, and it was a slice of heaven. Will definitely be making these again and again.” – Chloe P. (⭐️⭐️⭐️⭐️⭐️)
The Crumpet Conclusion
And there you have it, fellow food lovers! A journey into the delightful world of homemade Crumpets, a recipe that promises to bring joy and deliciousness to your kitchen. With those signature airy holes and that satisfying chew, these crumpets are a testament to the simple pleasures of baking. Whether you slather them with butter, douse them in honey, or pile on savory toppings, they’re sure to become a cherished part of your culinary repertoire. So go ahead, don’t be shy – whip up a batch, invite some friends over, and share the warmth of these incredible homemade treats. They’re far superior to any store-bought English Muffins and will leave everyone asking for more!
Recipe Note:
Please remember that cooking times can vary based on your griddle type and heat settings. Always keep an eye on your crumpets to prevent burning, especially when cooking the second side. Enjoy the process and the delicious results!