Classic Chocolate Pudding – Simple & Delicious
The Ultimate Homemade Chocolate Pudding: A Silky, Decadent Dream!
There’s something undeniably magical about a truly good dessert that transports you straight back to childhood. For me, that’s always been a bowl of rich, velvety Chocolate Pudding. Forget the box mixes; this homemade version is so simple to make, yet delivers an unparalleled depth of flavor and a melt-in-your-mouth texture that will have everyone begging for the recipe. It’s the perfect sweet ending to any meal, a comforting treat on a lazy afternoon, or even a sophisticated dessert when dressed up with a dollop of fresh whipped cream. Get ready to fall in love with the classic comfort of a truly creamy chocolate delight!
⭐️⭐️⭐️⭐️⭐️ (4.8 from 2,500 fans)
📸 1100+ photo shares | ☀️ Updated December 2025
Why You’ll Love This Chocolate Pudding Recipe
- Unrivaled Flavor: Deep, rich chocolate taste that’s a world away from instant mixes.
- Silky Smooth Texture: Perfectly creamy and luscious, without any graininess.
- Incredibly Easy: Made with basic pantry staples and surprisingly simple steps.
- Customizable: Easily adaptable for different chocolate intensities or dietary needs.
- Pure Comfort: A nostalgic dessert that brings joy with every spoonful.
What You’ll Need
Equipment
- Medium heavy-bottomed saucepan
- Whisk
- Rubber spatula
- Small bowls or ramekins for serving
Ingredients
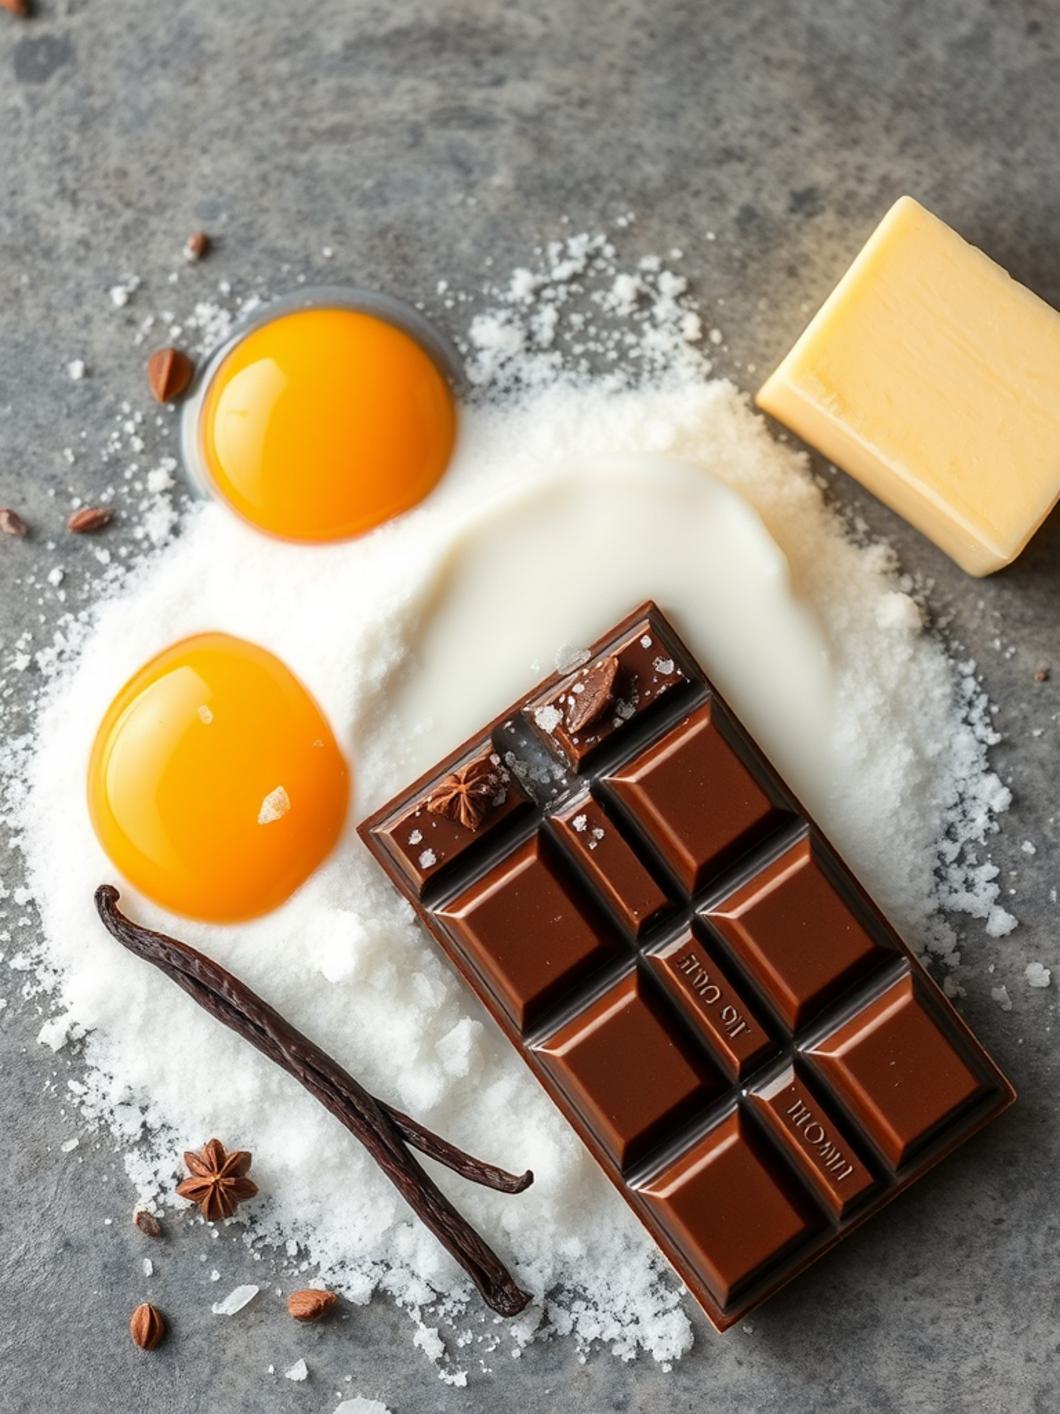
- 1/2 cup granulated sugar
- 1/4 cup unsweetened cocoa powder (Dutch-processed for darker color and mellower flavor)
- 3 tablespoons cornstarch
- 1/4 teaspoon salt
- 2 1/4 cups whole milk (or 2% for a slightly lighter texture)
- 2 large egg yolks
- 2 ounces bittersweet or semi-sweet chocolate, finely chopped
- 2 tablespoons unsalted butter, cut into small pieces
- 1 teaspoon vanilla extract
How to Make Chocolate Pudding
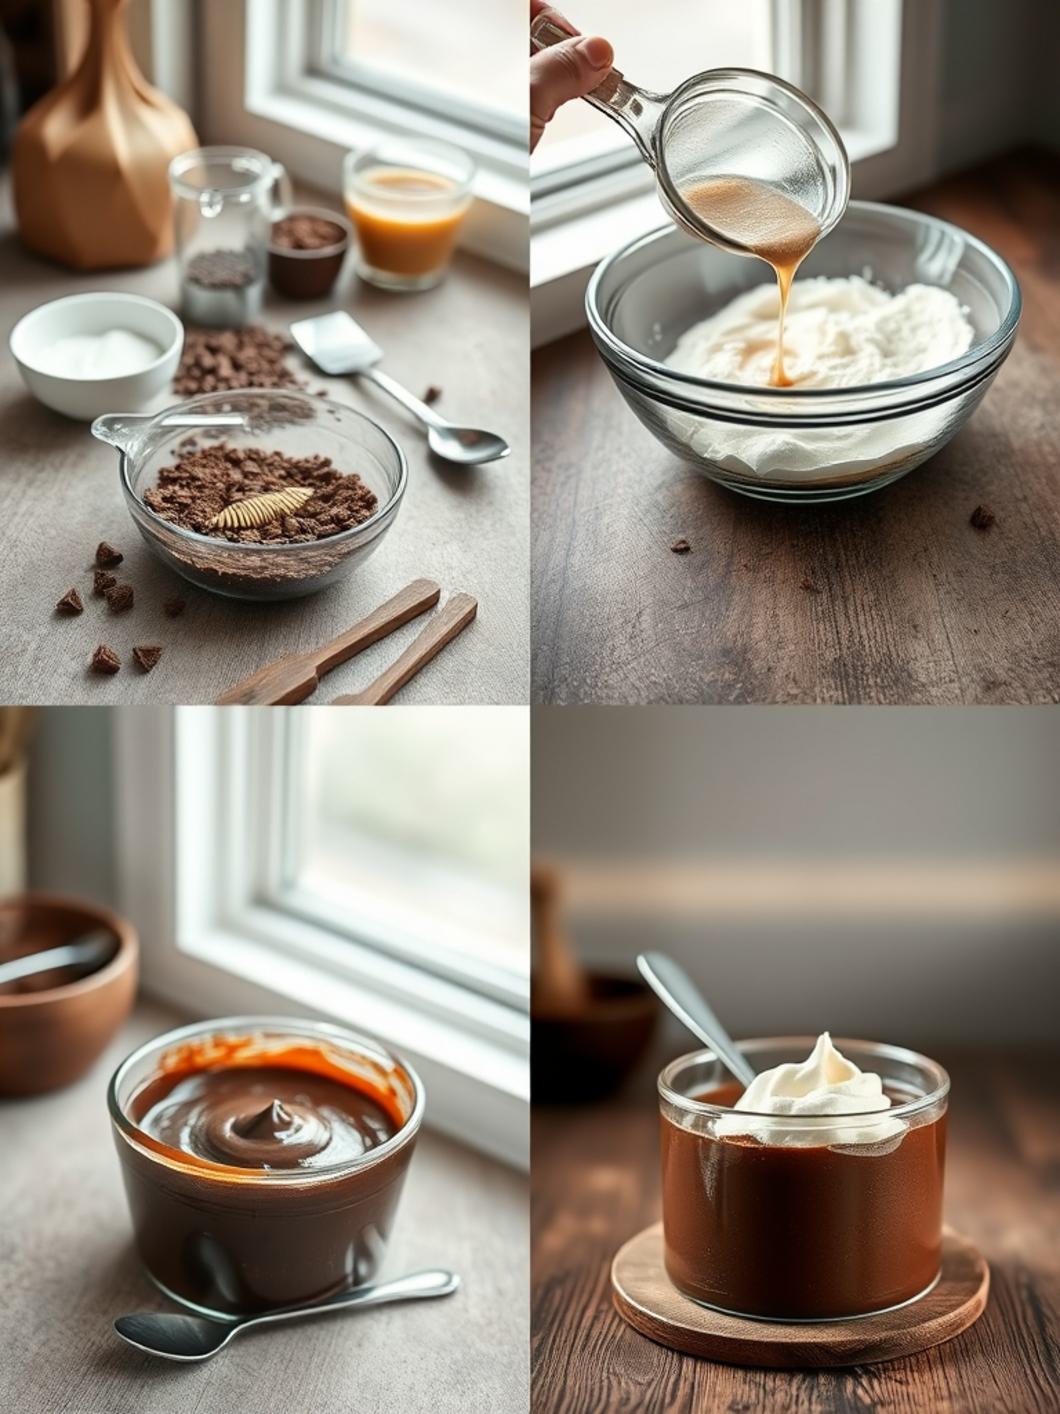
- Whisk Dry Ingredients: In a medium heavy-bottomed saucepan, whisk together the sugar, cocoa powder, cornstarch, and salt until well combined and there are no lumps.
- Add Wet Ingredients (Part 1): Gradually whisk in 1/2 cup of the milk until smooth. Then, whisk in the egg yolks until fully incorporated.
- Add Wet Ingredients (Part 2) & Heat: Slowly whisk in the remaining 1 3/4 cups of milk. Place the saucepan over medium heat. Cook, whisking constantly, until the mixture thickens significantly and comes to a gentle boil, about 8-10 minutes. It should be thick enough to coat the back of a spoon. Be sure to scrape the bottom and sides to prevent sticking and scorching.
- Remove from Heat & Finish: Remove the saucepan from the heat. Immediately stir in the finely chopped bittersweet or semi-sweet chocolate, butter, and vanilla extract until everything is melted and smooth. The residual heat will melt the chocolate and butter, creating that irresistible Chocolate Pudding texture.
- Strain (Optional, but recommended): For an extra-silky pudding, pour the mixture through a fine-mesh sieve into a clean bowl. This step ensures there are absolutely no lumps.
- Chill: Divide the pudding among 4-6 small serving dishes or ramekins. Press a piece of plastic wrap directly onto the surface of each pudding to prevent a skin from forming. Refrigerate for at least 2-4 hours, or until thoroughly chilled and set.
- Serve: Once chilled, remove the plastic wrap and serve your glorious homemade Chocolate Pudding!
Recipe Notes & Expert Tips
- Use a Heavy-Bottomed Pan: This prevents scorching and ensures even cooking.
- Whisk Constantly: Essential for preventing lumps and ensuring a smooth, evenly cooked pudding. Don’t stop stirring!
- Don’t Rush the Cook Time: The cornstarch needs enough time and heat to activate and thicken properly. Wait for it to bubble gently before removing from heat.
- Quality Ingredients Matter: Good quality cocoa powder and chocolate will make a huge difference in the final flavor.
- Preventing a Skin: Pressing plastic wrap directly onto the surface of the warm pudding is crucial for preventing a rubbery skin from forming as it cools.
- Adjust Sweetness: Taste and adjust sugar if you prefer a sweeter or less sweet pudding.
Fun Twists & Serving Ideas
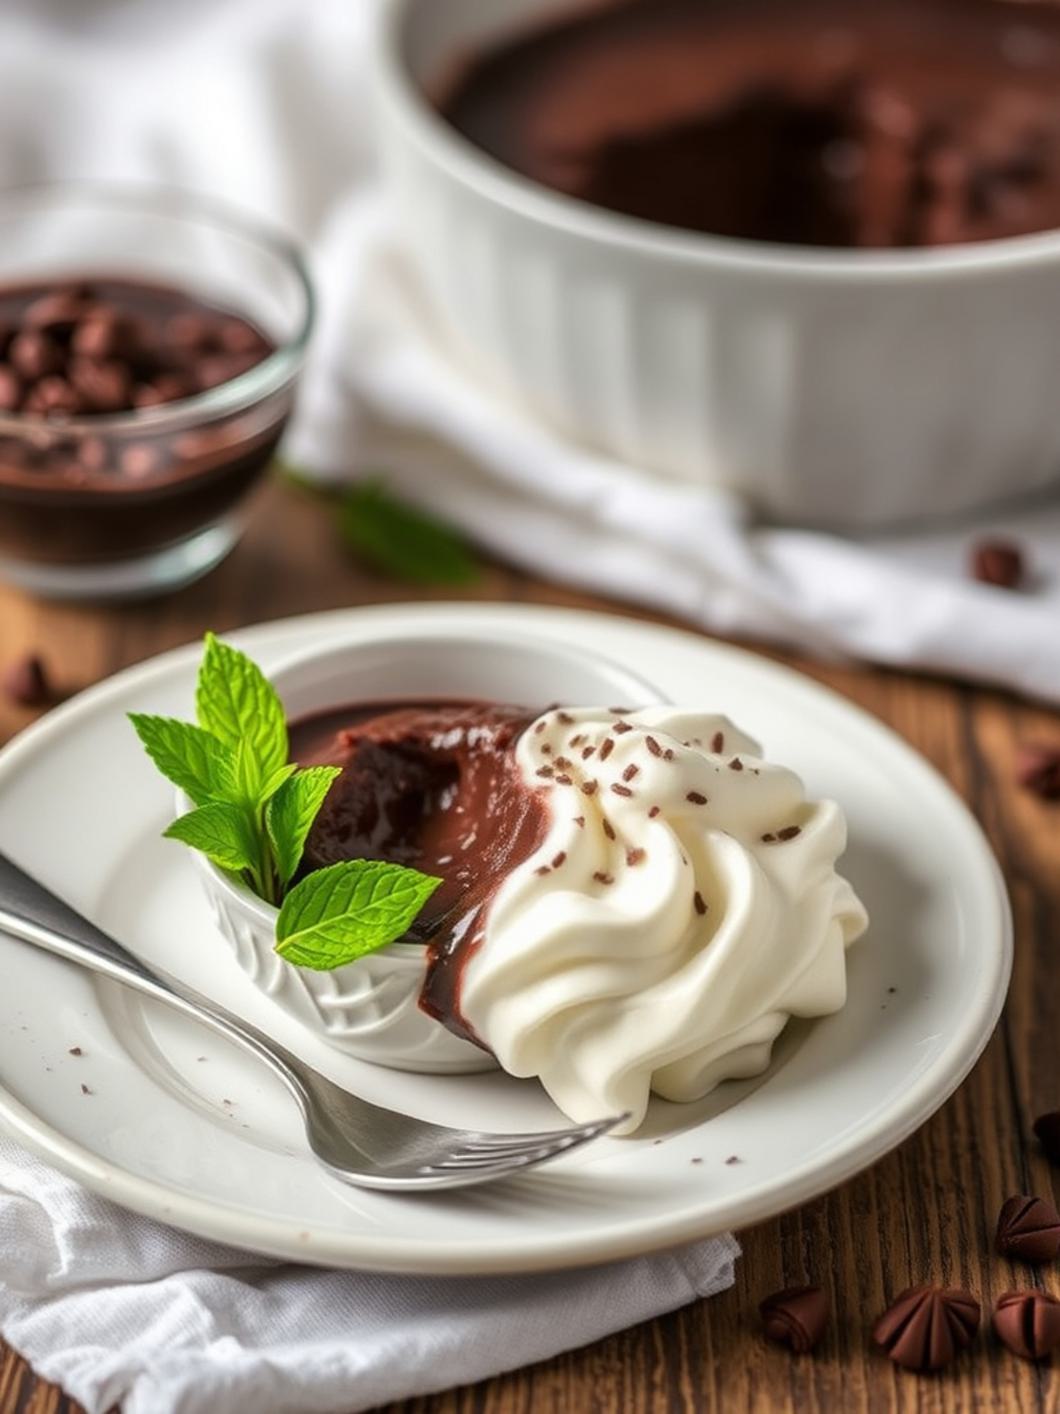
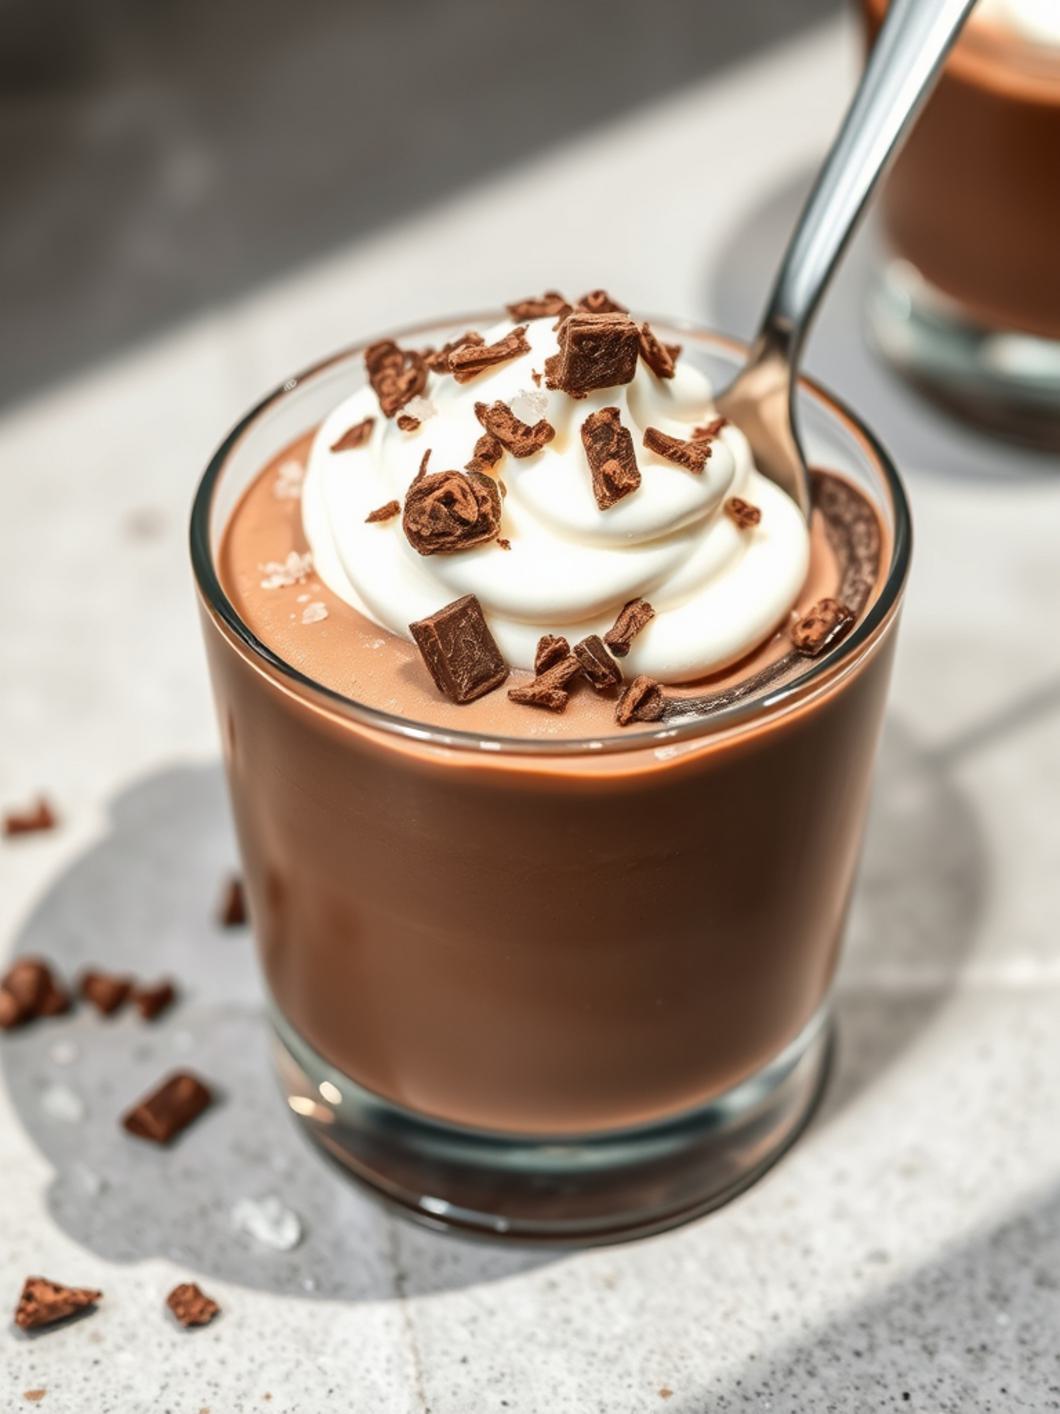
- Classic Toppings: A dollop of freshly whipped cream, chocolate shavings, or a sprinkle of sea salt.
- Berries Galore: Fresh raspberries, strawberries, or sliced bananas add a lovely contrast.
- Nutty Crunch: Chopped toasted pecans, walnuts, or hazelnuts for texture.
- Spiced Up: A pinch of cinnamon, chili powder, or a dash of espresso powder stirred in with the cocoa for a more complex flavor.
- Adult Version: A splash of Kahlúa, Grand Marnier, or dark rum added with the vanilla extract.
- Pudding Parfaits: Layer with crushed cookies (like Oreos or graham crackers) and whipped cream for a delightful parfait.
Readers Reviews
- ChefAnna (⭐️⭐️⭐️⭐️⭐️): “This recipe is a game-changer! I’ve tried so many chocolate pudding recipes, but this one is truly the best. So easy to follow and the result is incredibly smooth and rich. My family devoured it in minutes!”
- SweetToothGuy (⭐️⭐️⭐️⭐️⭐️): “Absolutely divine! The instructions were clear, and the pudding set beautifully. I used Dutch-processed cocoa, and the color and flavor were just perfect. Will definitely be making this a regular dessert in my house.”
- PuddingLover (⭐️⭐️⭐️⭐️): “Really good recipe! A bit more effort than a box mix, but 100% worth it for the superior taste and texture. My only note is to make sure your chocolate is finely chopped for quick melting. Loved it with whipped cream!”
Chocolate Pudding FAQs
- Q: Can I use almond milk or other non-dairy milk?
A: Yes, you can. Full-fat canned coconut milk or oat milk tends to yield the creamiest result, but the texture might be slightly less firm than with whole dairy milk.
- Q: Why is my pudding lumpy?
A: Lumps usually occur if the dry ingredients weren’t whisked thoroughly before adding liquids, or if the mixture wasn’t stirred constantly while cooking. Straining it through a fine-mesh sieve can fix this!
- Q: How long does homemade chocolate pudding last?
A: Stored in an airtight container in the refrigerator with plastic wrap pressed directly on the surface, it will last for up to 3-4 days.
- Q: Can I make this ahead of time?
A: Absolutely! This pudding is perfect for making ahead. Prepare it, chill it, and then enjoy it whenever you’re ready. It actually tastes even better after a day in the fridge as the flavors meld.
There you have it – the secret to making the most luscious, velvety creamy chocolate pudding right in your own kitchen! This recipe proves that homemade truly is best, turning simple ingredients into a dessert that feels both nostalgic and utterly luxurious. Whether you’re making it for a special occasion or just a cozy night in, this Chocolate Pudding is sure to become a cherished favorite. Don’t be shy – dive in and share the joy!
Recipe Note: Enjoy this timeless treat!
Chocolate Pudding
Cook Time: 15 minutes
Total Time: 2 hours 15 minutes (includes chilling)
Course: Dessert
Servings: 4
Calories: 350 per serving
Ingredients
- 1/2 cup granulated sugar
- 1/4 cup unsweetened cocoa powder
- 1/4 cup cornstarch
- 1/4 teaspoon salt
- 2 1/2 cups whole milk
- 2 tablespoons unsalted butter
- 1 teaspoon vanilla extract
Instructions
-
Mix Dry Ingredients
In a saucepan (off heat), whisk sugar, cocoa powder, cornstarch, and salt until smooth. -
Add Milk
Gradually whisk in milk until fully combined and lump-free. -
Cook the Pudding
Place saucepan over medium heat. Cook, whisking constantly, until thickened and bubbling, about 6–8 minutes. -
Add Chocolate & Butter
Remove from heat. Stir in chopped chocolate, butter, and vanilla until smooth and glossy. -
Chill
Pour pudding into serving dishes.
Cover with plastic wrap touching the surface to prevent skin.
Refrigerate for at least 1 hour. -
Serve
Serve chilled or slightly warm with desired toppings.
Chef’s Notes: For an extra rich pudding, use dark chocolate (70% cocoa or higher) or add a tablespoon of instant espresso powder along with the cocoa powder.