Perfect Dry Brine Turkey – Moist & Golden Brown
Learn how to make dry brine turkey for a perfectly crispy skin and juicy meat. This homemade, easy cooking recipe from thenextrecipes.com is the ultimate quick guide for your next holiday dish or family meal.
⭐️⭐️⭐️⭐️⭐️ (4.9 from 1,900 fans)
📸 700+ photo shares | ☀️ Updated [October 2025]
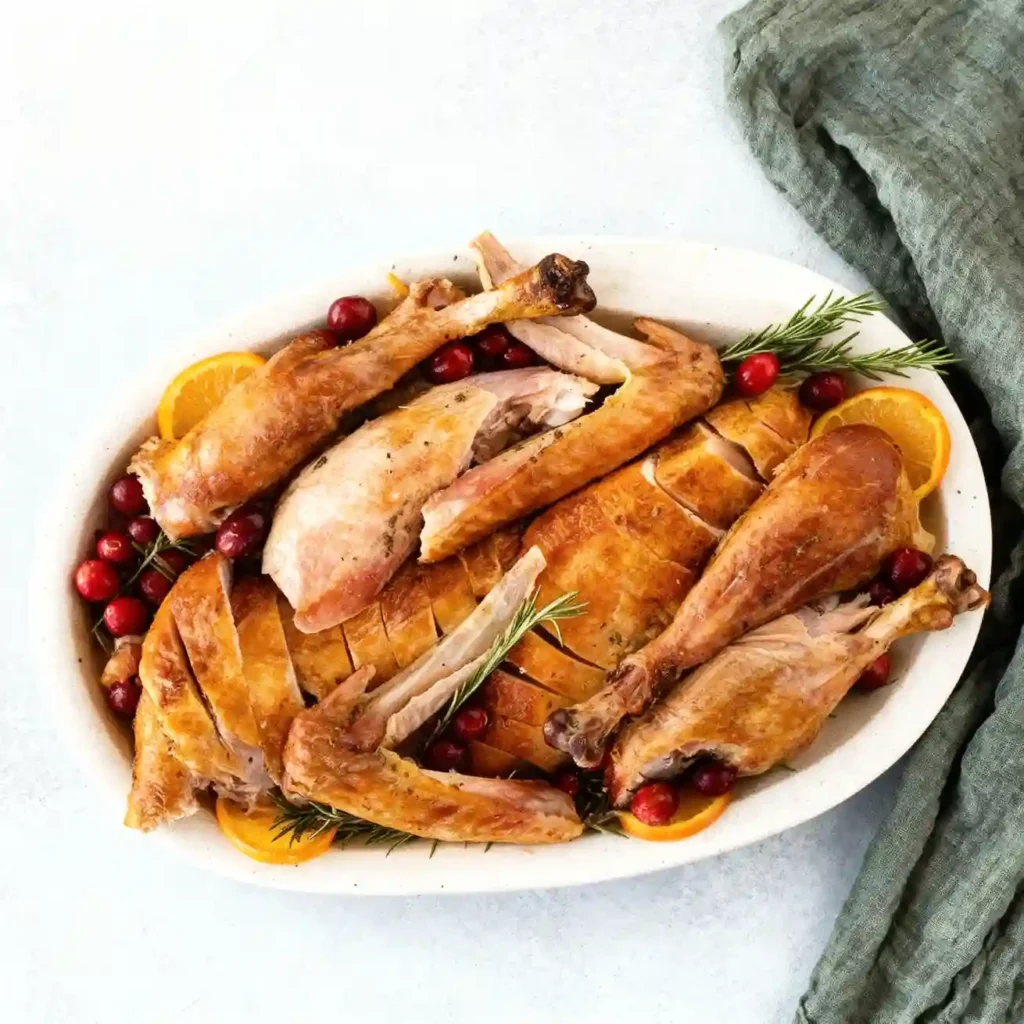
Table of Contents
Dry Brine Turkey: Unforgettably Juicy with Crispy, Golden Skin
There’s nothing quite like the majestic centerpiece of a perfectly roasted turkey, especially when it’s infused with deep flavor and boasts skin so shatteringly crisp it sings. This dry brine turkey recipe is your secret weapon for achieving just that – a bird that’s incredibly succulent from breast to thigh, with every bite bursting with savory goodness. Forget watery, bland turkey; this method locks in moisture and amplifies taste, making it the undisputed star of any holiday feast, special gathering, or even a cozy Sunday dinner. Get ready to experience turkey like never before!
Quick Glance
⏱️ Prep Time: 40 minutes (plus 1-3 days brining time)
🍽️ Servings: 8-12
💥 Vibe: Juicy, Crispy, Flavorful
What You’ll Need
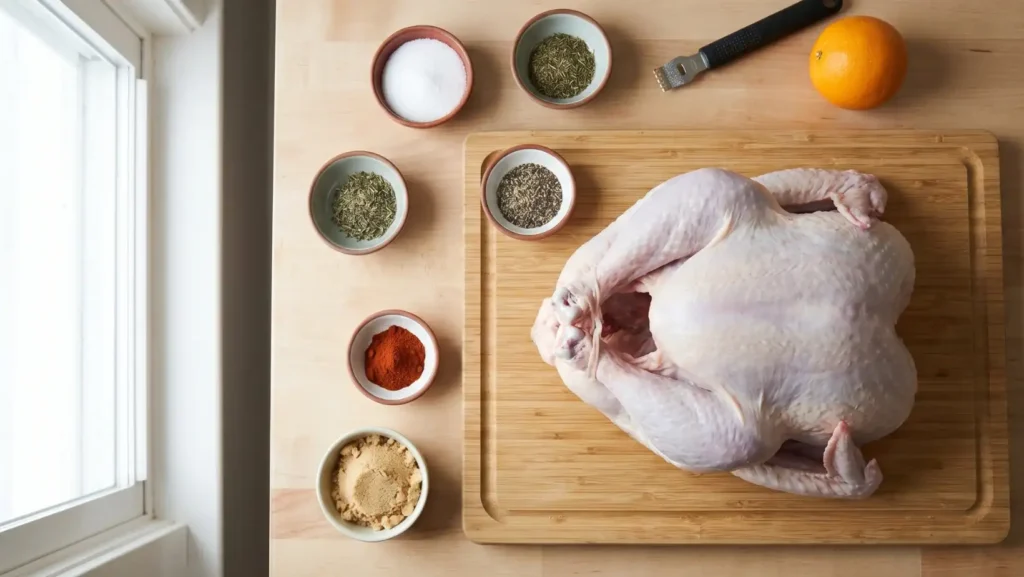
Crafting this magnificent dry brine turkey requires just a handful of simple ingredients, allowing the natural, rich flavors of the bird to truly shine. Gather these essentials, and you’re well on your way to a show-stopping meal.
- Whole Turkey: One fresh or fully thawed bird (the centerpiece of your holiday dish).
- Kosher Salt: A generous bowl (the most critical part of how to make dry brine turkey).
- Brown Sugar: One bowl to add a touch of sweetness and help with skin browning.
- Smoked Paprika: To provide a deep, rich color to your finished meal.
- Dried Herbs: Small bowls of dried rosemary, thyme, and sage for that classic recipe aroma.
- Black Peppercorns: Cracked or ground for a sharp savory bite.
- Fresh Orange: One whole orange for zesting (use the zester pictured to brighten the ingredients).
How To Dry Brine a Turkey
Prepare to transform your turkey into a masterpiece! This process is straightforward, but patience during the brining phase is key to that ultimate juicy texture and unbelievably crispy skin. Let’s get cooking!
How to Make dry brine turkey
Pat the Surface Dry
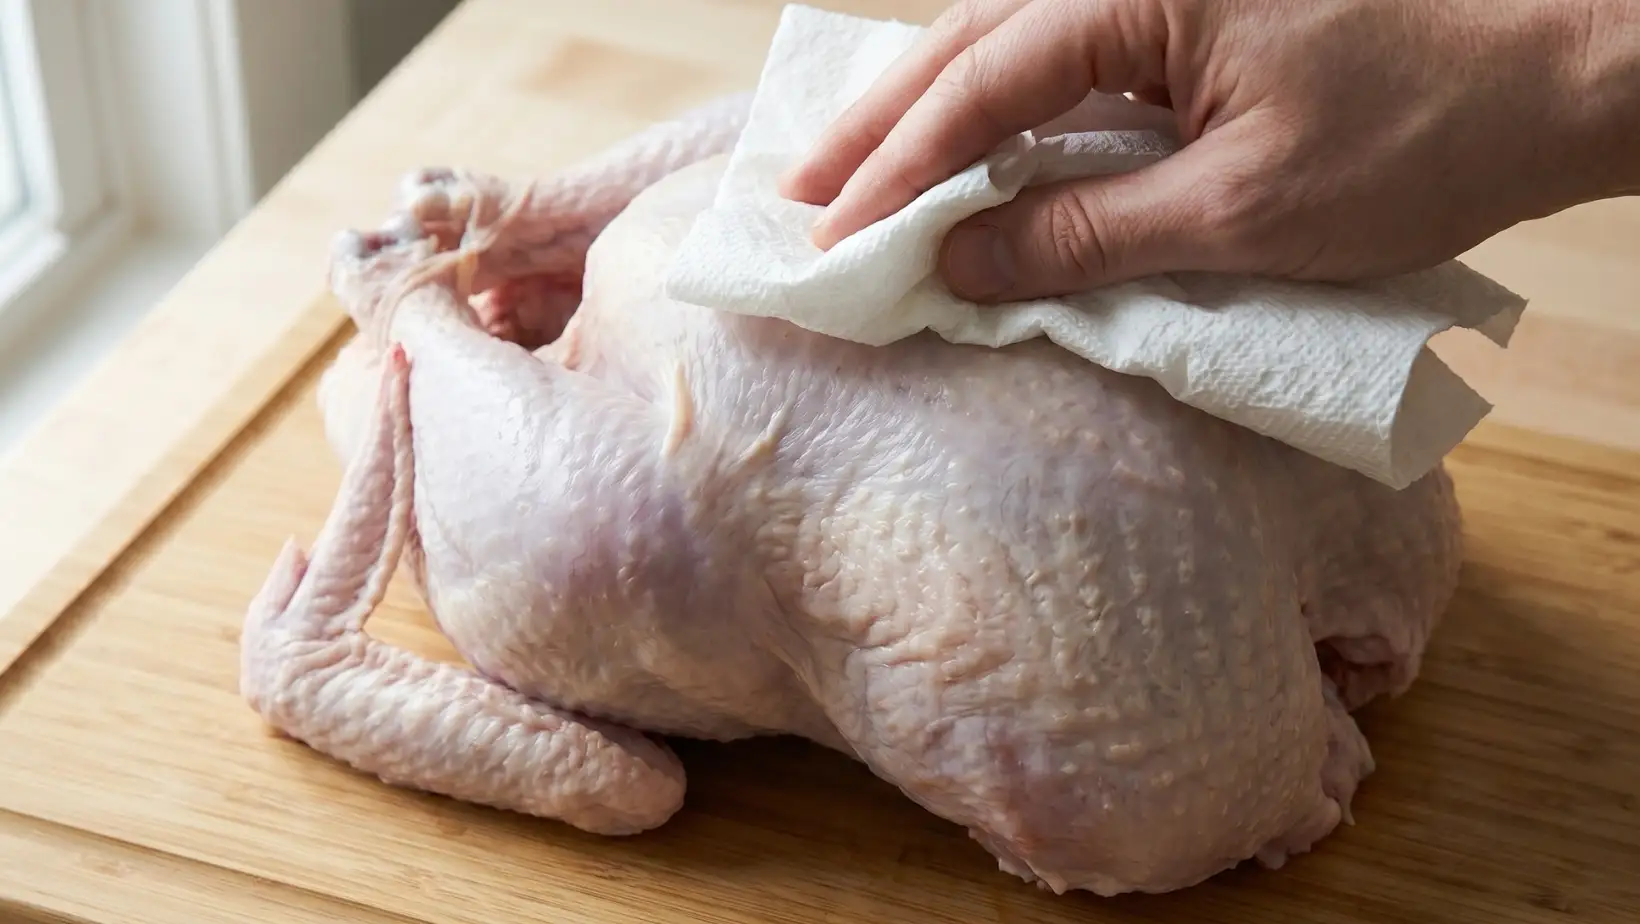
The first rule in this recipe is moisture management. Start by placing your bird on a clean wooden board. Use a paper towel to thoroughly pat the entire surface of the turkey until it is bone-dry. Removing surface moisture is essential for a quick sear and a golden-brown finish later on.
Season Under the Skin
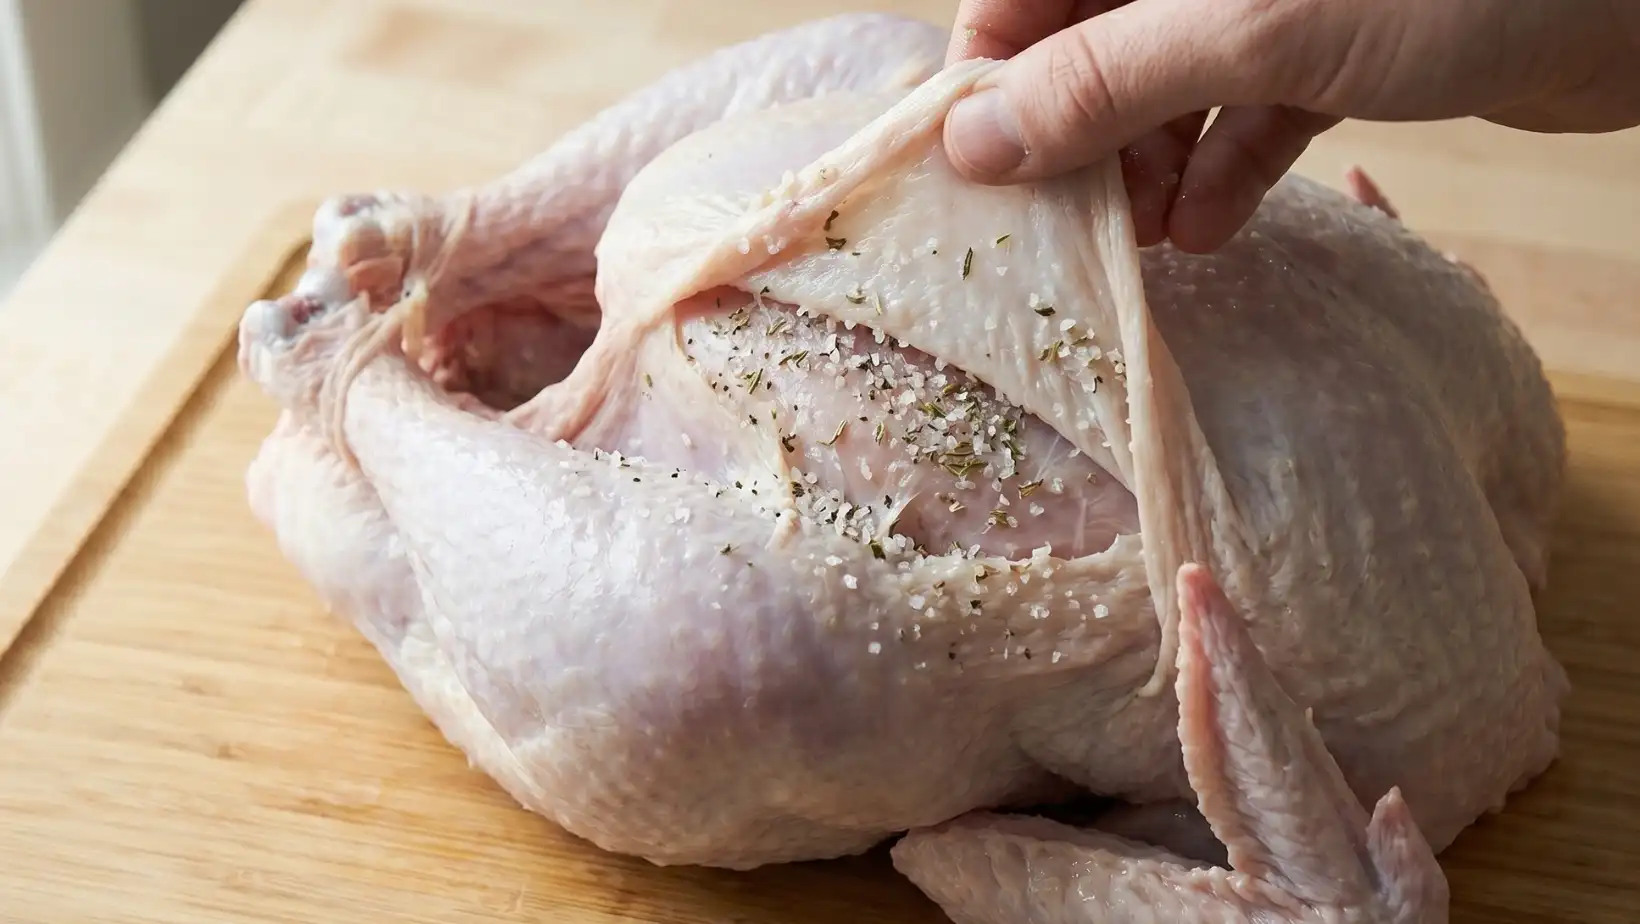
For a truly flavorful meat dish, the seasoning needs to reach the flesh. Gently lift the skin over the breast area and rub your salt and herb mixture directly onto the meat. This homemade brine usually consists of kosher salt, black pepper, and dried herbs like thyme and rosemary.
Apply the Exterior Brine
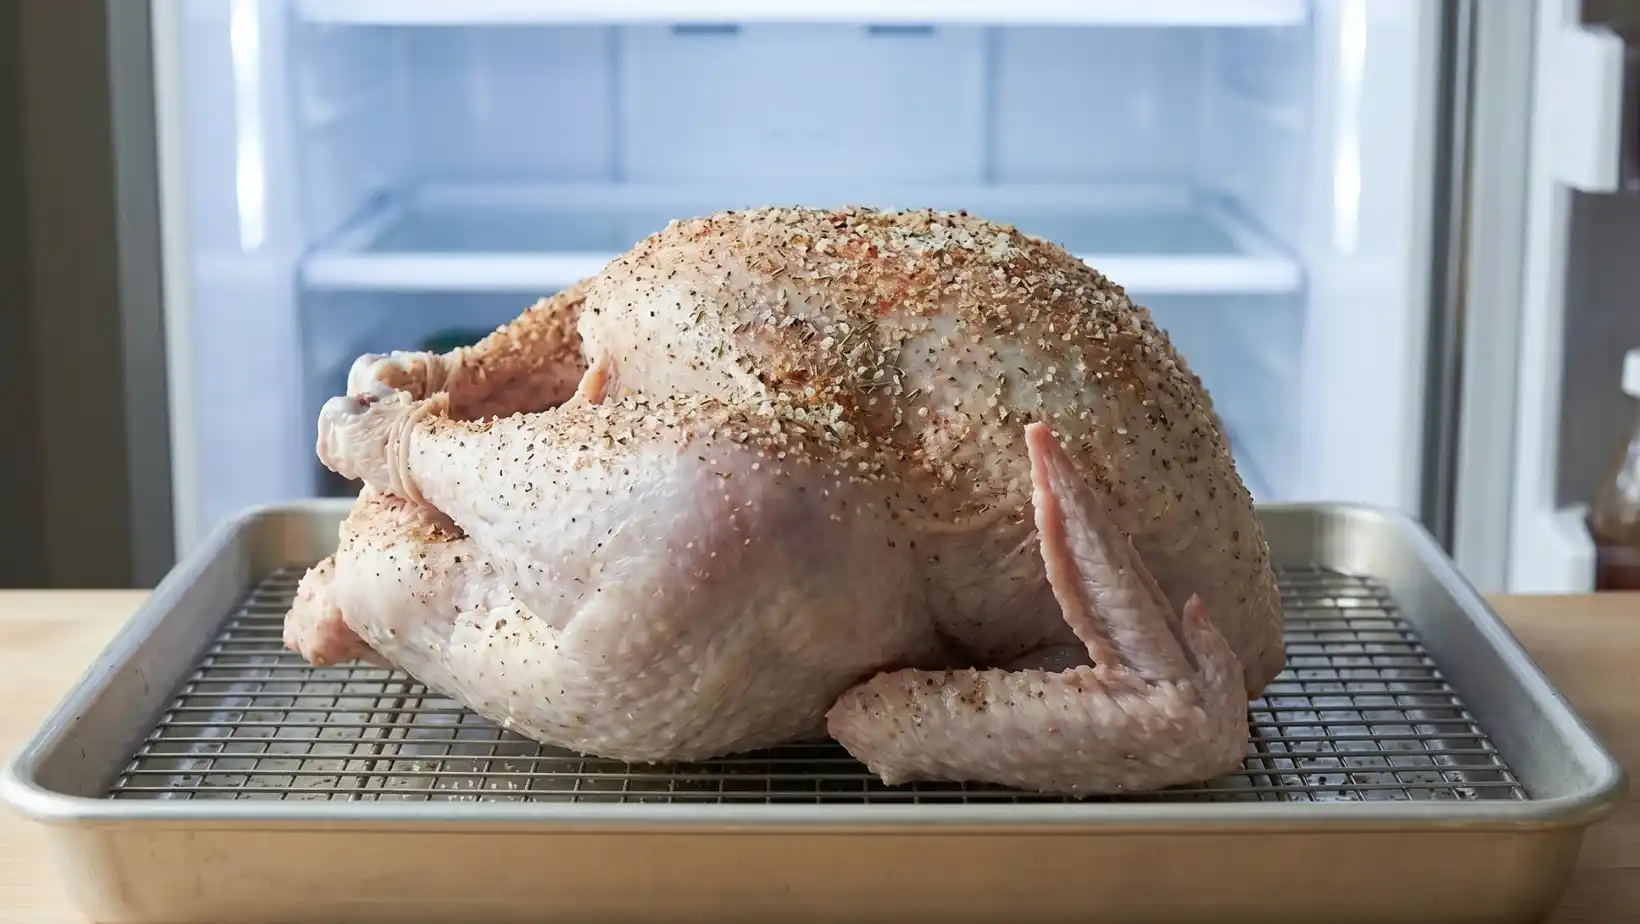
After seasoning underneath, rub the remaining salt mixture generously over the outside of the skin. Place the turkey on a wire rack set inside a rimmed baking sheet. This setup allows air to circulate around the entire bird while it sits in the refrigerator.
The Dry Brine Rest
One of the most important parts of how to make dry brine turkey is the resting period. Place the uncovered turkey in the refrigerator for 12 to 24 hours. The cold air dries out the skin (for maximum crispness) while the salt pulls the moisture into the meat, seasoning it to the bone.
Roast to Perfection
Once the brining is complete, roast your turkey according to your favorite recipe instructions. You will notice that a dry-brined bird browns much faster and more evenly than a traditionally wet-brined one.
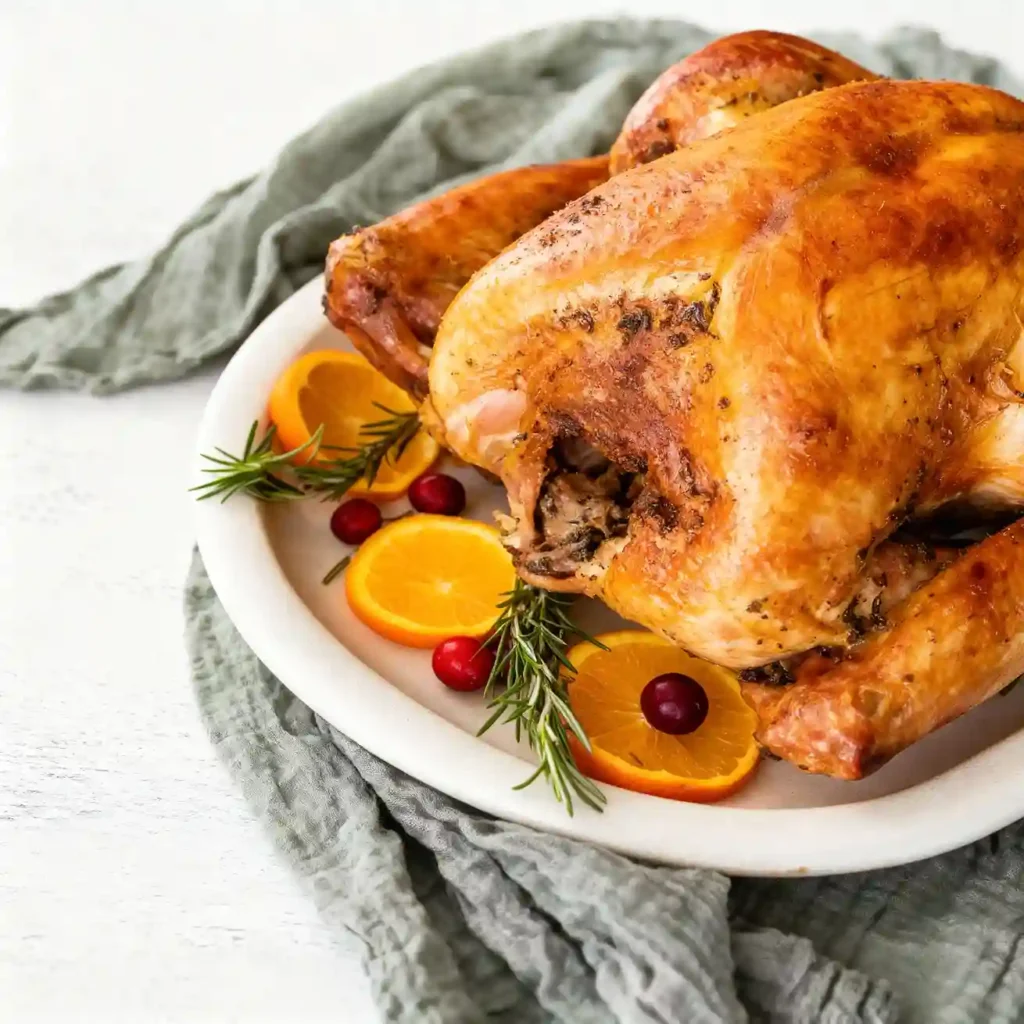
Garnish and Serve
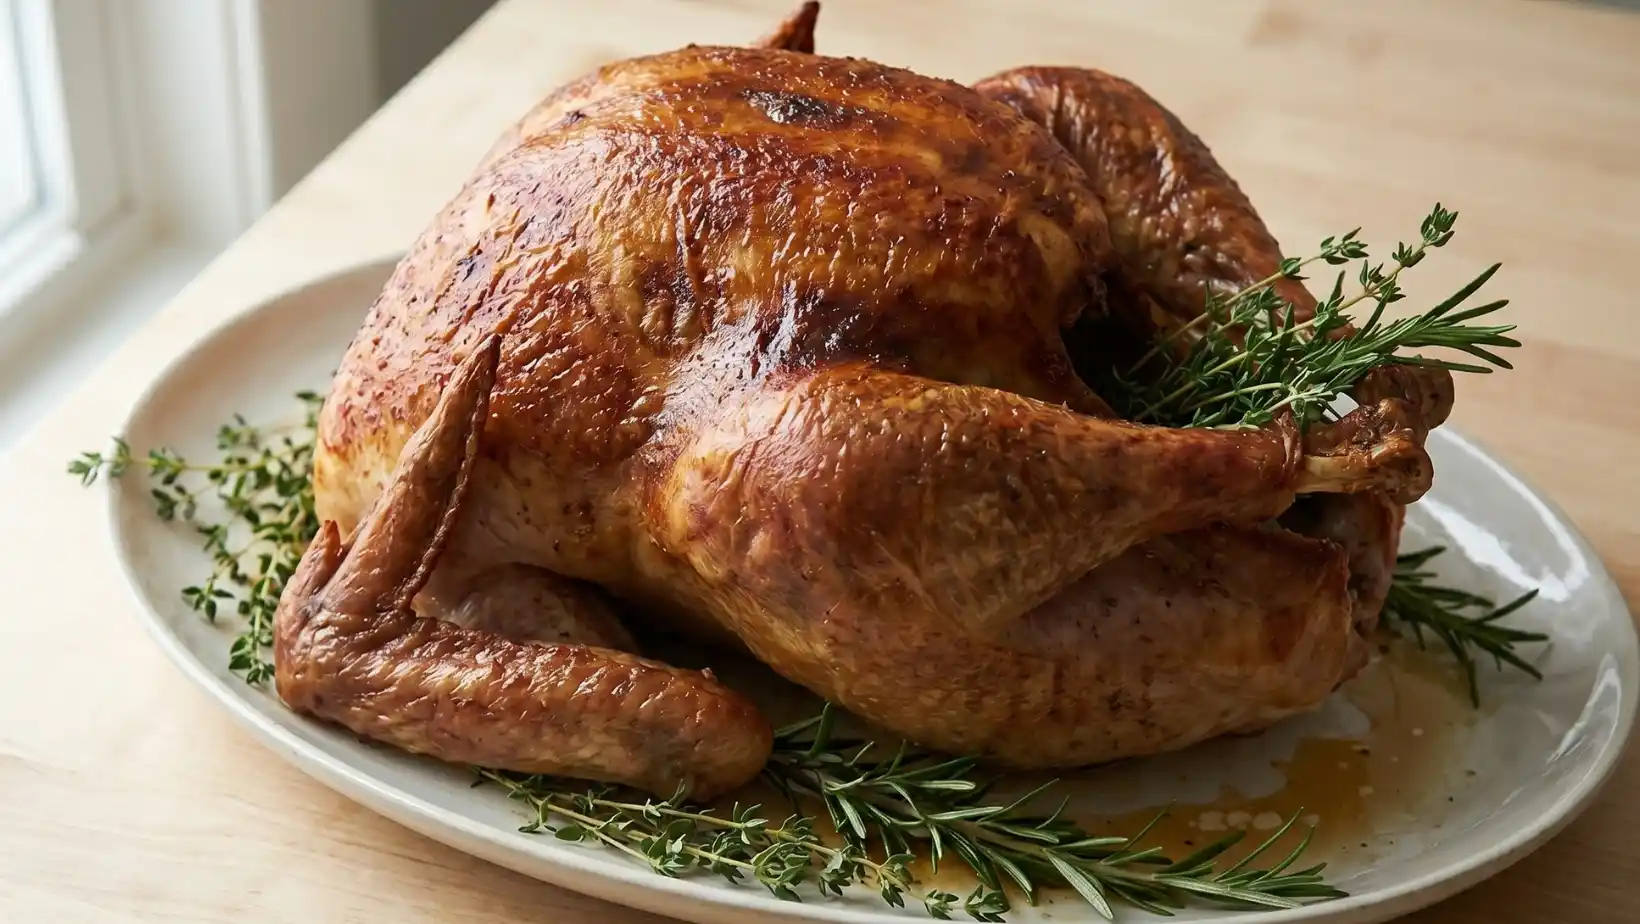
Transfer your finished turkey to a large serving platter. Garnish with fresh sprigs of rosemary and thyme to elevate the presentation. Your dish is now ready to be the centerpiece of a memorable family meal.
Fun Twists & Serving Ideas
While this dry brine turkey is spectacular on its own, a few delightful additions can elevate your feast even further. Get creative and make it truly your own!
- Herbaceous Rub: Mix finely chopped fresh sage, thyme, and rosemary into your salt brine for an even more aromatic skin and deeper herbaceous flavor throughout.
- Citrus Zest Burst: Grate the zest of an orange or lemon into your dry brine mixture. The citrus notes will subtly brighten the turkey’s flavor profile.
- Smoked Paprika Infusion: Add a teaspoon of smoked paprika to the salt mixture for a beautiful color and a hint of smoky depth that pairs wonderfully with poultry.
- Compound Butter Finish: Instead of plain melted butter, make a compound butter with minced garlic, fresh herbs, and a touch of lemon zest. Rub this under the skin and over the surface before roasting for extra richness.
- Gravy Companion: Don’t forget to use those delicious pan drippings to make a rich, homemade gravy! It’s the perfect savory complement to every slice of turkey.
Reviews
Hear what our wonderful community of home cooks are saying about this game-changing dry brine turkey!
Sarah L. (⭐️⭐️⭐️⭐️⭐️) – “I was skeptical, but this dry brine method is magic! My turkey was the juiciest I’ve ever made, and the skin was incredibly crispy. My family couldn’t stop raving. This is my new go-to!”
Michael T. (⭐️⭐️⭐️⭐️⭐️) – “Finally, a turkey that isn’t dry! The prep was so simple, and the results were beyond expectations. Even my picky eater loved it. Five stars!”
Jessica R. (⭐️⭐️⭐️⭐️) – “Amazing flavor and texture! My only tip would be to ensure you have enough fridge space, as an uncovered turkey takes up quite a bit. But totally worth the effort!”
FAQ
Got questions? We’ve got answers to help you master your dry brine turkey!
Why should I dry brine instead of wet brine?
Dry brining (or salting) extracts moisture from the skin, leading to incredibly crispy skin, and then the salt is reabsorbed, seasoning the meat deeply and helping it retain its own juices, resulting in a much more flavorful and moist bird without the added water that can dilute flavor. It’s also less messy than a wet brine!
How long can I dry brine a turkey?
For optimal results, dry brine a turkey for 1 to 3 days. A smaller turkey (10-12 lbs) can be done in 24 hours, while a larger bird (18+ lbs) benefits from the full 3 days.
Do I need to rinse the turkey before roasting?
No, absolutely not! Rinsing off the salt would negate the drying effect you worked so hard to achieve for that crispy skin. Simply pat dry any excess moisture on the surface if needed, but do not rinse.
Can I dry brine a pre-brined or kosher turkey?
It is generally not recommended to dry brine a pre-brined, enhanced, or kosher turkey, as these birds have often already been treated with a salt solution. Adding more salt can make the final product excessively salty.
Conclusion
And there you have it, friends! The secret to a show-stopping, conversation-starting turkey that will leave everyone at your table utterly delighted. This dry-brined method isn’t just a recipe; it’s an invitation to create a truly memorable meal, filled with the warmth, flavor, and joy that only homemade food can bring. Don’t be intimidated; embrace the simple elegance of dry brining, and prepare to be amazed by the incredible tenderness and crisp perfection that awaits. Happy roasting, and may your gatherings be filled with deliciousness and laughter!
Recipe Note
For the crispiest skin imaginable, ensure your turkey is thoroughly patted dry before applying the salt. The longer the uncovered dry brining time in the fridge, the drier the skin will become, leading to a golden, crackling crust once roasted.
Dry Brined Roast Turkey
Ingredients
Method
- Prep the Turkey: Remove the completely thawed turkey from its packaging and remove the neck and giblets from the cavity. Thoroughly pat the entire bird dry, both inside and out, using paper towels. This is a crucial step for crispy skin. Place the turkey breast-side up on a wire rack set inside a roasting pan.
- Mix the Brine: In a small bowl, mix together the kosher salt, baking powder, dried thyme, dried rosemary, and black pepper.
- Apply the Rub: Carefully loosen the skin over the turkey breasts with your fingers and rub about one-third of the salt mixture directly onto the meat. Sprinkle the remaining mixture evenly over the outside of the turkey, rubbing it lightly into the skin, and a little bit inside the cavity.
- Refrigerate Uncovered: Place the roasting pan with the uncovered turkey into the refrigerator. Let it chill for at least 24 hours, but ideally 48 hours. The skin will look translucent and dry, which is exactly what you want.
- Prepare for Roasting: When ready to cook, remove the turkey from the refrigerator and let it sit at room temperature for 1 hour. Do not rinse the turkey. Rinsing will wash away the flavor and ruin the crispy skin.
- Roast: Preheat your oven to 325°F (165°C). Stuff the quartered onion and lemon into the main cavity. Brush the outside of the turkey with the melted butter. Roast for 2 1/2 to 3 hours, or until a meat thermometer inserted into the thickest part of the thigh registers 165°F (74°C).
- Rest and Serve: Remove the turkey from the oven and tent it loosely with aluminum foil. Let it rest for at least 30 to 40 minutes before carving to allow the juices to redistribute.
Notes
Baking Powder Secret: Make sure you are using baking powder, not baking soda. The baking powder helps break down the proteins in the skin, resulting in an incredible crunch.
Do Not Rinse: It is very important that you do not rinse the bird after the brining period. The salt will have absorbed into the meat, and any remaining surface salt is meant to be there.